


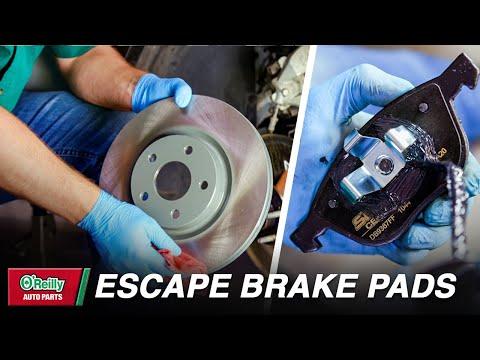


How to Replace Rear Brake Pads and Rotors on a 2019 Ford Escape
Step-by-step DIY rear brake job with tools, parts list, torque specs, safety tips, and cost-saving advice
How to Replace Rear Brake Pads and Rotors on a 2019 Ford Escape
Step-by-step DIY rear brake job with tools, parts list, torque specs, safety tips, and cost-saving advice
🔧 Escape - Rear Brake Pads & Rotors Replacement
You’ll be replacing the rear brake pads and rotors on your Escape, plus cleaning and re-lubing the hardware. This restores stopping power and helps prevent noise, vibration, and uneven wear.
Difficulty Level: Beginner-Intermediate | Estimated Time: 2–3 hours
⚠️ Safety & Precautions
- ⚠️ Always support the Escape with jack stands, never rely on a floor jack alone.
- ⚠️ Work on a flat, solid surface and chock (block) the front wheels so the vehicle cannot roll.
- ⚠️ Brakes and wheels may be very hot after driving; let everything cool before starting.
- ⚠️ Do not press the brake pedal with a caliper removed; it can push the piston out.
- ⚠️ Brake dust can be harmful; avoid blowing it with compressed air—use brake cleaner instead.
- ⚠️ Keep any grease off the pad friction surfaces and rotor faces.
- ⚠️ Battery disconnect is not required for this job on your Escape.
🔧 Required Tools
You'll need the following tools for this repair:
- 🛠️ Floor jack (rated 3-ton minimum)
- 🛠️ Jack stands (rated 3-ton minimum, Qty: 2)
- 🛠️ Wheel chocks
- 🛠️ 1/2" drive breaker bar
- 🛠️ 1/2" drive torque wrench (10–150 ft-lbs range)
- 🛠️ 3/8" drive ratchet
- 🛠️ Socket set (metric, 8mm–19mm)
- 🛠️ 13mm socket
- 🛠️ 15mm socket
- 🛠️ 18mm socket
- 🛠️ Torx T40 bit or screwdriver
- 🛠️ Flathead screwdriver (medium)
- 🛠️ Needle-nose pliers
- 🛠️ C-clamp (large) or disc brake piston tool
- 🛠️ Wire brush (hand)
- 🛠️ Bungee cord or mechanics wire
- 🛠️ Shop rags
- 🛠️ Brake cleaner spray
- 🛠️ High-temp brake grease
- 🛠️ Disposable gloves
- 🛠️ Safety glasses
🔩 Required Parts
HowToo sells all the parts you need for this repair:
- 🔩 Rear brake pad set (left and right) - Qty: 1 set (replace in pairs)
- 🔩 Rear brake rotors - Qty: 2 (replace in pairs)
- 🔩 Rear brake hardware kit (pad clips / abutment clips) - Qty: 1 set
- 🔩 Brake cleaner (spray can) - Qty: 1–2
- 🔩 High-temp synthetic brake lubricant - Qty: 1 tube
- 🔩 Rotor retaining screw (Torx, optional new) - Qty: 2 (if originals are corroded)
📋 Before You Begin
- 🧾 Park the Escape on level ground, shift to PARK, and set the parking brake firmly.
- 🧾 Loosen (but do not remove) the rear wheel lug nuts one turn with a breaker bar and appropriate socket.
- 🧾 Place wheel chocks in front of both front wheels.
- 🧾 Make sure you have good lighting and enough space to work behind each rear wheel.
- 🧾 Have a clean area or cardboard ready to lay tools and parts on.
🔨 Step-by-Step Instructions
Follow these steps in order:
Step 1: Lift and Support the Rear of the Escape
- Use the floor jack on the rear center jacking point or one side jacking point (check your owner’s manual diagram) to lift the rear of the Escape.
- Place jack stands securely under the rear pinch welds or frame locations, then slowly lower the vehicle onto the stands using the floor jack.
- Once supported, give the Escape a firm push at the rear to confirm it is stable.
- Remove the rear wheels using the breaker bar and correct socket and set the wheels aside.
Step 2: Inspect and Understand the Rear Brake Setup
- Look at the rear brakes: the rotor (big round disc), the caliper (clamp assembly), and the caliper bracket (holds the caliper and pads).
- Note the flexible brake hose going to the caliper; this must not be twisted or strained.
- Take a quick photo for reassembly reference.
Step 3: Remove the Caliper (Do Not Let It Hang)
- Locate the two caliper slide/guide bolts on the back of the caliper (usually 13mm).
- Use a 13mm socket and 3/8" ratchet to remove the upper and lower caliper slide bolts.
- Carefully slide the caliper off the bracket and pads. If it sticks, use a flathead screwdriver gently between the pad and rotor to pry it back slightly.
- Support the caliper with a bungee cord or mechanics wire from the suspension spring so it does not hang by the brake hose.
Step 4: Remove the Old Brake Pads
- Slide the inner and outer brake pads out of the caliper bracket by hand.
- Note how the pads sit in the metal clips—the orientation is important.
- Set the old pads aside for comparison with the new ones.
Step 5: Remove the Caliper Bracket
- Locate the two larger bolts holding the caliper bracket to the rear knuckle (usually 15mm or 18mm).
- Use a 15mm or 18mm socket and breaker bar to loosen and remove these two bolts.
- Remove the caliper bracket and set it on your work surface.
- Torque on reassembly: 115–130 Nm (85–96 ft-lbs)
Step 6: Remove the Old Rotor
- Remove any Torx T40 rotor retaining screw on the rotor face using a Torx T40 bit or screwdriver.
- If the rotor is stuck from rust, tap the rotor hat (center area) firmly with a rubber mallet or hammer from different angles until it loosens.
- Slide the old rotor off the hub and set it aside.
Step 7: Clean the Hub and Prepare the New Rotor
- Use the wire brush to clean rust and debris from the hub face where the rotor sits. The surface should be as smooth and flat as possible.
- Spray the new rotor (both sides and the hat) with brake cleaner to remove protective oil, then wipe with a clean shop rag.
- Clean rotors prevent pad glazing and noise.
Step 8: Install the New Rotor
- Place the new rotor onto the hub, aligning the rotor screw hole with the hub hole.
- Install the Torx retaining screw if equipped, using a Torx T40 bit, snug but not over-tight.
- Torque (if spec needed): 10–12 Nm (7–9 ft-lbs)
- If no screw, hold rotor with a lug nut finger-tight.
Step 9: Service the Caliper Bracket and Hardware
- Remove the old pad clips (metal hardware) from the caliper bracket by hand or with needle-nose pliers.
- Use the wire brush to clean the areas of the bracket where the clips sit.
- Install the new hardware clips from your kit into the bracket; they should snap in place.
- Apply a thin layer of high-temp brake grease to the pad contact areas on the clips (where pad ears slide). Do not over-apply.
Step 10: Reinstall the Caliper Bracket
- Position the caliper bracket over the new rotor and align the bolt holes with the knuckle.
- Start both bracket bolts by hand to avoid cross-threading.
- Tighten the bolts with a 15mm or 18mm socket and ratchet until snug.
- Then use a torque wrench and correct socket to tighten each bolt to 115–130 Nm (85–96 ft-lbs).
Step 11: Compress the Caliper Piston
- Place one of the old brake pads against the caliper piston (inside face).
- Use a C-clamp over the pad and the back of the caliper body, then slowly tighten the clamp to push the piston fully back into the caliper.
- Watch the brake fluid reservoir under the hood; if the level gets near the top, remove a little with a clean rag or syringe so it does not overflow.
- Go slow to avoid damaging the piston seal.
Step 12: Install the New Brake Pads
- Compare new pads to old ones to confirm shape and size match.
- Apply a very thin layer of brake grease to the pad “ears” (the metal tabs that slide in the clips) and to the back plate where it contacts the caliper or piston. Avoid friction surfaces.
- Slide the new inner and outer pads into the bracket hardware clips. They should move smoothly but not be loose.
Step 13: Reinstall the Caliper Over the New Pads
- Position the caliper over the new pads and rotor, lining up the slide bolt holes.
- Inspect the caliper slide pins (the small cylindrical pieces the bolts go into). They should move freely. If they are sticky, remove, clean with brake cleaner, dry, and apply a light coat of brake grease, then reinstall.
- Install the caliper slide bolts by hand, then tighten with a 13mm socket and ratchet.
- Use a torque wrench with 13mm socket to tighten slide bolts to 34–38 Nm (25–28 ft-lbs).
Step 14: Repeat on the Other Rear Side
- Repeat Steps 3–13 for the other rear wheel: remove caliper, pads, bracket, rotor, then install new rotor, hardware, pads, and refit the caliper.
- Do both sides so braking stays balanced.
Step 15: Reinstall Wheels and Lower the Escape
- Reinstall the rear wheels and hand-thread all lug nuts to avoid cross-threading.
- Use the breaker bar and socket to snug the lug nuts in a star pattern while the Escape is still on stands.
- Use the floor jack to lift the Escape slightly, remove the jack stands, then slowly lower the vehicle to the ground.
- Use a torque wrench and socket to tighten the lug nuts in a star pattern to 135 Nm (100 ft-lbs).
Step 16: Seat the Brake Pads (Pump the Pedal)
- With the engine off, sit in the driver’s seat and gently pump the brake pedal several times until it feels firm. This moves the pistons out to meet the new pads.
- Check the brake fluid level in the reservoir and adjust to the “MAX” line if needed.
- Do not drive until pedal feels solid.
✅ After Repair
- 🚗 Start the engine and press the brake pedal; confirm it feels firm and does not sink.
- 🚗 In a safe area, make a few gentle stops from 20–30 mph to verify there are no abnormal noises, vibrations, or pulling.
- 🚗 For the first 200–300 miles, avoid hard braking if possible. This helps “bed in” the new pads and rotors for best performance.
- 🚗 After a short test drive, recheck the lug nut torque to 135 Nm (100 ft-lbs) and look for any leaks or loose parts.
💰 DIY vs Shop Cost
Shop Cost: $450–$700 (parts + labor) for rear pads and rotors in the Los Angeles area
DIY Cost: $180–$320 (parts only, plus any tools you need)
You Save: $270–$380 by doing it yourself!
Shop labor rates in your area are typically $120–$160/hour. This repair takes a shop about 1.5–2 hours.
🎯 Ready to get started?
HowToo makes it easy: same-day/2-day shipping on every part, plus all the tools and specialty tools you need! Check out the parts and tools sections above to add everything to your cart.
