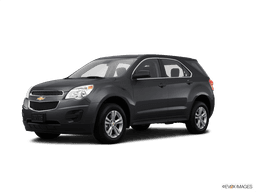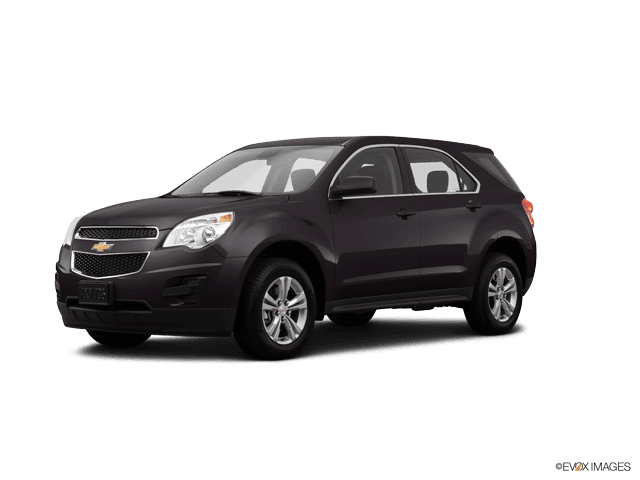









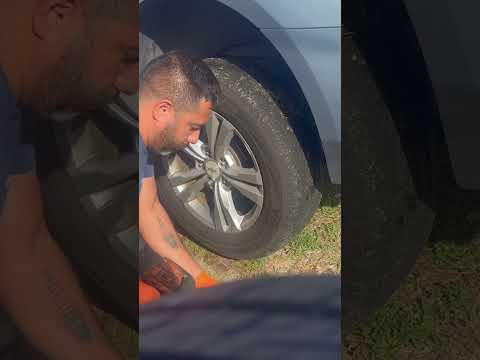







How to Replace Rear Brake Pads and Rotors on a 2014 Chevy Equinox
Step-by-step DIY rear brake job with tools, parts list, torque specs, and safety tips for your 2014 Chevrolet Equinox
How to Replace Rear Brake Pads and Rotors on a 2014 Chevy Equinox
Step-by-step DIY rear brake job with tools, parts list, torque specs, and safety tips for your 2014 Chevrolet Equinox


🔧 Equinox - Rear Brake Pads & Rotors Replacement
You’ll be replacing the rear brake pads and brake rotors on your Equinox, and pushing the caliper pistons back so the new, thicker pads fit. This restores braking power and helps eliminate noise and vibration from worn parts.
Difficulty Level: Beginner/Intermediate | Estimated Time: 2–3 hours
⚠️ Safety & Precautions
- ⚠️ Always work on a cool brake system; hot brakes can burn skin.
- ⚠️ Support the Equinox with jack stands under solid frame points; never rely on the floor jack alone.
- ⚠️ Wear safety glasses and mechanic gloves to protect eyes and hands from dust and sharp edges.
- ⚠️ Set the front wheels with wheel chocks so the vehicle cannot roll.
- ⚠️ Do not press the brake pedal with a caliper removed; it can push the piston out.
- ⚠️ Your Equinox uses a cable-operated parking brake; keep the parking brake released during the job.
- ⚠️ If brake fluid in the reservoir is already very full, watch carefully when pushing pistons back so fluid does not overflow.
🔧 Required Tools
You'll need the following tools for this repair:
- 🛠️ Floor jack (rated 3-ton minimum)
- 🛠️ Jack stands (rated 3-ton minimum)
- 🛠️ Wheel chocks
- 🛠️ Lug wrench (19mm)
- 🛠️ Socket wrench (3/8" drive)
- 🛠️ Socket wrench (1/2" drive)
- 🛠️ 13mm socket
- 🛠️ 18mm socket
- 🛠️ Torx T30 bit
- 🛠️ Breaker bar (1/2" drive)
- 🛠️ Torque wrench (3/8" drive, up to 40 ft-lbs)
- 🛠️ Torque wrench (1/2" drive, up to 120 ft-lbs)
- 🛠️ C-clamp (6" or larger) or brake caliper piston tool
- 🛠️ Flathead screwdriver (medium size)
- 🛠️ Wire brush (small, steel bristles)
- 🛠️ Bungee cord or strong wire hanger
- 🛠️ Shop rags
- 🛠️ Brake cleaner spray
- 🛠️ Anti-seize compound
- 🛠️ High-temperature brake grease
- 🛠️ Safety glasses
- 🛠️ Mechanic gloves
- 🛠️ Small wire brush for slide pins
🔩 Required Parts
HowToo sells all the parts you need for this repair:
- 🔩 Rear brake pad set - Qty: 1 (services both rear wheels)
- 🔩 Rear brake rotors - Qty: 2 (replace in pairs)
- 🔩 Rear brake caliper hardware kit (pad clips/abuttment clips) - Qty: 1 set
- 🔩 Brake cleaner (aerosol) - Qty: 1–2 cans
- 🔩 High-temperature synthetic brake grease - Qty: 1 small tube
- 🔩 Anti-seize compound - Qty: 1 small tube
- 🔩 Brake fluid DOT 3 or DOT 4 - Qty: 1 small bottle (for topping off if needed)
- 🔩 Rear caliper slide pins and boots - Qty: 1 kit (optional but recommended if originals are rusty or torn)
📋 Before You Begin
- Park the Equinox on level ground, shift to P, and release the parking brake; chock the front wheels.
- Loosen (but do not remove) the rear wheel lug nuts with the 19mm lug wrench while the vehicle is still on the ground.
- Raise the rear of the Equinox with the floor jack under the rear jacking point and place jack stands securely under the rear frame or pinch welds.
- Remove the rear wheels fully once the vehicle is safely supported.
- Open the hood and locate the brake fluid reservoir; remove the cap and place it loosely on top so air can move in and out.
- Take pictures before disassembly for easy reference.
🔨 Step-by-Step Instructions
Follow these steps in order:
Step 1: Remove the rear wheels
- Use the 19mm lug wrench to fully remove the loosened lug nuts.
- Pull the wheel straight off the hub and set it aside.
- Place wheels under frame as backup safety.
Step 2: Inspect the brake assembly
- Look at how the pads sit in the caliper bracket so you can copy it later.
- Check the rubber brake hose for cracks or leaks; do not twist or stretch it during the job.
Step 3: Remove the caliper guide pin bolts
- On the back of the caliper you will see two small bolts (guide pin bolts), one top and one bottom.
- Use the 13mm socket and 3/8" drive socket wrench to loosen and remove both guide pin bolts.
- Set these bolts aside; you will clean and reuse them unless you have new ones.
Step 4: Lift and support the caliper
- Use the flathead screwdriver to gently pry between the pad and rotor if the caliper is tight, just enough to loosen it.
- Lift the caliper off the bracket and pads.
- Hang the caliper with a bungee cord or wire hanger from the suspension spring so it is not hanging by the rubber brake hose.
- Never let the caliper dangle by the hose.
Step 5: Remove the old brake pads and hardware
- Slide the inner and outer pads out of the caliper bracket by hand.
- Remove the metal clips (hardware) from the caliper bracket using the flathead screwdriver if needed.
Step 6: Remove the caliper bracket
- Locate the two larger bolts that hold the caliper bracket to the rear knuckle (behind the rotor).
- Use the 18mm socket and breaker bar to loosen these two bolts; they may be quite tight.
- Remove the bolts and take off the caliper bracket.
- Torque spec on reassembly (caliper bracket bolts): 103 Nm (76 ft-lbs)
Step 7: Remove the rotor retaining screw (if present)
- On the face of the rotor you may see a small Torx screw holding the rotor to the hub.
- Use the Torx T30 bit with the 3/8" drive socket wrench to remove this screw.
- If it is stuck, gently tap the bit with a hammer before turning to avoid stripping.
Step 8: Remove the old rotor
- If the rotor is loose, pull it straight off the hub.
- If it is rusted on, apply a little penetrating oil (if you have some) around the hub center and let it sit a few minutes.
- Tap the rotor face between the wheel studs with a rubber mallet or the palm of your hand until it loosens and comes off.
- Hit around the center, not the thin edge.
Step 9: Clean the hub surface
- Use the wire brush to clean rust and debris from the face of the hub where the rotor sits.
- Wipe with a shop rag and spray lightly with brake cleaner to remove dust.
- Apply a very thin film of anti-seize compound around the hub center to help future removal (avoid the wheel stud threads).
Step 10: Prepare and install the new rotor
- New rotors are often coated with oil; spray both sides with brake cleaner and wipe clean with a shop rag.
- Slide the new rotor onto the hub, lining up the hole for the Torx screw if your rotor uses one.
- Reinstall the Torx screw with the Torx T30 bit and 3/8" drive socket wrench, snug it by hand (no exact torque needed; just firm).
Step 11: Service the caliper bracket and slide pins
- Take the caliper bracket you removed earlier.
- Pull out the two slide pins from the bracket by hand, noting which pin goes where (top vs bottom).
- Clean the pins with a shop rag and wire brush if rusty.
- Wipe out the pin holes in the bracket with a rag.
- Apply a light coat of high-temperature brake grease to each pin and the inside of the pin holes.
- Reinstall the pins, making sure they move smoothly in and out.
Step 12: Install new hardware on the caliper bracket
- Install the new metal clips from your hardware kit onto the caliper bracket in the same positions as the old ones.
- Make sure they snap fully into place and sit flat.
- Apply a very thin layer of high-temperature brake grease where the pads will slide on the clips (do not get grease on pad friction surfaces).
Step 13: Reinstall the caliper bracket
- Position the caliper bracket over the new rotor and line up the bolt holes.
- Install the two 18mm caliper bracket bolts by hand first to avoid cross-threading.
- Use the 18mm socket and breaker bar to snug them, then use the 1/2" drive torque wrench to tighten to 103 Nm (76 ft-lbs).
Step 14: Install the new brake pads
- Check your new pads for inner and outer marking; the inner pad often has a wear indicator tab or slightly different backing plate.
- Slide the inner pad into the bracket on the inside of the rotor and the outer pad on the outside, making sure the friction material faces the rotor.
- Ensure pads move freely in the clips and are seated fully.
Step 15: Compress the caliper piston
- Take the hanging caliper and inspect the piston and the rubber dust boot for tears.
- Place an old pad against the piston face inside the caliper.
- Use the C-clamp or brake caliper piston tool to slowly push the piston back into the caliper housing until it is fully seated and flush.
- Watch the brake fluid reservoir under the hood to make sure it does not overflow; if it rises too high, remove a little fluid with a clean syringe or turkey baster.
Step 16: Reinstall the caliper over the new pads
- Position the caliper over the new pads and caliper bracket, making sure the rubber boots on the slide pins are not twisted.
- Align the holes for the guide pin bolts.
- Install the two 13mm guide pin bolts by hand to start.
- Use the 13mm socket and 3/8" drive socket wrench to tighten, then use the 3/8" drive torque wrench to torque each to 31 Nm (23 ft-lbs).
Step 17: Repeat for the other rear side
- Repeat Steps 1–16 on the other rear wheel.
- Do one side at a time for reference.
Step 18: Reinstall wheels and lower the vehicle
- Place each wheel back on its hub and install the lug nuts by hand.
- Snug the lug nuts with the 19mm lug wrench in a criss-cross pattern while the vehicle is still on stands.
- Use the floor jack to lift the Equinox slightly, remove the jack stands, then lower the vehicle fully to the ground.
- Use the 1/2" drive torque wrench and 19mm socket to torque the lug nuts to 140 Nm (103 ft-lbs) in a star pattern.
Step 19: Final checks under the hood
- Check the brake fluid level in the reservoir; it should be between MIN and MAX.
- Top off slightly with DOT 3 or DOT 4 brake fluid if needed, but do not overfill.
- Securely reinstall the reservoir cap.
✅ After Repair
- With the engine off, slowly press the brake pedal several times until it becomes firm; this seats the pads against the rotors.
- Start the engine and press the pedal again; it should feel firm and not sink to the floor.
- Check around each rear caliper and brake hose for any signs of fluid leaks.
- Take a short, gentle test drive at low speed in a safe area; make several smooth stops to bed the pads.
- For the first 300–500 km, avoid very hard braking from high speeds to allow proper brake pad bedding.
💰 DIY vs Shop Cost
Shop Cost: $450–$650 (parts + labor) for rear pads and rotors.
DIY Cost: $150–$250 (parts only), depending on brands and local prices.
You Save: $300–$400 by doing it yourself!
Shop labor rates vary but typically run $100–$150/hour. This repair takes a shop approximately 1.5–2.0 hours.
🎯 Ready to get started?
HowToo makes it easy: same-day/2-day shipping on every part, plus all the tools and specialty tools you need! Check out the parts and tools sections above to add everything to your cart.
Guide for replace for these Chevrolet vehicles
| Year Make Model | Sub Model | Engine | Body Style |
|---|