










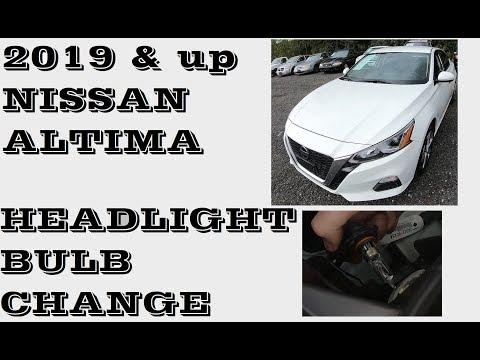






How to Replace LED Headlight Assemblies on a 2019-2021 Nissan Altima
Step-by-step guide with bumper removal, tools, parts, torque specs, and aiming tips for 2019, 2020, 2021
How to Replace LED Headlight Assemblies on a 2019-2021 Nissan Altima
Step-by-step guide with bumper removal, tools, parts, torque specs, and aiming tips for 2019, 2020, 2021


🔧 Altima - Headlight Bulb Replacement
Replacing both headlight bulbs on your Altima restores night visibility and keeps both sides evenly matched. The Platinum trim uses LED headlamp assemblies from the factory, so the “bulb” is not serviced separately; if a low/high beam LED fails, the affected headlamp assembly is replaced.
Difficulty Level: Intermediate | Estimated Time: 1.5-3 hours
Assumption: This covers factory LED headlamps on the Platinum trim.
⚠️ Safety & Precautions
- ⚠️ Turn the headlights off and let the lamp assemblies cool before touching anything.
- ⚠️ Disconnect the negative battery cable before unplugging headlamp connectors.
- ⚠️ Support the front of the vehicle with jack stands if you raise it. Never rely on a floor jack alone.
- ⚠️ Do not touch LED circuit areas or force connectors. LED headlamp assemblies can be damaged by static electricity and moisture.
- ⚠️ After replacing headlamp assemblies, aim must be checked so you do not blind oncoming drivers.
🔧 Required Tools
You'll need the following tools for this repair:
- 10mm socket
- 12mm socket
- 3/8-inch ratchet
- 3/8-inch extension set
- Torque wrench 5-50 Nm
- Phillips #2 screwdriver
- Flat-blade screwdriver
- Trim clip removal tool
- Panel removal tool set
- Painter’s tape 1-inch
- Microfiber towel
- Flashlight
- Floor jack rated 2-ton minimum
- Jack stands rated 2-ton minimum
- Wheel chocks
- Nitrile gloves
- Safety glasses
🔩 Required Parts
HowToo sells all the parts you need for this repair:
- Left LED headlight assembly - Qty: 1
- Right LED headlight assembly - Qty: 1
- Front bumper cover clips - Qty: As needed
- Fender liner clips - Qty: As needed
📋 Before You Begin
- 🅿️ Park your Altima on level ground, turn the headlights off, and set the parking brake.
- 🧱 Place wheel chocks behind the rear wheels.
- 🔋 Use a 10mm socket and 3/8-inch ratchet to loosen the negative battery terminal, then move the cable aside so it cannot spring back.
- 🔧 A trim clip removal tool is a small fork-shaped tool used to lift plastic clips without breaking them.
- 🔧 Painter’s tape protects painted bumper and fender edges from scratches while panels are moved.
- 💡 Factory LED headlamps are sealed units. If the main LED fails, replace the complete assembly rather than a bulb.
🔨 Step-by-Step Instructions
Follow these steps in order:
Step 1: Protect the Paint
- Use painter’s tape 1-inch along the front edges of both fenders where the bumper cover meets the body.
- Use painter’s tape 1-inch along the upper bumper corners below each headlamp.
- Use a microfiber towel to wipe dirt away first so tape does not trap grit.
- Clean paint scratches less.
Step 2: Raise and Secure the Front
- Use the floor jack rated 2-ton minimum to raise the front of your Altima at the front jacking point.
- Place jack stands rated 2-ton minimum under the front support points.
- Lower the vehicle gently onto the jack stands.
- Shake the vehicle lightly by hand to confirm it is stable before working near the bumper.
Step 3: Remove the Upper Radiator Cover Clips
- Open the hood.
- Use the trim clip removal tool or flat-blade screwdriver to lift the center pin of the plastic clips on the upper radiator cover.
- Remove the clips by hand and set them aside in order.
- Lift the upper cover away and place it on a soft surface.
Step 4: Remove the Upper Bumper Fasteners
- Use the 10mm socket, 3/8-inch extension set, and 3/8-inch ratchet to remove the upper bumper cover bolts.
- Use the trim clip removal tool to remove any upper plastic push clips.
- Keep bolts and clips separated so they go back in the same locations.
Step 5: Loosen Both Front Fender Liners
- Turn the steering wheel left to access the right-side fender liner area.
- Use the Phillips #2 screwdriver and trim clip removal tool to remove the screws and clips along the front edge of the right fender liner.
- Turn the steering wheel right to access the left-side fender liner area.
- Use the Phillips #2 screwdriver and trim clip removal tool to remove the screws and clips along the front edge of the left fender liner.
- Pull each liner back gently by hand to expose the bumper-to-fender corner fasteners.
Step 6: Remove Lower Bumper Fasteners
- Use the 10mm socket and 3/8-inch ratchet to remove the lower bumper cover bolts.
- Use the trim clip removal tool to remove lower splash shield clips connected to the bumper cover.
- Support the bumper cover by hand as the last fasteners are removed.
Step 7: Release the Bumper Corners
- Use the panel removal tool set to gently release the right bumper corner from the fender bracket.
- Repeat on the left bumper corner using the panel removal tool set.
- Pull outward gently, not downward, to avoid breaking the side retainers.
- Gentle clips release cleaner.
Step 8: Move the Bumper Cover Forward
- With a helper if available, pull the bumper cover forward just enough to access the headlamp bolts.
- Use the flashlight to look behind the bumper for fog lamp, parking sensor, or harness connectors.
- If connectors limit movement, unplug them by pressing the connector lock tab by hand.
- Place the bumper cover on a soft surface if fully removed.
Step 9: Remove the Left Headlamp Assembly
- Use the 10mm socket, 3/8-inch extension set, and 3/8-inch ratchet to remove the visible upper and side headlamp mounting bolts.
- Use the 12mm socket if any larger bracket bolt is fitted at the lower mount.
- Support the headlamp with one hand and slide it forward carefully.
- Unplug the headlamp electrical connector by pressing the lock tab and pulling the connector straight back.
- Remove the left headlamp assembly from the vehicle.
Step 10: Install the New Left Headlamp Assembly
- Connect the electrical connector to the new left LED headlight assembly until it clicks.
- Slide the assembly into place, making sure locating tabs fit into their guides.
- Start all mounting bolts by hand first.
- Use the 10mm socket and 3/8-inch ratchet to snug the bolts evenly.
- Use the torque wrench 5-50 Nm to tighten headlamp mounting bolts to Torque to 5.5 Nm (49 in-lbs).
Step 11: Remove the Right Headlamp Assembly
- Use the 10mm socket, 3/8-inch extension set, and 3/8-inch ratchet to remove the visible upper and side headlamp mounting bolts.
- Use the 12mm socket if any larger bracket bolt is fitted at the lower mount.
- Support the headlamp with one hand and slide it forward carefully.
- Unplug the headlamp electrical connector by pressing the lock tab and pulling straight back.
- Remove the right headlamp assembly from the vehicle.
Step 12: Install the New Right Headlamp Assembly
- Connect the electrical connector to the new right LED headlight assembly until it clicks.
- Slide the assembly into place, making sure locating tabs fit correctly.
- Start all mounting bolts by hand first.
- Use the 10mm socket and 3/8-inch ratchet to snug the bolts evenly.
- Use the torque wrench 5-50 Nm to tighten headlamp mounting bolts to Torque to 5.5 Nm (49 in-lbs).
Step 13: Reconnect the Battery and Test Lights
- Use the 10mm socket and 3/8-inch ratchet to reconnect the negative battery terminal.
- Turn the ignition on without starting the engine.
- Switch on the low beams, high beams, turn signals, parking lights, and hazard lights.
- Use the flashlight if needed to check that connectors are seated and no harness is pinched.
- If everything works, turn the lights and ignition off.
Step 14: Refit the Bumper Cover
- Lift the bumper cover into position by hand.
- Reconnect any bumper electrical connectors by hand until they click.
- Align the center of the bumper cover first, then align both corners.
- Press each bumper corner into the fender bracket by hand until it snaps in place.
- Use the 10mm socket and 3/8-inch ratchet to reinstall the upper and lower bumper bolts.
- Use the trim clip removal tool and your fingers to reinstall bumper clips.
- Use the torque wrench 5-50 Nm to tighten bumper bolts to Torque to 6 Nm (53 in-lbs).
Step 15: Reinstall Fender Liners and Upper Cover
- Use the Phillips #2 screwdriver to reinstall fender liner screws on both sides.
- Use the trim clip removal tool and your fingers to reinstall fender liner clips.
- Set the upper radiator cover back in place by hand.
- Push the plastic clips in by hand until they sit flush.
Step 16: Lower the Vehicle
- Use the floor jack rated 2-ton minimum to lift the front slightly off the jack stands.
- Remove the jack stands rated 2-ton minimum.
- Lower your Altima slowly to the ground.
- Remove the wheel chocks from behind the rear wheels.
Step 17: Check Headlight Aim
- Park your Altima on level ground facing a wall about 25 feet away.
- Use the flashlight to locate the headlamp vertical adjusters behind each assembly.
- Use the appropriate adjuster access with the Phillips #2 screwdriver if adjustment is needed.
- Adjust only small amounts so both beam cutoffs are even and not aimed high.
- For the most accurate result, have the headlamp aim checked with professional aiming equipment.
✅ After Repair
- ✅ Confirm low beams, high beams, turn signals, parking lights, and hazards work correctly.
- ✅ Check that the bumper cover gaps are even at both fenders and under both headlights.
- ✅ Drive at night in a safe area to confirm visibility and beam aim.
- ✅ If your Altima shows a headlamp warning message, recheck the connectors before replacing any additional parts.
- ✅ Have headlight aim professionally checked if the beams look uneven or too high.
💰 DIY vs Shop Cost
Shop Cost: $1,600-$3,200 (parts + labor)
DIY Cost: $1,000-$2,400 (parts only)
You Save: $300-$800 by doing it yourself!
Shop labor rates vary but typically run $100-$150/hour. This repair takes a shop approximately 2-4 hours.
🎯 Ready to get started?
HowToo makes it easy: same-day/2-day shipping on every part, plus all the tools and specialty tools you need! Check out the parts and tools sections below to add everything to your cart.
