








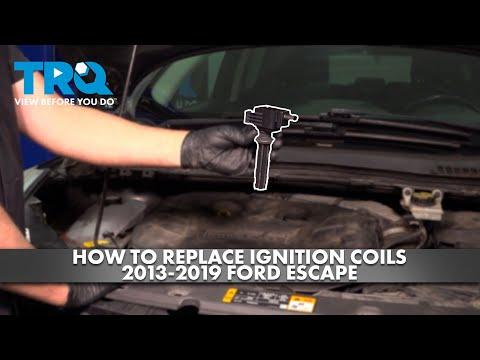






How to Replace Ignition Coils on a 2022 Ford Escape 1.5L (Fix Misfire & Rough Idle)
Step-by-step coil-on-plug replacement with required tools, parts list, safety tips, and 8 Nm (71 in-lbs) torque spec
How to Replace Ignition Coils on a 2022 Ford Escape 1.5L (Fix Misfire & Rough Idle)
Step-by-step coil-on-plug replacement with required tools, parts list, safety tips, and 8 Nm (71 in-lbs) torque spec


🔧 Escape - Ignition Coil Replacement
Your Escape uses coil-on-plug ignition coils (one coil per cylinder) that sit right on top of the spark plugs. Replacing a bad coil can fix misfires, rough idle, and flashing check-engine light, and it’s a straightforward under-hood job.
Difficulty Level: Beginner | Estimated Time: 0.5-1.0 hours
⚠️ Safety & Precautions
- ⚠️ Let the engine cool fully before working near the turbo and cylinder head.
- ⚠️ Keep the key far away from the vehicle so the ignition can’t be turned on accidentally.
- ⚠️ If the check-engine light is flashing, avoid driving until repaired (can damage the catalytic converter).
- ⚠️ Battery disconnect is not required, but disconnecting the negative terminal reduces the chance of an accidental short.
🔧 Required Tools
You'll need the following tools for this repair:
- 8mm socket
- 10mm socket
- 1/4" drive ratchet
- 1/4" drive extension (3"-6")
- Torque wrench (inch-pound or low-range Nm)
- Trim clip remover tool
- Small flathead screwdriver
- Flashlight
- Nitrile gloves
- Safety glasses
🔩 Required Parts
HowToo sells all the parts you need for this repair:
- Ignition coil - Qty: 1
- Dielectric grease (spark plug boot grease) - Qty: 1
📋 Before You Begin
- Park on level ground, shift to Park, and set the parking brake.
- Open the hood and let the engine cool (the turbo area can stay hot a long time).
- If you choose to disconnect the battery: use a 10mm socket to remove the negative terminal and isolate it so it can’t spring back.
🔨 Step-by-Step Instructions
Follow these steps in order:
Step 1: Remove the engine cover (if equipped)
- Use your hands to pull straight up at the corners to release the rubber grommets.
- If your cover uses fasteners instead, remove them with an 8mm socket.
Step 2: Identify the coils and choose what you’re replacing
- On your Escape’s 1.5L inline-3, there are 3 coils lined up on top of the engine.
- Replace just the failed coil or all 3.
Step 3: Unplug the coil electrical connector
- Press the connector lock tab, then pull the connector straight off.
- If it’s stubborn, use a small flathead screwdriver gently on the lock tab (don’t pry on the wires).
Step 4: Remove the coil hold-down bolt
- Use an 8mm socket with a 1/4" drive ratchet and extension to remove the bolt.
- Set the bolt somewhere safe (it’s easy to drop).
Step 5: Remove the ignition coil
- Grab the coil and twist it slightly left-right to break the seal.
- Pull straight up to remove it from the spark plug well.
- If it won’t budge, re-check that the bolt is fully removed, then wiggle again—don’t force it sideways.
Step 6: Prep and install the new coil
- Put a pea-size amount of dielectric grease inside the rubber boot of the new coil (this helps prevent moisture and makes future removal easier).
- Push the coil straight down until it fully seats on the spark plug.
Step 7: Reinstall and torque the hold-down bolt
- Thread the bolt in by hand first to avoid cross-threading.
- Use a torque wrench to tighten the bolt: Torque to 8 Nm (71 in-lbs).
Step 8: Reconnect the electrical connector
- Push the connector on until it clicks/locks.
- Gently tug to confirm it’s fully latched.
Step 9: Reinstall the engine cover
- Line up the cover and press down firmly to seat the grommets.
- If it uses fasteners, tighten with an 8mm socket (snug, do not over-tighten).
✅ After Repair
- If you disconnected the battery, reconnect it using a 10mm socket (snug the clamp).
- Start the engine and let it idle for 1-2 minutes. It should run smoothly with no shaking.
- If the check-engine light was on, it may take a few drive cycles to clear on its own. If it stays on, scan for codes to confirm the misfire is gone.
- Road test: light acceleration first, then normal driving. Stop if the check-engine light flashes again.
💰 DIY vs Shop Cost
Shop Cost: $250-$500 (parts + labor)
DIY Cost: $60-$240 (parts only, depending on 1 coil vs all 3)
You Save: $190-$260 by doing it yourself!
Shop labor rates vary but typically run $100-$150/hour. This repair takes a shop approximately 0.5-1.0 hours.
🎯 Ready to get started?
HowToo makes it easy: same-day/2-day shipping on every part, plus all the tools and specialty tools you need! Check out the parts and tools sections below to add everything to your cart.
Guide for replace for these Ford vehicles
| Year Make Model | Sub Model | Engine | Body Style |
|---|