









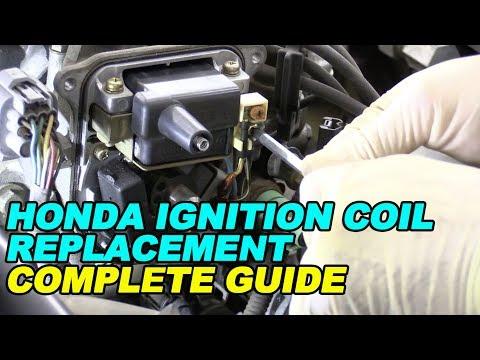






How to Replace Ignition Coils on a 2021 Honda Passport (Fix Misfire & Rough Idle)
Step-by-step DIY instructions with tools, parts list, safety tips, torque specs (12 Nm), and code clearing for 2019, 2020, 2021, 2022, 2023, 2024
How to Replace Ignition Coils on a 2021 Honda Passport (Fix Misfire & Rough Idle)
Step-by-step DIY instructions with tools, parts list, safety tips, torque specs (12 Nm), and code clearing for 2019, 2020, 2021, 2022, 2023, 2024


🔧 Passport - Ignition Coil Replacement
Ignition coils sit on top of the spark plugs and create the high-voltage spark your Passport needs to run smoothly. Replacing a bad coil can fix misfires, rough idle, flashing check-engine light, and loss of power.
Difficulty Level: Intermediate | Estimated Time: 1.0-2.5 hours
⚠️ Safety & Precautions
- ⚠️ Let the engine cool fully before starting (hot parts burn fast).
- ⚠️ Disconnect the negative battery cable to prevent accidental shorts.
- ⚠️ If the check-engine light is flashing, avoid driving until repaired (can damage the catalytic converters).
- ⚠️ Keep dirt out of spark plug holes—blow debris away before removing coils.
🔧 Required Tools
You'll need the following tools for this repair:
- Safety glasses
- Nitrile gloves
- 10mm socket
- 1/4" ratchet
- 3/8" ratchet
- 3" extension
- 6" extension
- Torque wrench (5–30 Nm range)
- Flat-blade screwdriver
- Trim clip removal tool
- Needle-nose pliers
- Compressed air blow gun
- Shop rags
- OBD2 scan tool
🔩 Required Parts
HowToo sells all the parts you need for this repair:
- Ignition coil - Qty: 1-6
- Dielectric grease (spark plug boot grease) - Qty: 1
- Upper intake manifold gasket set - Qty: 1 (only if upper intake is removed)
📋 Before You Begin
- 🅿️ Park on level ground, shift to Park, and set the parking brake.
- 🔋 Use a 10mm socket to disconnect the negative battery cable and isolate it so it can’t spring back.
- 🧭 Decide your scope: are you replacing one coil or all coils? If you tell me which cylinder is misfiring (like P0302), I can point you to the exact coil location.
🔨 Step-by-Step Instructions
Follow these steps in order:
Step 1: Remove the engine cover (if equipped)
- Remove the cover using a trim clip removal tool (some covers pull upward from rubber grommets).
- Set it aside on a clean surface.
Step 2: Remove the air intake ducting for access
- Loosen hose clamps using a flat-blade screwdriver.
- Release any clips using a trim clip removal tool.
- Lift the intake duct out and place it aside.
- Take a quick photo before removing hoses.
Step 3: (If needed) Gain access to the rear bank coils
- If you can clearly reach the rear coils, skip to Step 4.
- If access is too tight, you may need to remove the upper intake manifold.
- Label and disconnect vacuum/PCV/EVAP hoses using needle-nose pliers as needed.
- Remove the upper intake manifold fasteners using a 10mm socket with a 3/8" ratchet and extensions.
- Lift the upper intake manifold off and cover openings with shop rags to keep debris out.
- Replace the gasket(s) during reassembly.
Step 4: Unplug the ignition coil connector
- Press the connector lock tab and pull the connector straight off by hand.
- If it’s stubborn, gently help the tab with a flat-blade screwdriver (don’t pry hard).
Step 5: Remove the ignition coil retaining bolt
- Use a 10mm socket with a 1/4" ratchet to remove the coil bolt.
- Set the bolt aside so it doesn’t get lost.
Step 6: Remove the ignition coil
- Before pulling the coil out, blow debris away from the coil/spark plug area using a compressed air blow gun.
- Twist the coil boot slightly, then pull the coil straight up and out by hand.
Step 7: Install the new ignition coil
- Put a small dab of dielectric grease inside the new coil boot (a thin smear is enough).
- Push the coil straight down until it fully seats on the spark plug.
- Install the retaining bolt by hand first (to avoid cross-threading).
- Tighten the bolt with a torque wrench: Torque to 12 Nm (9 ft-lbs).
- Reconnect the coil connector until it clicks.
Step 8: Repeat for any other coils being replaced
- Move to the next coil and repeat Steps 4–7.
- Replace coils in matched pairs if possible.
Step 9: Reassemble the intake components
- Reinstall the upper intake manifold (if removed) using a 10mm socket and extensions.
- Use a torque wrench to tighten the manifold fasteners evenly in stages (crisscross pattern).
- Reconnect all hoses and clamps using needle-nose pliers and a flat-blade screwdriver.
- Reinstall the intake ducting and engine cover.
Step 10: Reconnect battery and clear/check codes
- Reconnect the negative battery cable using a 10mm socket.
- Use an OBD2 scan tool to clear codes and confirm the misfire does not return.
✅ After Repair
- ✅ Start the engine and let it idle for 2–3 minutes; it should run smooth with no shaking.
- ✅ Road test for 10–15 minutes; verify no flashing check-engine light.
- ✅ Re-scan with your OBD2 scan tool; confirm misfire counters stay at 0.
- ✅ Recheck that every coil connector is fully clicked in place.
💰 DIY vs Shop Cost
Shop Cost: $250-$650 (parts + labor, depending on how many coils and rear-bank access)
DIY Cost: $45-$420 (parts only, depending on 1 coil vs all 6)
You Save: $150-$350 by doing it yourself!
Shop labor rates vary but typically run $100-$150/hour. This repair takes a shop approximately 1.0-2.5 hours.
🎯 Ready to get started?
HowToo makes it easy: same-day/2-day shipping on every part, plus all the tools and specialty tools you need! Check out the parts and tools sections below to add everything to your cart.