















How to Replace Ignition Coils on a 2019 Hyundai Santa Fe XL (V6)
Step-by-step front and rear bank instructions, intake manifold removal tips, tools, parts, and torque specs for 2019
How to Replace Ignition Coils on a 2019 Hyundai Santa Fe XL (V6)
Step-by-step front and rear bank instructions, intake manifold removal tips, tools, parts, and torque specs for 2019


🔧 Santa Fe XL - Ignition Coil Replacement
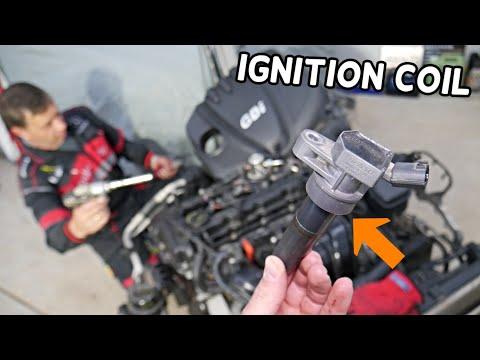
Ignition coils sit on top of each spark plug and create the high voltage needed to fire the plug. On your Santa Fe XL V6, the front-bank coils are easy to access, but the rear-bank coils require removing the upper intake manifold to reach them.
Before I tailor this perfectly: Are you replacing all 6 coils or just one cylinder? And are you replacing the spark plugs at the same time?
Difficulty Level: Intermediate | Estimated Time: 1.5-4.0 hours
⚠️ Safety & Precautions
- ⚠️ Work on a cool engine; the intake and plugs get very hot.
- ⚠️ Disconnect the negative battery cable before unplugging coils.
- ⚠️ Keep dirt out of the spark plug wells; blow debris away before removing coils.
- ⚠️ If removing the upper intake manifold, cover the intake ports immediately with clean shop towels.
🔧 Required Tools
You'll need the following tools for this repair:
- 10mm socket
- 10mm wrench
- Ratchet (3/8")
- Extension set (3/8")
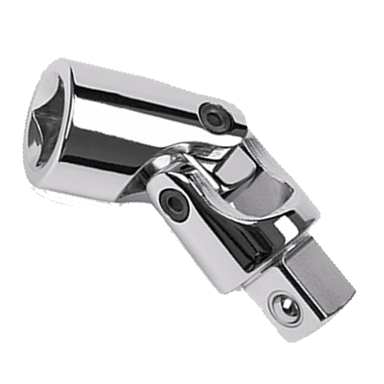
- Universal swivel joint (3/8")
- Torque wrench (inch-pound)
- Torque wrench (foot-pound)
- Flathead screwdriver
- Trim clip tool
- Needle-nose pliers
- Compressed air blow gun
- Shop towels
- Painter’s tape and marker
- Safety glasses
- Nitrile gloves
- 5/8" spark plug socket
🔩 Required Parts
HowToo sells all the parts you need for this repair:
- Ignition coil - Qty: 1 (or Qty: 6 if replacing all)
- Upper intake manifold gasket set - Qty: 1 (required if rear-bank coils are replaced)
- Dielectric grease - Qty: 1
- Spark plugs - Qty: 6 (recommended if you’re already there)
📋 Before You Begin
- Park on level ground, shift to Park, and open the hood.
- Let the engine cool fully.
- Use painter’s tape and marker to label any hoses/connectors you remove. Labeling prevents mix-ups.
- Disconnect the battery: use a 10mm wrench to remove the negative terminal and tuck it aside.
🔨 Step-by-Step Instructions
Follow these steps in order:
Step 1: Remove the engine cover
- Grip the cover and pull upward to release it from the rubber grommets.
- If clips are present, use a trim clip tool to release them.
Step 2: Replace front-bank ignition coils (easy access)
- Locate the front bank (closest to the radiator).
- Blow out debris around each coil with compressed air blow gun.
- Unplug the coil connector: depress the lock tab and pull straight back (use needle-nose pliers only if needed). Don’t pull on wires.
- Remove the coil hold-down bolt with a 10mm socket and ratchet.
- Twist the coil slightly and pull it straight up to remove.
- Apply a very small amount of dielectric grease inside the new coil boot.
- Install the new coil, push down firmly until fully seated.
- Reinstall the bolt with a 10mm socket, then Torque to 9.8 Nm (7.2 ft-lbs) using a torque wrench (inch-pound).
- Reconnect the electrical connector until it clicks.
Step 3: Gain access to rear-bank coils (upper intake manifold removal)
- Remove the air intake duct: loosen clamps with a flathead screwdriver and remove any clips with a trim clip tool.
- Label and disconnect any vacuum lines/PCV hoses you need to move using painter’s tape and marker and needle-nose pliers.
- Unplug the throttle body/related connectors that prevent lifting the upper intake (use your hands; use a flathead screwdriver gently only if a lock tab is stuck).
- Remove the upper intake manifold fasteners with a 10mm socket, ratchet, and extensions.
- Lift the upper intake manifold off carefully.
- Immediately cover the intake ports with shop towels. Dropping anything inside is serious.
- Remove and discard old upper intake gaskets; you’ll install new ones later.
Step 4: Replace rear-bank ignition coils
- With the rear bank exposed (closest to the firewall), blow out debris around each coil with compressed air blow gun.
- Unplug each coil connector.
- Remove each coil bolt with a 10mm socket and ratchet.
- Remove coils (twist and pull upward), apply a small amount of dielectric grease to new boots, and reinstall.
- Reinstall bolts and Torque to 9.8 Nm (7.2 ft-lbs) using a torque wrench (inch-pound).
- Reconnect all coil connectors until they click.
Step 5: Reinstall the upper intake manifold
- Remove the shop towels from the intake ports.
- Install the new upper intake manifold gaskets.
- Set the upper intake manifold back into place carefully.
- Start all fasteners by hand to avoid cross-threading, then tighten evenly using a 10mm socket and ratchet.
- Reconnect all hoses and electrical connectors (match your labels).
- Reinstall the air intake duct and tighten clamps with a flathead screwdriver.
Step 6: Reconnect the battery and reinstall the engine cover
- Reconnect the negative battery cable using a 10mm wrench.
- Press the engine cover back onto its mounting grommets.
✅ After Repair
- Start your Santa Fe XL and let it idle for 1–2 minutes.
- Listen/feel for misfires (shaking idle) and confirm the check engine light does not flash.
- If you removed the upper intake manifold, check for a hissing sound (vacuum leak) and recheck any hoses/connectors.
- If a check engine light remains on, a scan tool may be needed to read/clear codes and confirm the misfire is resolved.
💰 DIY vs Shop Cost
Shop Cost: $350-$900 (parts + labor, varies a lot based on rear-bank access)
DIY Cost: $60-$420 (parts only, depending on 1 coil vs all 6)
You Save: $290-$480+ by doing it yourself!
Shop labor rates vary but typically run $100-$150/hour. This repair takes a shop approximately 1.5-3.5 hours.
🎯 Ready to get started?
HowToo makes it easy: same-day/2-day shipping on every part, plus all the tools and specialty tools you need! Check out the parts and tools sections below to add everything to your cart.