









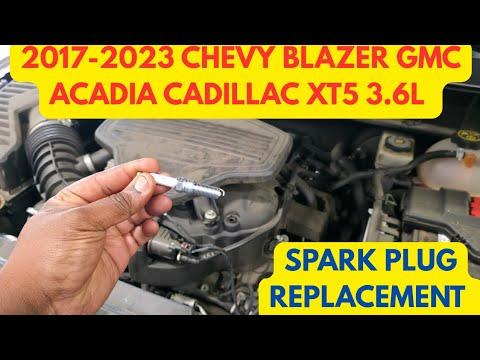







How to Replace Ignition Coils on a 2019-2022 Chevrolet Blazer 3.6L V6 (Front & Rear Bank) (Engine: V6 3.6L)
Step-by-step coil swap with plenum removal tips, required tools/parts, gasket notes, and torque specs
How to Replace Ignition Coils on a 2019-2022 Chevrolet Blazer 3.6L V6 (Front & Rear Bank) (Engine: V6 3.6L)
Step-by-step coil swap with plenum removal tips, required tools/parts, gasket notes, and torque specs for 2019, 2020, 2021, 2022


🔧 Blazer - Ignition Coil Replacement
Your Blazer uses one ignition coil per cylinder. On the 3.6L V6, the front bank coils are easy to reach, but the rear bank coils sit near the firewall and typically require removing the upper intake manifold (also called the “plenum”) to access them.
Difficulty Level: Intermediate | Estimated Time: 1.5-3.5 hours
Quick check: Are you replacing all 6 coils, or just the coil(s) on a specific cylinder? Also, are you planning to do spark plugs at the same time?
⚠️ Safety & Precautions
- 🛑 Work on a cool engine; the rear bank area gets very hot.
- 🧯 Disconnect the negative battery cable to prevent accidental shorts and to protect electronics when unplugging coils/throttle body.
- 🧤 Keep dirt out of the intake; cover open ports immediately after the plenum comes off.
- ⚠️ Do not pull on wiring; release connector locks first to avoid broken terminals.
🔧 Required Tools
You'll need the following tools for this repair:
- Safety glasses
- Nitrile gloves
- Floor jack (rated 3-ton minimum)
- Jack stands (rated 3-ton minimum)
- Wheel chocks
- 3/8" drive ratchet
- 1/4" drive ratchet
- 3/8" drive extension set (3" and 6")
- 1/4" drive extension set (3" and 6")
- 10mm socket
- 8mm socket
- 7mm socket
- Flat-blade screwdriver
- Trim clip removal tool
- Torque wrench (inch-pound)
- Torque wrench (foot-pound)
- Pick tool
- Shop light
- Clean shop towels
🔩 Required Parts
HowToo sells all the parts you need for this repair:
- Ignition coil - Qty: 1-6
- Upper intake manifold (plenum) gasket set - Qty: 1
- Throttle body gasket - Qty: 1
- Dielectric grease - Qty: 1
📋 Before You Begin
- Park on level ground, shift to Park, and set the parking brake.
- Open the hood and let the engine cool fully.
- Use a 10mm socket to disconnect the negative battery cable and isolate it so it can’t spring back.
- Take a few photos of hose routing and electrical connectors before removal. Photos save reassembly time.
🔨 Step-by-Step Instructions
Follow these steps in order:
Step 1: Remove the engine cover
- Grip the cover and pull straight up to release the grommets (no tools typically needed).
- Set it aside where it won’t get stepped on.
Step 2: Replace the front bank ignition coils
- Locate the three front coils (closest to the radiator).
- For each coil, release the electrical connector lock using a pick tool, then unplug the connector by hand.
- Remove the coil retaining bolt with a 10mm socket.
- Twist the coil slightly and pull upward to remove it.
- Apply a thin film of dielectric grease inside the new coil boot (the rubber end that seals to the spark plug).
- Install the new coil, pushing straight down until it fully seats.
- Install the coil bolt with a 10mm socket, then Torque to 10 Nm (89 in-lbs).
- Reconnect the electrical connector until it clicks.
Step 3: Remove the air intake duct (to access the plenum area)
- Loosen the hose clamp(s) using a 7mm socket or flat-blade screwdriver (whichever your clamp uses).
- Unclip/unplug any sensors on the duct by hand after releasing locks with the pick tool.
- Remove the duct and set it aside.
Step 4: Remove the upper intake manifold (plenum)
- Plenum = the upper intake piece that routes air into the engine; it must come off to reach the rear coils.
- Unplug the throttle body and any nearby connectors using the pick tool to release locks first.
- Disconnect vacuum/PCV hoses carefully; use a pick tool only to help release stuck hoses (don’t gouge the plastic).
- Remove plenum fasteners using an 8mm socket and/or 10mm socket (your Blazer may use one or both).
- Lift the plenum off evenly. Immediately place clean shop towels into the exposed intake ports to keep hardware out.
- Important torque note: Plenum/throttle body fastener torque depends on the exact fastener set used on your build. If you want, tell me whether your plenum fasteners are 8mm or 10mm heads and I’ll give you the correct tightening sequence guidance for your setup.
Step 5: Replace the rear bank ignition coils
- Locate the three rear coils (closest to the firewall).
- Unplug each coil connector (use pick tool to release the lock), then remove the coil bolt with a 10mm socket.
- Remove the coil by twisting and pulling upward.
- Add a small amount of dielectric grease inside the new coil boot.
- Install the new coil straight down until fully seated.
- Install the coil bolt with a 10mm socket, then Torque to 10 Nm (89 in-lbs).
- Reconnect the electrical connectors until they click.
Step 6: Reinstall the plenum with new gaskets
- Remove the shop towels from the intake ports.
- Remove old plenum gaskets and install the new gasket set by hand (make sure they sit flat and don’t pinch).
- Reinstall the plenum and start all bolts by hand first to avoid cross-threading.
- Tighten bolts evenly using an 8mm socket and/or 10mm socket, then torque with your torque wrench (inch-pound) or torque wrench (foot-pound) as applicable.
- Reinstall/replace the throttle body gasket, then reinstall the throttle body and reconnect the connector(s).
- Reconnect all vacuum/PCV hoses and electrical connectors exactly as removed.
- Double-check every connector “click”.
Step 7: Reinstall the air intake duct and engine cover
- Reinstall the intake duct and tighten clamps with a 7mm socket or flat-blade screwdriver.
- Reconnect any sensors on the duct.
- Press the engine cover back into its grommets.
Step 8: Reconnect the battery
- Reconnect the negative battery cable using a 10mm socket.
✅ After Repair
- Start the engine and let it idle for 2-3 minutes. It may idle slightly rough for a few seconds while it relearns airflow.
- Listen for hissing (vacuum leak) around the plenum area. If you hear one, shut off and re-check gasket seating and hose connections.
- If the check engine light was on before, you’ll typically need to clear codes with a scan tool to confirm the fix.
- Test drive 10-15 minutes and re-check for warning lights.
💰 DIY vs Shop Cost
Shop Cost: $400-$900 (parts + labor)
DIY Cost: $120-$450 (parts only)
You Save: $280-$450 by doing it yourself!
Shop labor rates vary but typically run $100-$150/hour. This repair takes a shop approximately 1.5-3.5 hours.
🎯 Ready to get started?
HowToo makes it easy: same-day/2-day shipping on every part, plus all the tools and specialty tools you need! Check out the parts and tools sections below to add everything to your cart.
Guide for Ignition Coil replace for these Chevrolet vehicles
| Year Make Model | Sub Model | Engine | Body Style |
|---|---|---|---|
| 2022 Chevrolet Blazer | - | V6 3.6L | - |
| 2021 Chevrolet Blazer | - | V6 3.6L | - |
| 2020 Chevrolet Blazer | - | V6 3.6L | - |
| 2019 Chevrolet Blazer | - | V6 3.6L | - |