









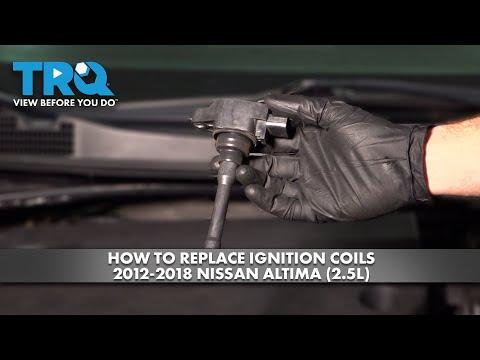







How to Replace Ignition Coils on a 2018 Nissan Altima (Fix Misfire & Rough Idle)
Step-by-step coil pack replacement with tools, parts list, safety tips, and 64 in-lb torque spec
How to Replace Ignition Coils on a 2018 Nissan Altima (Fix Misfire & Rough Idle)
Step-by-step coil pack replacement with tools, parts list, safety tips, and 64 in-lb torque spec


🔧 Altima - Ignition Coil Replacement
Your Altima’s ignition coils sit on top of the engine and send high voltage to the spark plugs. A failed coil can cause misfires, rough running, flashing check-engine light, and poor acceleration. Replacing coils is a straightforward bolt-on repair.
Difficulty Level: Beginner | Estimated Time: 0.5-1.5 hours
⚠️ Safety & Precautions
- ⚠️ Let the engine cool fully before working (hot parts burn).
- ⚠️ Disconnect the negative battery cable to reduce short/misfire risk.
- ⚠️ If the check-engine light is flashing, avoid driving until repaired (can damage the catalytic converter).
- ⚠️ Don’t pull on wiring—release the connector lock first.
🔧 Required Tools
You'll need the following tools for this repair:
- 10mm socket
- 1/4" ratchet
- 3" extension for 1/4" ratchet
- Torque wrench (inch-pound, 20-200 in-lb range)
- Flat trim tool
- Needle-nose pliers
- OBD2 scan tool (basic code reader)
- Nitrile gloves
- Safety glasses
🔩 Required Parts
HowToo sells all the parts you need for this repair:
- Ignition coil - Qty: 1-4
- Dielectric grease (spark plug boot grease) - Qty: 1
- Intake/engine cover grommets or push clips (as needed) - Qty: 0-4
- Spark plugs (recommended if due) - Qty: 4
📋 Before You Begin
- Park on level ground, shift to Park, and set the parking brake.
- Open the hood and let the engine cool.
- Use a 10mm socket to disconnect the negative battery terminal and move it aside so it can’t spring back.
- Tip: Take a quick photo of connectors first.
🔨 Step-by-Step Instructions
Follow these steps in order:
Step 1: Remove the engine cover (if equipped)
- Grab the cover near the corners and pull straight up to release it, or remove fasteners using a flat trim tool (if your cover uses push clips).
- Set the cover aside where it won’t get stepped on.
Step 2: Locate the ignition coils
- The coils are the four identical modules on top of the engine, each held by one bolt and one electrical connector.
Step 3: Unplug the coil electrical connector
- Press the connector lock tab and pull the connector straight off the coil.
- If it’s stubborn, use needle-nose pliers gently on the connector body (not the wires).
- Tip: Wiggle slightly—don’t yank.
Step 4: Remove the coil hold-down bolt
- Use a 10mm socket, 1/4" ratchet, and 3" extension to remove the single bolt holding the coil.
Step 5: Remove the ignition coil
- Twist the coil gently left-right to break the boot loose, then pull straight up.
- If you see oil in the spark plug tube, stop and note it—this can indicate a valve cover gasket tube seal leak.
Step 6: Prep and install the new coil
- Add a small dab of dielectric grease inside the new coil boot (this helps prevent sticking and moisture issues).
- Push the new coil straight down until it fully seats on the spark plug.
Step 7: Reinstall and torque the coil bolt
- Hand-start the bolt to avoid cross-threading.
- Use a torque wrench (inch-pound) to tighten the bolt: Torque to 7.2 Nm (64 in-lb).
Step 8: Reconnect the coil connector
- Push the connector on until you feel/hear it click.
- Give it a gentle tug to confirm it’s locked.
Step 9: Repeat for any other coils being replaced
- Repeat Steps 3-8 for the remaining cylinders if you’re replacing more than one coil.
- Tip: Do one coil at a time to avoid mix-ups.
Step 10: Reinstall engine cover and reconnect the battery
- Reinstall the engine cover (push down evenly until seated).
- Reconnect the negative battery terminal using a 10mm socket.
✅ After Repair
- Start the engine and let it idle for 1-2 minutes. It should run smooth with no shaking.
- Use an OBD2 scan tool to clear any stored misfire codes, then re-check for codes after a short test drive.
- Take a 10-15 minute drive with light/moderate throttle and confirm the check-engine light stays off.
- If it still misfires, the next most common causes are spark plugs, a fuel injector issue, or a vacuum leak.
💰 DIY vs Shop Cost
Shop Cost: $220-$550 (parts + labor)
DIY Cost: $60-$320 (parts only)
You Save: $160-$230 by doing it yourself!
Shop labor rates vary but typically run $100-$150/hour. This repair takes a shop approximately 0.7-1.2 hours.
🎯 Ready to get started?
HowToo makes it easy: same-day/2-day shipping on every part, plus all the tools and specialty tools you need! Check out the parts and tools sections below to add everything to your cart.