









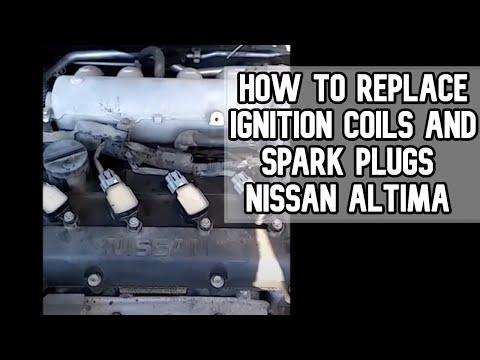





How to Replace Ignition Coils on a 2018 Nissan Altima 3.5L V6
Step-by-step DIY guide with tools, parts, torque specs, safety tips, and misfire checks for 2014, 2015
How to Replace Ignition Coils on a 2018 Nissan Altima 3.5L V6
Step-by-step DIY guide with tools, parts, torque specs, safety tips, and misfire checks for 2014, 2015


🔧 Altima - Ignition Coil Replacement
Replacing the ignition coils on your Altima restores strong spark to the spark plugs and can fix misfires, rough idle, poor acceleration, and a flashing check engine light. On the V6 3.5L engine, the front three coils are easy to reach, but the rear three sit under the upper intake manifold, so this job takes patience.
Difficulty Level: Intermediate | Estimated Time: 2.5-4 hours
⚠️ Safety & Precautions
- ⚠️ Let the engine cool completely before starting; the intake manifold and cylinder heads can stay hot for a long time.
- ⚠️ Disconnect the negative battery cable before unplugging ignition coils to prevent accidental shorts.
- ⚠️ Keep dirt, bolts, and tools out of the open intake ports. Cover openings immediately after the upper intake manifold is removed.
- ⚠️ Do not pull on wiring by the wires. Press the connector tab and pull on the plastic connector body.
- ⚠️ If the check engine light is flashing, avoid driving until repaired because a misfire can damage the catalytic converters.
🔧 Required Tools
You'll need the following tools for this repair:
- 10mm socket
- 12mm socket
- 14mm socket
- 3/8-inch drive ratchet
- 3/8-inch drive 6-inch extension
- 3/8-inch drive 12-inch extension
- 1/4-inch drive ratchet
- 1/4-inch drive 6-inch extension
- Torque wrench inch-pound range
- Torque wrench foot-pound range
- Flat-blade screwdriver
- Needle-nose pliers
- Plastic trim removal tool
- Pick tool set
- Magnetic pickup tool
- Shop vacuum
- Clean shop towels
- Masking tape
- Permanent marker
- OBD2 scan tool
- Nitrile gloves
- Safety glasses
🔩 Required Parts
HowToo sells all the parts you need for this repair:
- Ignition coils - Qty: 6
- Upper intake manifold gasket set - Qty: 1
- Throttle body gasket - Qty: 1
- Dielectric grease - Qty: 1 tube
📋 Before You Begin
- 🅿️ Park your Altima on level ground, shift to Park, and set the parking brake.
- 🔋 Use a 10mm socket to disconnect the negative battery cable, then move the cable aside so it cannot touch the battery post.
- 🧊 Let the engine cool fully before touching the intake manifold area.
- 🏷️ Use masking tape and a permanent marker to label hoses and connectors as you remove them. This helps first-time DIYers avoid mix-ups.
- 🧽 Use a shop vacuum around the intake manifold before removal so loose dirt cannot fall into the engine.
- 📟 An OBD2 scan tool is helpful after the repair to clear misfire codes and confirm the repair worked.
🔨 Step-by-Step Instructions
Follow these steps in order:
Step 1: Remove the Engine Cover
- Use a 10mm socket to remove the engine cover fasteners if equipped.
- Lift the cover straight up and set it aside.
- Keep bolts in labeled cups.
Step 2: Disconnect the Air Intake Tube
- Use a flat-blade screwdriver to loosen the clamp at the throttle body.
- Use a flat-blade screwdriver to loosen the clamp at the air filter housing.
- Unplug the mass airflow sensor connector by pressing the tab and pulling the connector body.
- Use needle-nose pliers to release any small hose clamps attached to the intake tube.
- Remove the air intake tube from the engine bay.
- The throttle body is the round air valve on the front of the intake manifold.
Step 3: Remove Intake Manifold Attachments
- Use masking tape and a permanent marker to label each vacuum hose and electrical connector connected to the upper intake manifold.
- Use needle-nose pliers to release hose clamps, then gently twist hoses loose by hand.
- Use a plastic trim removal tool or pick tool to release wiring clips without breaking them.
- Unplug the throttle body connector by pressing the lock tab and pulling the connector body.
- Do not force connectors. If stuck, use a pick tool to gently lift the locking tab.
Step 4: Remove the Throttle Body
- Use a 10mm socket and ratchet to remove the throttle body bolts.
- Carefully move the throttle body aside without pulling hard on wiring or hoses.
- Remove and discard the old throttle body gasket.
- A gasket is a thin seal that prevents air leaks between two parts.
- During reassembly, install a new throttle body gasket and tighten the bolts evenly to Torque to 10 Nm (89 in-lbs).
Step 5: Remove the Upper Intake Manifold
- Use a 12mm socket with a 6-inch extension to remove the upper intake manifold bolts.
- Use a 12mm socket with a 12-inch extension for the harder-to-reach rear fasteners.
- Use a 14mm socket if any support bracket fasteners need to be loosened for clearance.
- Lift the upper intake manifold carefully upward and forward.
- Use clean shop towels to cover the open intake ports immediately.
- The intake ports are the openings where air enters the engine. Nothing can fall inside them.
- Remove and discard the old upper intake manifold gaskets.
Step 6: Access the Ignition Coils
- Locate the six ignition coils. Each coil sits directly on top of a spark plug and has one electrical connector.
- Use a shop vacuum to clean around the coils before removal.
- Use a pick tool to gently release each coil connector lock if it is stuck.
- Unplug each coil connector by pressing the tab and pulling the connector body.
Step 7: Remove the Old Ignition Coils
- Use a 10mm socket with a 1/4-inch ratchet to remove each ignition coil retaining bolt.
- Twist each coil slightly by hand, then pull it straight upward.
- If a coil boot sticks, pull slowly and evenly. Do not pry against the valve cover.
- Use a magnetic pickup tool if a bolt drops into a tight area.
- The coil boot is the rubber tube at the bottom of the coil that seals around the spark plug.
Step 8: Install the New Ignition Coils
- Apply a very small amount of dielectric grease inside the end of each new coil boot.
- Dielectric grease is a non-conductive grease that helps the rubber boot seal and release later.
- Push each new ignition coil straight down until it fully seats on the spark plug.
- Use a 10mm socket and inch-pound torque wrench to tighten each ignition coil bolt to Torque to 6 Nm (53 in-lbs).
- Reconnect each coil connector until it clicks.
- A click means it locked.
Step 9: Reinstall the Upper Intake Manifold
- Remove the clean shop towels from the intake ports and verify nothing fell inside.
- Install the new upper intake manifold gaskets into position.
- Set the upper intake manifold carefully onto the engine.
- Start all manifold bolts by hand first to avoid cross-threading.
- Use a 12mm socket and inch-pound torque wrench to tighten the upper intake manifold bolts in an even crisscross pattern to Torque to 25 Nm (18 ft-lbs).
- Use a 14mm socket and foot-pound torque wrench to reinstall any support bracket fasteners removed for clearance to Torque to 25 Nm (18 ft-lbs).
Step 10: Reinstall the Throttle Body and Air Intake
- Install the new throttle body gasket.
- Use a 10mm socket and inch-pound torque wrench to tighten the throttle body bolts evenly to Torque to 10 Nm (89 in-lbs).
- Reconnect the throttle body electrical connector until it clicks.
- Reconnect all labeled vacuum hoses and wiring clips by hand.
- Use needle-nose pliers to reposition hose clamps exactly where they were.
- Reinstall the air intake tube.
- Use a flat-blade screwdriver to tighten both intake tube clamps snugly.
- Reconnect the mass airflow sensor connector until it clicks.
Step 11: Reconnect the Battery
- Use a 10mm socket to reconnect the negative battery cable.
- Tighten the terminal nut snugly, but do not overtighten it.
- Reinstall the engine cover using a 10mm socket.
Step 12: Perform Idle Air Volume Relearn if Needed
- If the idle is high, unstable, or the engine stalls after throttle body removal, use an OBD2 scan tool with Nissan idle relearn capability to run Idle Air Volume Learn.
- If your scan tool does not support this, let the engine reach full operating temperature, turn off all accessories, and allow the engine to idle undisturbed for several minutes.
- Do not press the accelerator during idle relearn.
✅ After Repair
- ✅ Start the engine and listen for smooth idle.
- ✅ Check around the upper intake manifold and air intake tube for hissing sounds that may indicate a vacuum leak.
- ✅ Use an OBD2 scan tool to clear any stored misfire codes.
- ✅ Road test your Altima for 10-15 minutes with light acceleration first, then normal acceleration.
- ✅ Recheck for warning lights after the road test.
- ✅ If a misfire remains on the same cylinder, inspect the spark plug and coil connector for damage.
💰 DIY vs Shop Cost
Shop Cost: $650-$1,150 (parts + labor)
DIY Cost: $180-$450 (parts only)
You Save: $470-$700 by doing it yourself!
Shop labor rates vary but typically run $100-$150/hour. This repair takes a shop approximately 2.0-3.0 hours.
🎯 Ready to get started?
HowToo makes it easy: same-day/2-day shipping on every part, plus all the tools and specialty tools you need! Check out the parts and tools sections below to add everything to your cart.