









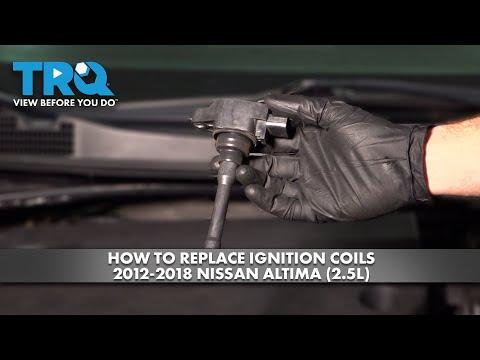




How to Replace Ignition Coils on a 2017 Nissan Altima
Step-by-step DIY guide with tools, parts, torque specs, intake removal, and safety tips for 2007, 2008, 2009
How to Replace Ignition Coils on a 2017 Nissan Altima
Step-by-step DIY guide with tools, parts, torque specs, intake removal, and safety tips for 2007, 2008, 2009


🔧 Altima - Ignition Coil Replacement
Replacing the ignition coils on your Altima can fix engine misfires, rough idle, hesitation, poor fuel economy, and a flashing check engine light. The V6 has six coils total; the front three are easy to reach, while the rear three require removing the upper intake manifold.
Difficulty Level: Intermediate | Estimated Time: 2-3.5 hours
⚠️ Safety & Precautions
- ⚠️ Work only on a completely cool engine to avoid burns from hot aluminum parts and coolant hoses.
- 🔋 Disconnect the negative battery cable before unplugging ignition coils or engine sensors.
- 🧤 Wear safety glasses and nitrile gloves to protect your eyes and hands.
- 🚫 Do not allow bolts, dirt, rags, or tools to fall into the open intake ports.
- 📌 Cover open intake ports with clean shop towels immediately after removing the upper intake manifold.
- ⚠️ If the check engine light flashes after repair, stop driving and recheck the coil connectors and intake hoses.
🔧 Required Tools
You'll need the following tools for this repair:
- 10mm socket
- 12mm socket
- 14mm socket
- 1/4-inch ratchet
- 3/8-inch ratchet
- 3-inch socket extension
- 6-inch socket extension
- 1/4-inch torque wrench
- 3/8-inch torque wrench
- Flat-blade screwdriver
- Needle-nose pliers
- Trim clip removal tool
- Magnetic pickup tool
- Flashlight
- Painter’s tape
- Marker
- Clean shop towels
- Nitrile gloves
- Safety glasses
🔩 Required Parts
HowToo sells all the parts you need for this repair:
- Ignition coils - Qty: 6
- Upper intake manifold gasket set - Qty: 1
- Throttle body gasket - Qty: 1
- Spark plugs - Qty: 6
Best practice: replace all six coils together.
📋 Before You Begin
- 🚗 Park your Altima on level ground, shift to Park, and set the parking brake.
- ❄️ Let the engine cool for at least 1 hour.
- 🔋 Use a 10mm socket to disconnect the negative battery cable.
- 🏷️ Use painter’s tape and a marker to label hoses and connectors before unplugging them.
- 📌 A torque wrench tightens bolts to an exact tightness so parts are not cracked or stripped.
- 📌 A trim clip removal tool is a small pry tool that releases plastic wire clips without breaking them.
🔨 Step-by-Step Instructions
Follow these steps in order:
Step 1: Remove the Engine Cover
- Use both hands to pull the plastic engine cover straight upward from the rubber mounting grommets.
- Place the cover aside where it will not be stepped on.
- Pull evenly, not sideways.
Step 2: Disconnect the Negative Battery Cable
- Use a 10mm socket and 3/8-inch ratchet to loosen the negative battery terminal nut.
- Lift the negative cable off the battery post.
- Move the cable aside so it cannot touch the post while you work.
Step 3: Remove the Air Intake Duct
- Use a flat-blade screwdriver to loosen the hose clamp at the throttle body.
- Use a flat-blade screwdriver to loosen the hose clamp at the air filter housing.
- Use needle-nose pliers to release any small hose clamps attached to the intake duct.
- Lift the intake duct out of the engine bay.
Step 4: Disconnect Intake Sensors and Hoses
- Use your fingers to press the mass air flow sensor connector tab, then unplug the connector.
- Use painter’s tape and a marker to label every hose and connector before removing it.
- Use needle-nose pliers to squeeze spring clamps and slide them back from hose ends.
- Use a trim clip removal tool to release wiring harness clips from brackets.
Step 5: Remove the Throttle Body
- Use a 10mm socket, 3-inch extension, and 3/8-inch ratchet to remove the throttle body bolts.
- Move the throttle body aside without pulling hard on the wiring or coolant hoses.
- If coolant hoses must come off, use needle-nose pliers to release the hose clamps and catch small drips with clean shop towels.
- Remove and discard the old throttle body gasket.
- During installation, use a 1/4-inch torque wrench to tighten the throttle body bolts to Torque to 8.8 Nm (78 in-lbs).
Step 6: Disconnect Upper Intake Manifold Attachments
- Use painter’s tape and a marker to label all vacuum hoses, electrical connectors, and brackets on the upper intake manifold.
- Use needle-nose pliers to move spring clamps away from hose ends.
- Use a flat-blade screwdriver gently at the hose edge if a hose is stuck.
- Use a trim clip removal tool to release wiring retainers from the manifold.
Step 7: Remove the Upper Intake Manifold
- Use a 12mm socket, 6-inch extension, and 3/8-inch ratchet to remove the upper intake manifold bolts.
- Use a 10mm socket and 3/8-inch ratchet to remove any small support bracket bolts.
- Lift the upper intake manifold straight up and away from the engine.
- Immediately place clean shop towels into the open intake ports.
- Remove and discard the old upper intake manifold gaskets.
- During installation, use a 3/8-inch torque wrench to tighten the upper intake manifold bolts evenly to Torque to 19.6 Nm (14 ft-lbs).
Step 8: Locate the Ignition Coils
- Use a flashlight to locate all six ignition coils on top of the engine.
- Each ignition coil is a black electrical part held by one 10mm bolt and one connector.
- An ignition coil sends high-voltage spark to the spark plug so the cylinder can fire.
Step 9: Unplug the Ignition Coil Connectors
- Use your finger to press the lock tab on each ignition coil connector.
- Pull the connector body straight off the coil.
- If a tab is stubborn, use a flat-blade screwdriver gently on the lock tab only.
- Do not pull on the wires.
Step 10: Remove the Old Ignition Coils
- Use a 10mm socket, 3-inch extension, and 1/4-inch ratchet to remove each ignition coil retaining bolt.
- Twist each coil slightly by hand to loosen the rubber boot.
- Pull each coil straight upward out of the spark plug tube.
- Use a magnetic pickup tool if a bolt drops into a tight area.
Step 11: Install the New Ignition Coils
- Push each new ignition coil straight down into the spark plug tube until it seats fully.
- Use a 10mm socket and 1/4-inch ratchet to start each retaining bolt by hand.
- Use a 1/4-inch torque wrench to tighten each ignition coil bolt to Torque to 5.4 Nm (48 in-lbs).
- Reconnect each ignition coil connector until it clicks.
- The click means it is locked.
Step 12: Install New Intake Gaskets
- Use clean shop towels to wipe the intake gasket sealing surfaces.
- Remove all shop towels from the intake ports before installing the manifold.
- Place the new upper intake manifold gaskets into their grooves.
- Use a flashlight to confirm no bolts, rags, or debris are near the intake openings.
Step 13: Reinstall the Upper Intake Manifold
- Lower the upper intake manifold straight into place.
- Use a 12mm socket and 6-inch extension to start every manifold bolt by hand.
- Use a 3/8-inch torque wrench to tighten the manifold bolts evenly in stages to Torque to 19.6 Nm (14 ft-lbs).
- Use a 10mm socket and 3/8-inch ratchet to reinstall any support brackets.
Step 14: Reconnect Hoses, Wiring, and Brackets
- Use your painter’s tape labels to reconnect every hose and connector to its original location.
- Use needle-nose pliers to slide spring clamps back over hose ends.
- Press electrical connectors by hand until they click.
- Use the trim clip removal tool to guide wiring clips back into their holders if needed.
Step 15: Reinstall the Throttle Body
- Install the new throttle body gasket.
- Set the throttle body back onto the intake manifold.
- Use a 10mm socket and 3-inch extension to start all throttle body bolts by hand.
- Use a 1/4-inch torque wrench to tighten the throttle body bolts evenly to Torque to 8.8 Nm (78 in-lbs).
- Reconnect any throttle body hoses and connectors.
Step 16: Reinstall the Air Intake Duct
- Fit the air intake duct onto the throttle body and air filter housing.
- Use a flat-blade screwdriver to tighten both intake duct clamps snugly.
- Use needle-nose pliers to reinstall any small hose clamps.
- Reconnect the mass air flow sensor connector until it clicks.
Step 17: Reconnect the Battery
- Place the negative battery cable back onto the battery post.
- Use a 10mm socket and 3/8-inch ratchet to tighten the terminal nut snugly.
- Do not overtighten it because the battery terminal can crack.
Step 18: Reinstall the Engine Cover
- Line up the plastic engine cover with the rubber mounting grommets.
- Push the cover down by hand until it seats securely.
✅ After Repair
- ✅ Start the engine and let it idle for 2-3 minutes.
- 👂 Listen for hissing noises, which can mean a vacuum hose or intake gasket leak.
- 🔍 Check that all ignition coil connectors, sensor connectors, and hoses are fully seated.
- 🚗 Test drive your Altima gently for 10-15 minutes.
- 🧠 If idle is high or unstable after throttle body removal, an idle air volume relearn may be needed with a compatible scan tool.
- ⚠️ If the check engine light flashes, stop driving and recheck coil connectors and intake hoses.
💰 DIY vs Shop Cost
Shop Cost: $650-$1,100 (parts + labor)
DIY Cost: $180-$450 (parts only)
You Save: $470-$650 by doing it yourself!
Shop labor rates vary but typically run $100-$150/hour. This repair takes a shop approximately 2-3 hours.
🎯 Ready to get started?
HowToo makes it easy: same-day/2-day shipping on every part, plus all the tools and specialty tools you need! Check out the parts and tools sections below to add everything to your cart.