









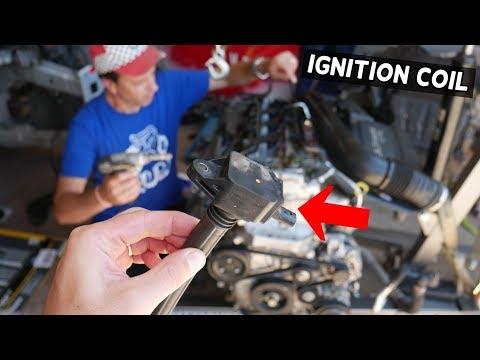







How to Replace Ignition Coils on a 2014-2022 Jeep Cherokee (Fix Misfires & Rough Idle) (Engine: Inline 4 2.4L)
Step-by-step coil-on-plug replacement with tools, parts list, safety tips, and 80 in-lb torque spec
How to Replace Ignition Coils on a 2014-2022 Jeep Cherokee (Fix Misfires & Rough Idle) (Engine: Inline 4 2.4L)
Step-by-step coil-on-plug replacement with tools, parts list, safety tips, and 80 in-lb torque spec for 2014, 2015, 2016, 2017, 2018, 2019, 2020, 2021, 2022


🔧 Cherokee - Ignition Coil Replacement
Your Cherokee uses a coil-on-plug setup (each spark plug has its own ignition coil sitting directly on top). Replacing a bad coil can fix misfires, rough idle, flashing check-engine light, and loss of power.
Difficulty Level: Beginner | Estimated Time: 0.5-1.5 hours
⚠️ Safety & Precautions
- ⚠️ Work on a cool engine to avoid burns.
- ⚠️ Keep the key fob away from the vehicle while working so the ignition can’t be turned on.
- ⚠️ Disconnecting the battery is recommended to prevent accidental shorts and surprise electrical activity.
- ⚠️ Do not pull on wires—only press the connector lock and pull the plug body.
🔧 Required Tools
You'll need the following tools for this repair:
- 10mm socket
- 1/4-inch drive ratchet
- 6-inch socket extension
- Torque wrench 20-200 in-lb
- Flathead screwdriver
- Trim clip removal tool
- Needle-nose pliers
- Shop flashlight
- Nitrile gloves
- Safety glasses
🔩 Required Parts
HowToo sells all the parts you need for this repair:
- Ignition coil - Qty: 1 or replace all four
- Dielectric grease - Qty: 1
📋 Before You Begin
- Park on level ground, shift to Park, and set the parking brake.
- Open the hood and let the engine fully cool.
- Disconnect the battery negative cable using a 10mm socket. Move the cable aside so it can’t spring back.
- Take a quick photo before unplugging anything.
🔨 Step-by-Step Instructions
Follow these steps in order:
Assumption: This is the 2.4L engine with individual coils on top of the valve cover.
Step 1: Remove the engine cover (if equipped)
- Grip the cover firmly and pull upward to release the rubber grommets from their mounting pegs.
- If a clip or fastener is present on your cover, remove it with a trim clip removal tool before lifting.
- Set the cover aside where it won’t get stepped on.
Step 2: Make room at the top of the engine (air duct if needed)
- If the air intake duct blocks access, loosen the hose clamp(s) with a flathead screwdriver.
- Disconnect any small breather hose(s) using needle-nose pliers to slide the clamp back, then twist/pull the hose off.
- Lift the duct out and set it aside.
Step 3: Unplug the ignition coil electrical connector
- Locate the coil you’re replacing on top of the engine (one per cylinder).
- Press the connector lock tab and pull the connector straight back off the coil.
- If it’s stuck, gently help it with a flathead screwdriver (light pressure only).
Step 4: Remove the ignition coil retaining bolt
- Remove the coil bolt using a 10mm socket, 6-inch socket extension, and 1/4-inch drive ratchet.
- Put the bolt somewhere safe so it doesn’t fall into the engine bay.
Step 5: Pull the ignition coil out
- Twist the coil slightly left and right to break it loose.
- Pull straight upward to remove it from the spark plug tube.
- Inspect the coil boot (the rubber tube). If you see oil inside the tube, the valve cover seal may be leaking and can cause repeat misfires.
Step 6: Install the new ignition coil
- Apply a tiny smear of dielectric grease inside the end of the coil boot (this is an insulating grease that helps prevent moisture and makes future removal easier).
- Slide the coil straight down onto the spark plug until it seats fully.
- Reinstall the bolt by hand first (prevents cross-threading), then tighten with a 10mm socket.
- Torque to 9 Nm (80 in-lb) using a torque wrench 20-200 in-lb.
Step 7: Reconnect the coil connector
- Push the electrical connector on until you feel/hear it click.
- Light tug test: it shouldn’t pull off.
Step 8: Reassemble what you removed
- Reinstall the air intake duct (if removed) and tighten clamps with a flathead screwdriver.
- Reinstall the engine cover by lining up the grommets and pressing down firmly.
Step 9: Reconnect the battery
- Reconnect the negative cable and tighten with a 10mm socket.
✅ After Repair
- Start the engine and let it idle for 1-2 minutes. It should run smooth with no shaking.
- If the check-engine light was flashing before, it should stop flashing immediately after the misfire is fixed.
- If you have a code reader, clear stored misfire codes and recheck after a short drive.
- Test drive 10-15 minutes and confirm no hesitation under acceleration.
💰 DIY vs Shop Cost
Shop Cost: $180-$450 (parts + labor)
DIY Cost: $40-$320 (parts only, depends on 1 coil vs all 4)
You Save: $100-$200+ by doing it yourself!
Shop labor rates vary but typically run $100-$150/hour. This repair takes a shop approximately 0.7-1.2 hours.
🎯 Ready to get started?
HowToo makes it easy: same-day/2-day shipping on every part, plus all the tools and specialty tools you need! Check out the parts and tools sections below to add everything to your cart.
Guide for Ignition Coil replace for these Jeep vehicles
| Year Make Model | Sub Model | Engine | Body Style |
|---|---|---|---|
| 2022 Jeep Cherokee | - | Inline 4 2.4L | - |
| 2021 Jeep Cherokee | - | Inline 4 2.4L | - |
| 2020 Jeep Cherokee | - | Inline 4 2.4L | - |
| 2019 Jeep Cherokee | - | Inline 4 2.4L | - |
| 2018 Jeep Cherokee | - | Inline 4 2.4L | - |
| 2017 Jeep Cherokee | - | Inline 4 2.4L | - |
| 2016 Jeep Cherokee | - | Inline 4 2.4L | - |
| 2015 Jeep Cherokee | - | Inline 4 2.4L | - |
| 2014 Jeep Cherokee | - | Inline 4 2.4L | - |