















How to Replace Ignition Coils on a 2014-2019 GMC Sierra 1500 (Trim: Base | Engine: V6 4.3L)
Step-by-step instructions, tools, parts, torque specs, and safety tips for DIY repair
How to Replace Ignition Coils on a 2014-2019 GMC Sierra 1500 (Trim: Base | Engine: V6 4.3L)
Step-by-step instructions, tools, parts, torque specs, and safety tips for DIY repair for 2014, 2015, 2016, 2017, 2018, 2019


🔧 Ignition Coils - Replacement
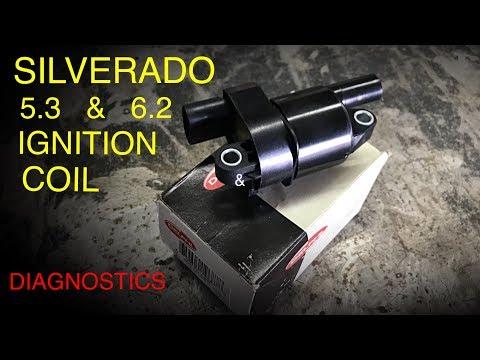
The ignition coils on your Sierra send high-voltage spark to each cylinder. If one fails, you may get a rough idle, misfire, poor fuel economy, or a check engine light. Replacing the failed coil is usually straightforward, but the intake tube and engine cover may need to come off first.
Difficulty Level: Beginner | Estimated Time: 1-2 hours
⚠️ Safety & Precautions
- Work with the engine fully cool before touching coils or plug boots.
- Ignition systems can deliver a painful shock. Do not pull on coil wires while the engine is running.
- Disconnect the negative battery cable before starting to reduce the chance of accidental shorts.
- Keep dirt out of the spark plug wells. Debris can damage the plugs or cause misfires.
- If your Sierra has active trouble codes, clear them after the repair and verify the misfire is gone.
🔧 Required Tools
You'll need the following tools for this repair:
- 10mm socket
- 1/4-inch ratchet
- 1/4-inch extension
- Flat blade trim tool
- Torque wrench
- Dielectric grease
- Safety glasses
- Mechanic gloves
- Battery terminal wrench
🔩 Required Parts
HowToo sells all the parts you need for this repair:
- Ignition coil - Qty: 1 per failed cylinder
- Ignition coil bolt - Qty: 1 per coil if damaged or corroded
- Spark plug - Qty: 1 per cylinder if you are servicing plugs at the same time
- Dielectric grease - Qty: 1 tube
📋 Before You Begin
- Park on level ground and set the parking brake.
- Let the engine cool completely.
- Disconnect the negative battery cable before touching ignition components.
- If you are replacing one coil, it is smart to inspect the other coils for cracks, oil contamination, or loose boots.
🔨 Step-by-Step Instructions
Follow these steps in order:
Step 1: Disconnect battery power
- Use a 10mm socket or battery terminal wrench to loosen the negative battery terminal.
- Remove the negative cable and set it aside so it cannot spring back and touch the post.
- Keep the cable isolated.
Step 2: Remove intake ducting if needed
- If the coil is hard to reach, use a flat blade trim tool to release any clamps or retainers on the intake tube.
- Remove the intake duct to open up access to the rear coils.
Step 3: Locate the failed coil
- Find the coil on the cylinder you are replacing.
- Each coil sits directly over its spark plug on the valve cover area.
- Inspect the coil and surrounding area for oil, cracks, or burnt connectors.
Step 4: Unplug the coil
- Press the connector lock tab and pull the electrical connector off the coil.
- If the connector is stuck, gently wiggle it while pressing the release tab.
- Do not pull on the wires.
Step 5: Remove the coil
- Use a 10mm socket, 1/4-inch ratchet, and 1/4-inch extension to remove the coil hold-down bolt.
- Pull the coil straight up to remove it from the spark plug well.
- If it sticks, twist it slightly by hand while lifting.
Step 6: Install the new coil
- Apply a small amount of dielectric grease inside the rubber boot of the new coil.
- Push the new coil straight down onto the spark plug until it seats fully.
- Install the coil bolt by hand first, then tighten it with a 10mm socket.
- Torque to 8 Nm (71 in-lbs).
Step 7: Reconnect the electrical connector
- Push the connector on until the lock clicks into place.
- Check that the connector is fully seated and not loose.
Step 8: Reinstall intake parts and battery
- Reinstall any intake ducting or covers you removed.
- Reconnect the negative battery cable and tighten it with a 10mm socket or battery terminal wrench.
Step 9: Start and verify the repair
- Start the engine and let it idle.
- Listen for smooth operation and watch for a check engine light.
- If you have a scan tool, clear codes and confirm the misfire counter stays at zero.
✅ After Repair
- Road test the Sierra and confirm the engine pulls smoothly under light acceleration.
- Recheck the coil connector and hold-down bolt after the test drive.
- If the misfire returns, the spark plug, wiring, or fuel injector may also need inspection.
💰 DIY vs Shop Cost
Shop Cost: $180-$600 (parts + labor)
DIY Cost: $40-$220 (parts only)
You Save: $140-$380 by doing it yourself!
Shop labor rates vary but typically run $100-$150/hour. This repair takes a shop approximately 0.8-1.5 hours.
🎯 Ready to get started?
HowToo makes it easy: same-day/2-day shipping on every part, plus all the tools and specialty tools you need! Check out the parts and tools sections below to add everything to your cart.
Guide for Ignition Coil replace for these GMC vehicles
| Year Make Model | Sub Model | Engine | Body Style |
|---|---|---|---|
| 2019 GMC Sierra 1500 | Base | V6 4.3L | - |
| 2019 GMC Sierra 1500 | Base | V8 5.3L | - |
| 2019 GMC Sierra 1500 | Denali | V8 5.3L | - |
| 2019 GMC Sierra 1500 | Denali | V8 6.2L | - |
| 2019 GMC Sierra 1500 | SLE | V8 5.3L | - |
| 2019 GMC Sierra 1500 | SLT | V8 5.3L | - |
| 2019 GMC Sierra 1500 | SLT | V8 6.2L | - |
| 2019 GMC Sierra 1500 | AT4 | V8 5.3L | - |
| 2019 GMC Sierra 1500 | AT4 | V8 6.2L | - |
| 2019 GMC Sierra 1500 | Elevation | V8 5.3L | - |
| 2018 GMC Sierra 1500 | Base | V6 4.3L | - |
| 2018 GMC Sierra 1500 | Base | V8 5.3L | - |
| 2018 GMC Sierra 1500 | Denali | V8 5.3L | - |
| 2018 GMC Sierra 1500 | Denali | V8 6.2L | - |
| 2018 GMC Sierra 1500 | SLE | V6 4.3L | - |
| 2018 GMC Sierra 1500 | SLE | V8 5.3L | - |
| 2018 GMC Sierra 1500 | SLT | V8 5.3L | - |
| 2018 GMC Sierra 1500 | SLT | V8 6.2L | - |
| 2017 GMC Sierra 1500 | Base | V6 4.3L | - |
| 2017 GMC Sierra 1500 | Base | V8 5.3L | - |
| 2017 GMC Sierra 1500 | Denali | V8 5.3L | - |
| 2017 GMC Sierra 1500 | Denali | V8 6.2L | - |
| 2017 GMC Sierra 1500 | SLE | V6 4.3L | - |
| 2017 GMC Sierra 1500 | SLE | V8 5.3L | - |
| 2017 GMC Sierra 1500 | SLT | V8 5.3L | - |
| 2017 GMC Sierra 1500 | SLT | V8 6.2L | - |
| 2016 GMC Sierra 1500 | Base | V6 4.3L | - |
| 2016 GMC Sierra 1500 | Base | V8 5.3L | - |
| 2016 GMC Sierra 1500 | Denali | V8 5.3L | - |
| 2016 GMC Sierra 1500 | Denali | V8 6.2L | - |
| 2016 GMC Sierra 1500 | SLE | V6 4.3L | - |
| 2016 GMC Sierra 1500 | SLE | V8 5.3L | - |
| 2016 GMC Sierra 1500 | SLT | V8 5.3L | - |
| 2016 GMC Sierra 1500 | SLT | V8 6.2L | - |
| 2015 GMC Sierra 1500 | Base | V6 4.3L | - |
| 2015 GMC Sierra 1500 | Base | V8 5.3L | - |
| 2015 GMC Sierra 1500 | Denali | V8 5.3L | - |
| 2015 GMC Sierra 1500 | Denali | V8 6.2L | - |
| 2015 GMC Sierra 1500 | SLE | V6 4.3L | - |
| 2015 GMC Sierra 1500 | SLE | V8 5.3L | - |
| 2015 GMC Sierra 1500 | SLT | V8 5.3L | - |
| 2015 GMC Sierra 1500 | SLT | V8 6.2L | - |
| 2014 GMC Sierra 1500 | Base | V6 4.3L | - |
| 2014 GMC Sierra 1500 | Base | V8 5.3L | - |
| 2014 GMC Sierra 1500 | Denali | V8 5.3L | - |
| 2014 GMC Sierra 1500 | Denali | V8 6.2L | - |
| 2014 GMC Sierra 1500 | SLE | V6 4.3L | - |
| 2014 GMC Sierra 1500 | SLE | V8 5.3L | - |
| 2014 GMC Sierra 1500 | SLT | V8 5.3L | - |
| 2014 GMC Sierra 1500 | SLT | V8 6.2L | - |