









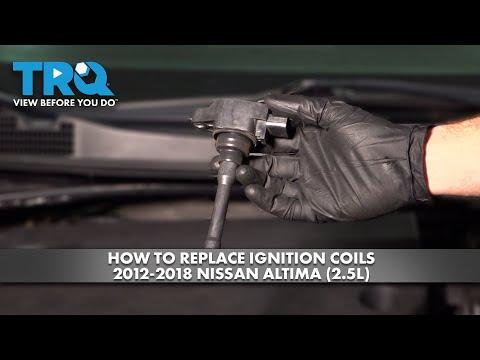





How to Replace Ignition Coils on a 2013 Nissan Altima V6
Step-by-step DIY guide with tools, parts, torque specs, intake removal, and safety tips for 2007, 2008, 2009, 2010, 2011, 2012, 2013, 2014, 2015, 2016, 2017, 2018
How to Replace Ignition Coils on a 2013 Nissan Altima V6
Step-by-step DIY guide with tools, parts, torque specs, intake removal, and safety tips for 2007, 2008, 2009, 2010, 2011, 2012, 2013, 2014, 2015, 2016, 2017, 2018


🔧 Altima - Ignition Coil Replacement
Replacing the ignition coils on your Altima fixes misfires caused by weak or failed coils. The V6 engine has six coils total: three are easy to access on the front bank, and three sit under the upper intake manifold on the rear bank.
Difficulty Level: Intermediate | Estimated Time: 2-4 hours
⚠️ Safety & Precautions
- ⚠️ Work only on a cool engine. The intake manifold and cylinder heads can burn you if the engine was recently running.
- ⚠️ Disconnect the negative battery cable before starting to avoid electrical shorts.
- ⚠️ Keep dirt, bolts, and tools out of the intake ports when the intake manifold is removed.
- ⚠️ Do not pull on ignition coil wires. Press the connector tab and pull the connector body instead.
- ⚠️ If replacing only one failed coil, match the cylinder location from the diagnostic trouble code before removing parts.
🔧 Required Tools
You'll need the following tools for this repair:
- 10mm socket
- 12mm socket
- 14mm socket
- 3/8-inch ratchet
- 3/8-inch extension set
- Inch-pound torque wrench
- Foot-pound torque wrench
- Flat-blade screwdriver
- Needle-nose pliers
- Plastic trim tool
- Pick tool
- Shop vacuum
- Clean shop towels
- Masking tape
- Permanent marker
- Nitrile gloves
- Safety glasses
🔩 Required Parts
HowToo sells all the parts you need for this repair:
- Ignition coil - Qty: 1-6
- Upper intake manifold gasket set - Qty: 1
- Throttle body gasket - Qty: 1
📋 Before You Begin
- Park your Altima on level ground and set the parking brake.
- Let the engine cool completely before touching intake or ignition parts.
- Open the hood and use a 10mm socket to disconnect the negative battery cable.
- Label hoses and connectors with masking tape and a permanent marker. This helps first-time DIYers avoid mix-ups.
- A torque wrench is a tool that tightens bolts to an exact tightness so parts seal correctly without cracking.
- The intake manifold is the large air chamber on top of the engine that feeds air into the cylinders.
🔨 Step-by-Step Instructions
Follow these steps in order:
Step 1: Remove the Engine Cover
- Use a 10mm socket to remove the engine cover fasteners, if equipped.
- Lift the cover straight up and set it aside.
- Keep bolts in a cup.
Step 2: Disconnect the Battery
- Use a 10mm socket to loosen the negative battery terminal nut.
- Move the cable away from the battery post so it cannot spring back.
Step 3: Remove the Air Intake Duct
- Use a flat-blade screwdriver to loosen the hose clamp at the throttle body.
- Use a flat-blade screwdriver to loosen the hose clamp at the air cleaner box.
- Use needle-nose pliers to release any small hose clamps attached to the intake duct.
- Pull the air intake duct off and place it aside.
Step 4: Access the Front Ignition Coils
- The front three ignition coils are visible at the front side of the engine.
- Use a plastic trim tool or your thumb to press each coil connector release tab.
- Unplug the connector by pulling the connector body, not the wires.
- Use a 10mm socket to remove each front ignition coil retaining bolt.
- Twist each coil gently by hand, then pull it straight up.
Step 5: Install Front Ignition Coils
- Push each new ignition coil straight into the spark plug tube until it seats fully.
- Use a 10mm socket to install the coil retaining bolt.
- Use an inch-pound torque wrench to tighten each coil bolt to Torque to 5.4 Nm (48 in-lbs).
- Reconnect each ignition coil electrical connector until it clicks.
- A click means it locked.
Step 6: Remove Throttle Body Electrical Connector
- If replacing the rear coils, use a plastic trim tool or your thumb to unlock the throttle body connector.
- Pull the connector straight off by the connector body.
- Do not force the connector. Use a pick tool gently if the locking tab is stuck.
Step 7: Disconnect Hoses and Brackets from the Upper Intake Manifold
- Use masking tape and a permanent marker to label every hose before removal.
- Use needle-nose pliers to release spring clamps on vacuum and breather hoses.
- Use a 10mm socket and 12mm socket to remove brackets attached to the upper intake manifold.
- Move hoses and harnesses aside carefully without stretching them.
Step 8: Remove the Upper Intake Manifold
- Use a 12mm socket, 3/8-inch ratchet, and 3/8-inch extension set to remove the upper intake manifold bolts and nuts.
- Lift the upper intake manifold upward evenly.
- If it sticks, gently work it loose by hand. Do not pry against sealing surfaces with metal tools.
- Remove the old upper intake manifold gasket set.
Step 9: Cover the Intake Ports
- Use a shop vacuum to clean loose dirt from around the intake openings.
- Place clean shop towels into the intake ports so nothing can fall inside.
- Count towels before and after.
Step 10: Remove the Rear Ignition Coils
- Use a plastic trim tool or your thumb to press the connector release tab on each rear ignition coil.
- Unplug each connector by pulling the connector body.
- Use a 10mm socket to remove each rear ignition coil retaining bolt.
- Twist each coil gently by hand, then pull it straight up from the spark plug tube.
Step 11: Install Rear Ignition Coils
- Push each new ignition coil straight down until fully seated.
- Use a 10mm socket to install each coil retaining bolt.
- Use an inch-pound torque wrench to tighten each coil bolt to Torque to 5.4 Nm (48 in-lbs).
- Reconnect each coil connector until it clicks.
Step 12: Reinstall the Upper Intake Manifold
- Remove all clean shop towels from the intake ports. Count them to make sure none are left inside.
- Install the new upper intake manifold gasket set onto the lower intake.
- Set the upper intake manifold carefully into place.
- Use a 12mm socket to start all bolts and nuts by hand first.
- Use an inch-pound torque wrench to tighten the upper intake manifold fasteners in a crisscross pattern to Torque to 18 Nm (13 ft-lbs).
Step 13: Reinstall Throttle Body and Hoses
- If the throttle body was removed, install a new throttle body gasket.
- Use a 10mm socket to install the throttle body bolts.
- Use an inch-pound torque wrench to tighten the throttle body bolts to Torque to 8.4 Nm (74 in-lbs).
- Use needle-nose pliers to reinstall hose clamps on all vacuum and breather hoses.
- Use a 10mm socket and 12mm socket to reinstall any brackets removed earlier.
Step 14: Reinstall the Air Intake Duct
- Slide the intake duct back onto the throttle body and air cleaner box.
- Use a flat-blade screwdriver to tighten both hose clamps snugly.
- Reconnect any small hoses removed from the duct using needle-nose pliers.
Step 15: Reconnect the Battery and Reinstall the Cover
- Use a 10mm socket to reconnect the negative battery cable.
- Use a 10mm socket to reinstall the engine cover fasteners.
- Use a foot-pound torque wrench only if your battery terminal clamp needs final tightening; tighten snugly, not excessively.
✅ After Repair
- ✅ Turn the key on for 5 seconds before starting. This lets the throttle body initialize.
- ✅ Start the engine and let it idle. It may idle rough for a few seconds while the computer relearns airflow.
- ✅ Listen for hissing sounds around the intake manifold. A hiss can mean a vacuum leak.
- ✅ Check that every ignition coil connector, vacuum hose, and intake duct clamp is fully seated.
- ✅ If the check engine light was on, clear codes with a scan tool after confirming the engine runs smoothly.
- ✅ Test drive gently for 10-15 minutes and confirm the misfire is gone.
💰 DIY vs Shop Cost
Shop Cost: $450-$1,100 (parts + labor)
DIY Cost: $80-$480 (parts only)
You Save: $370-$620 by doing it yourself!
Shop labor rates vary but typically run $100-$150/hour. This repair takes a shop approximately 2-3 hours.
🎯 Ready to get started?
HowToo makes it easy: same-day/2-day shipping on every part, plus all the tools and specialty tools you need! Check out the parts and tools sections below to add everything to your cart.