









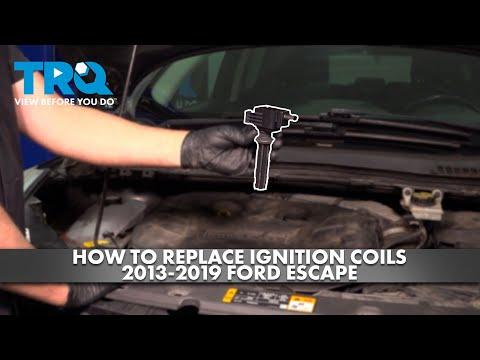






How to Replace Ignition Coils on a 2013-2016 Ford Escape (Fix Misfire & Rough Idle) (Trim: SE | Engine: Inline 4 2.0L)
Step-by-step coil swap with required tools/parts, safety tips, and the 62 in-lb (7 Nm) torque spec
How to Replace Ignition Coils on a 2013-2016 Ford Escape (Fix Misfire & Rough Idle) (Trim: SE | Engine: Inline 4 2.0L)
Step-by-step coil swap with required tools/parts, safety tips, and the 62 in-lb (7 Nm) torque spec for 2013, 2014, 2015, 2016


🔧 Escape - Ignition Coil Replacement
The ignition coils sit on top of the spark plugs and create the high-voltage spark your engine needs to run smoothly. Replacing a weak coil can fix misfires, rough idle, flashing check engine light, and loss of power.
Difficulty Level: Beginner | Estimated Time: 0.5-1.5 hours
⚠️ Safety & Precautions
- ⚠️ Work on a cool engine; the turbo/engine can burn you.
- ⚠️ Keep dirt out of the spark plug holes—debris can damage the engine.
- ⚠️ Disconnect the negative battery cable if you’ll be unplugging multiple connectors at once.
- ⚠️ If the check engine light is flashing, avoid driving until repaired (active misfire can damage the catalytic converter).
🔧 Required Tools
You'll need the following tools for this repair:
- 10mm socket
- 1/4" drive ratchet
- 6" 1/4" drive extension
- Inch-pound torque wrench (20-200 in-lb range)
- Foot-pound torque wrench (10-80 ft-lb range)
- Flat trim tool
- Needle-nose pliers
- Compressed air nozzle
- Shop vacuum
- Clean shop rags
- Nitrile gloves
- Safety glasses
🔩 Required Parts
HowToo sells all the parts you need for this repair:
- Ignition coil - Qty: 1 (or Qty: 4 if replacing all)
- Dielectric grease - Qty: 1
- Spark plug set - Qty: 1 Recommended if plugs are due
📋 Before You Begin
- Park on level ground, shift to Park, and set the parking brake.
- Let the engine cool fully (at least 30 minutes).
- If you’re replacing more than one coil: use a 10mm socket to disconnect the negative battery terminal and move it aside so it can’t spring back.
- Tip: Replace coils one-by-one to avoid mix-ups.
🔨 Step-by-Step Instructions
Follow these steps in order:
Step 1: Remove the engine cover (if equipped)
- Pull up on the engine cover to release the rubber grommets (use a flat trim tool if it’s tight).
- Set the cover aside.
Step 2: Locate the ignition coils
- The coils are mounted on top of the valve cover in a row (one per cylinder) with an electrical connector on each.
Step 3: Clean around the coil(s)
- Use a shop vacuum to remove loose dirt around the coils.
- Use compressed air nozzle to blow debris away from the base of the coil so nothing falls into the spark plug hole.
- Safety glasses on for compressed air.
Step 4: Unplug the coil electrical connector
- Press the connector lock tab and pull the connector straight off.
- If the tab is stubborn, gently assist with a flat trim tool (don’t pry hard—plastic breaks easily).
Step 5: Remove the coil retaining bolt
- Use a 10mm socket, 1/4" drive ratchet, and 6" extension to remove the bolt holding the coil down.
- Put the bolt somewhere safe (it’s easy to drop).
Step 6: Remove the ignition coil
- Twist the coil gently left-right to break the seal, then pull straight up.
- If it’s stuck, use steady force—don’t yank the wiring.
Step 7: Prep and install the new coil
- Put a small dab of dielectric grease inside the new coil boot (the rubber tube). Dielectric grease is a non-conductive grease that helps seal out moisture and makes future removal easier.
- Push the coil straight down onto the spark plug until it seats fully.
Step 8: Reinstall the coil bolt and torque it
- Start the bolt by hand to avoid cross-threading, then snug it with a 10mm socket.
- Use an inch-pound torque wrench: Torque to 62 in-lb (7 Nm).
Step 9: Reconnect the electrical connector
- Push the connector on until it clicks.
- Give it a gentle tug to confirm it’s locked.
Step 10: Repeat for any other coils
- If you’re replacing multiple coils, repeat Steps 3-9 one coil at a time.
- Tip: Keep parts in cylinder order.
Step 11: Reinstall the engine cover
- Align the cover with its mounting points and press down firmly until it snaps into place.
✅ After Repair
- If disconnected, reconnect the negative battery cable using a 10mm socket and tighten snugly.
- Start the engine and let it idle for 1-2 minutes. It should run smooth with no shaking.
- If you have a scan tool, clear misfire codes and confirm none return after a short drive.
- Road test 10-15 minutes, then recheck that the engine cover is secure and no connectors look loose.
💰 DIY vs Shop Cost
Shop Cost: $180-$450 (parts + labor)
DIY Cost: $45-$280 (parts only, depending on 1 coil vs all 4)
You Save: $100-$250 by doing it yourself!
Shop labor rates vary but typically run $100-$150/hour. This repair takes a shop approximately 0.5-1.0 hours.
🎯 Ready to get started?
HowToo makes it easy: same-day/2-day shipping on every part, plus all the tools and specialty tools you need! Check out the parts and tools sections below to add everything to your cart.
Guide for Dielectric Grease replace for these Ford vehicles
| Year Make Model | Sub Model | Engine | Body Style |
|---|---|---|---|
| 2016 Ford Escape | SE | Inline 4 1.6L | - |
| 2016 Ford Escape | Titanium | Inline 4 1.6L | - |
| 2015 Ford Escape | SE | Inline 4 1.6L | - |
| 2015 Ford Escape | Titanium | Inline 4 1.6L | - |
| 2014 Ford Escape | SE | Inline 4 1.6L | - |
| 2014 Ford Escape | Titanium | Inline 4 1.6L | - |
| 2013 Ford Escape | SE | Inline 4 1.6L | - |
| 2013 Ford Escape | SEL | Inline 4 1.6L | - |