









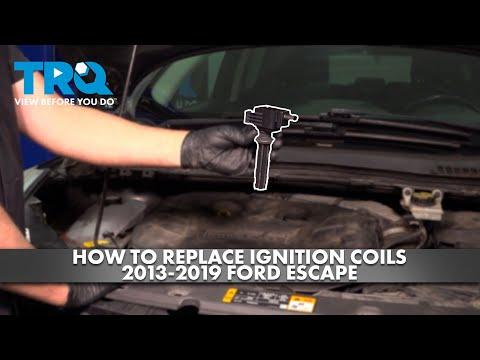






How to Replace Ignition Coils on a 2013-2016 Ford Escape (Engine: Inline 4 2.0L)
Step-by-step DIY guide with required tools, parts, torque specs, and safety tips
How to Replace Ignition Coils on a 2013-2016 Ford Escape (Engine: Inline 4 2.0L)
Step-by-step DIY guide with required tools, parts, torque specs, and safety tips for 2013, 2014, 2015, 2016


🔧 Escape - Ignition Coil Replacement
The ignition coils sit on top of the spark plugs and create the high voltage needed to fire each plug. Replacing them on your Escape is a straightforward repair: remove the engine cover, unplug each coil, unbolt it, and install the new coils in the same positions.
Difficulty Level: Beginner | Estimated Time: 30-60 minutes
⚠️ Safety & Precautions
- ⚠️ Let the engine cool completely before starting. The turbocharged 1.6L engine gets very hot.
- ⚠️ Disconnect the negative battery cable before unplugging ignition coils to avoid electrical shorts.
- ⚠️ Do not pull on wiring. Always release the connector lock and pull from the connector body.
- ⚠️ Keep dirt and debris out of the spark plug wells. A spark plug well is the tube-shaped opening where the coil sits over the spark plug.
🔧 Required Tools
You'll need the following tools for this repair:
- 8mm socket
- 10mm socket
- 1/4-inch ratchet
- 1/4-inch extension 6-inch
- Torque wrench inch-pound 1/4-inch drive
- Flathead screwdriver small
- Plastic trim removal tool
- Compressed air duster
- Nitrile gloves
- Safety glasses
🔩 Required Parts
HowToo sells all the parts you need for this repair:
- Ignition coils - Qty: 4
- Dielectric grease packet - Qty: 1
📋 Before You Begin
- Park your Escape on level ground and shift to Park.
- Set the parking brake.
- Open the hood and let the engine cool fully.
- Wear safety glasses and gloves.
- Disconnect the negative battery cable using a 10mm socket. The negative cable is usually marked with a minus symbol.
- If replacing only one coil due to a misfire code, match the cylinder number carefully. On this engine, cylinder 1 is at the passenger side of the engine, then 2, 3, and 4 moving toward the driver side.
🔨 Step-by-Step Instructions
Follow these steps in order:
Step 1: Remove the Engine Cover
- Use both hands to lift the plastic engine cover upward from the rubber mounting points.
- If it feels stuck, use a plastic trim removal tool to gently help lift one corner at a time.
- Set the cover aside where it will not get stepped on.
- Tip: Pull straight up, not sideways.
Step 2: Clean Around the Ignition Coils
- Put on safety glasses.
- Use a compressed air duster to blow dirt away from the top of each ignition coil.
- This helps keep debris from falling into the spark plug wells when the coils are removed.
Step 3: Disconnect the Coil Electrical Connectors
- Look at the electrical plug on each coil.
- Use a small flathead screwdriver only if needed to gently lift the connector lock tab.
- Press the release tab and pull the connector straight back by the plastic connector body.
- Repeat this for all 4 coils.
- Tip: Never pull on the wires.
Step 4: Remove the Ignition Coil Bolts
- Use an 8mm socket, 1/4-inch ratchet, and 1/4-inch extension 6-inch to remove the retaining bolt from each ignition coil.
- Place the bolts in a small tray or cup so they do not get lost.
Step 5: Remove the Old Ignition Coils
- Grip one ignition coil firmly by the top.
- Twist it slightly left and right to loosen the rubber boot.
- Pull the coil straight upward out of the spark plug well.
- Repeat for all 4 coils.
- If a rubber boot separates from the coil and stays in the well, remove it carefully before installing the new coil.
Step 6: Prepare the New Ignition Coils
- Compare each new ignition coil with the old one to make sure the shape and connector match.
- Apply a very small amount of dielectric grease inside the end of each coil boot. Dielectric grease is an electrical-safe grease that helps prevent moisture and makes future removal easier.
- Do not fill the boot with grease. A light film is enough.
Step 7: Install the New Ignition Coils
- Push each new ignition coil straight down into its spark plug well.
- You should feel the rubber boot seat onto the spark plug.
- Make sure each coil mounting hole lines up with the bolt hole.
Step 8: Reinstall the Coil Bolts
- Start each bolt by hand first to avoid cross-threading. Cross-threading means the bolt is going in crooked and can damage the threads.
- Use an 8mm socket, 1/4-inch ratchet, and 1/4-inch extension 6-inch to snug each bolt.
- Use a torque wrench inch-pound 1/4-inch drive to tighten each ignition coil bolt to Torque to 8 Nm (71 in-lbs).
- Tip: Small bolts strip easily.
Step 9: Reconnect the Electrical Connectors
- Push each connector onto its ignition coil until it clicks.
- Lightly tug the connector body to confirm it is locked in place.
Step 10: Reinstall the Engine Cover
- Line up the engine cover with the rubber mounting points.
- Press down firmly by hand until the cover seats fully.
Step 11: Reconnect the Battery
- Reconnect the negative battery cable.
- Use a 10mm socket to tighten the terminal nut snugly.
- Do not overtighten the terminal.
✅ After Repair
- Start your Escape and let it idle for 1-2 minutes.
- The idle should be smooth with no shaking or flashing check engine light.
- If the check engine light was on before the repair, it may need several drive cycles to turn off if the fault is fixed.
- If you have a scan tool, clear stored misfire codes after installation.
- Road test gently for 10-15 minutes and confirm there is no hesitation, misfire, or rough idle.
- If a misfire remains on the same cylinder after replacing the coil, the spark plug, wiring, fuel injector, or compression may need diagnosis.
💰 DIY vs Shop Cost
Shop Cost: $250-$550 (parts + labor)
DIY Cost: $90-$260 (parts only)
You Save: $160-$290 by doing it yourself!
Shop labor rates vary but typically run $100-$150/hour. This repair takes a shop approximately 0.5-1.0 hours.
🎯 Ready to get started?
HowToo makes it easy: same-day/2-day shipping on every part, plus all the tools and specialty tools you need! Check out the parts and tools sections below to add everything to your cart.
Guide for Ignition Coil replace for these Ford vehicles
| Year Make Model | Sub Model | Engine | Body Style |
|---|---|---|---|
| 2016 Ford Escape | - | Inline 4 1.6L | - |
| 2015 Ford Escape | - | Inline 4 1.6L | - |
| 2014 Ford Escape | - | Inline 4 1.6L | - |
| 2013 Ford Escape | - | Inline 4 1.6L | - |