









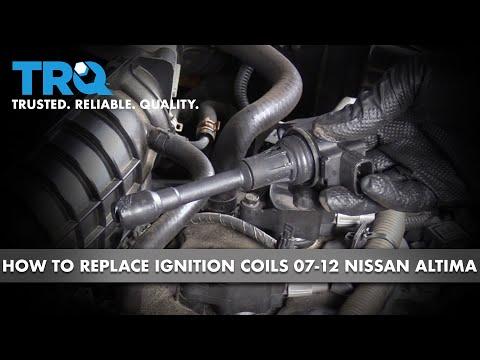







How to Replace Ignition Coils on a 2007 Nissan Altima (Fix Misfire & Rough Idle)
Step-by-step coil swap with required tools/parts, safety tips, and coil bolt torque spec (77 in-lbs) for 2007, 2008, 2009, 2010, 2011, 2012, 2013, 2014, 2015, 2016, 2017, 2018
How to Replace Ignition Coils on a 2007 Nissan Altima (Fix Misfire & Rough Idle)
Step-by-step coil swap with required tools/parts, safety tips, and coil bolt torque spec (77 in-lbs) for 2007, 2008, 2009, 2010, 2011, 2012, 2013, 2014, 2015, 2016, 2017, 2018


🔧 Altima - Ignition Coil Replacement
Your Altima uses one ignition coil per cylinder (4 total). Replacing a bad coil restores a strong spark so the engine runs smooth and stops misfiring.
Difficulty Level: Beginner | Estimated Time: 0.5-1.5 hours
⚠️ Safety & Precautions
- 🛑 Let the engine cool completely before starting.
- 🛑 Disconnect the negative battery terminal to prevent accidental shorts.
- 🛑 Don’t pull on wires—only unplug connectors by the plastic body.
- 🛑 Keep dirt out of the spark plug tubes (the deep holes under the coils).
🔧 Required Tools
You'll need the following tools for this repair:
- 10mm socket
- 1/4" drive ratchet
- 6" socket extension
- Torque wrench (inch-pound)
- Flat-blade screwdriver
- Needle-nose pliers
- Shop towels
- Flashlight
- Nitrile gloves
- Safety glasses
🔩 Required Parts
HowToo sells all the parts you need for this repair:
- Ignition coil - Qty: 1-4
- Dielectric grease - Qty: 1
📋 Before You Begin
- Park on level ground, set the parking brake, and open the hood.
- Use a 10mm socket to disconnect the negative battery terminal and tuck it aside so it can’t spring back.
- If there’s dust/debris on the valve cover area, wipe it with shop towels first.
🔨 Step-by-Step Instructions
Follow these steps in order:
Step 1: Make room to access the coils
- Locate the ignition coils on top of the valve cover (4 identical units in a row).
- If the air intake tube blocks your hands, loosen the hose clamps with a flat-blade screwdriver and move the tube slightly out of the way.
- Take a quick photo of the layout.
Step 2: Unplug the coil electrical connector
- At the first coil, press the connector lock tab and pull the connector straight back.
- If it’s stubborn, gently help the tab with a flat-blade screwdriver (don’t pry hard).
- If the tab breaks, the connector may not stay tight.
Step 3: Remove the coil hold-down bolt
- Use a 10mm socket, ratchet, and extension to remove the coil hold-down bolt.
- Set the bolt somewhere safe (a magnetic tray is handy if you have one).
Step 4: Pull the coil out
- Twist the coil gently left-right to break the seal, then pull straight up to remove it.
- Look down the spark plug tube with a flashlight. It should be dry and clean.
- If you see oil in the tube, stop and don’t install the new coil yet—oil usually means a valve cover/tube seal leak that can ruin coils.
Step 5: Install the new coil
- Put a very small amount of dielectric grease inside the rubber boot of the new coil. (Dielectric grease is a non-conductive grease that helps prevent moisture/corrosion.)
- Slide the coil straight down into the tube until it fully seats on the spark plug.
Step 6: Reinstall the bolt and torque it
- Start the bolt by hand first (prevents cross-threading), then snug it with a 10mm socket.
- Use an inch-pound torque wrench and Torque to 8.7 Nm (77 in-lbs).
Step 7: Plug the connector back in
- Push the electrical connector on until it clicks/locks.
- Gently tug it to confirm it’s latched.
Step 8: Repeat for the remaining coils
- Repeat Steps 2-7 for each coil you’re replacing.
- If you’re replacing all coils, do them one at a time so nothing gets mixed up.
Step 9: Reassemble and reconnect battery
- Reposition the intake tube and tighten clamps with a flat-blade screwdriver (snug, not stripped).
- Reconnect the negative battery terminal using a 10mm socket.
✅ After Repair
- Start the engine and let it idle for 1-2 minutes. It should run smooth with no shaking.
- If the Check Engine Light was on, it may take a few drive cycles to turn off, or you can clear codes with a scan tool.
- Test drive 10-15 minutes and recheck that all connectors are fully seated.
💰 DIY vs Shop Cost
Shop Cost: $250-$650 (parts + labor)
DIY Cost: $80-$320 (parts only)
You Save: $170-$330 by doing it yourself!
Shop labor rates vary but typically run $100-$150/hour. This repair takes a shop approximately 0.7-1.2 hours.
🎯 Ready to get started?
HowToo makes it easy: same-day/2-day shipping on every part, plus all the tools and specialty tools you need! Check out the parts and tools sections below to add everything to your cart.