









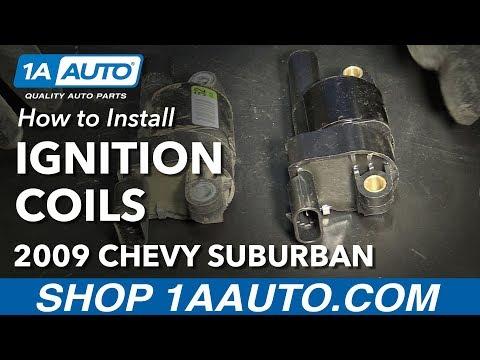







How to Replace Ignition Coils on a 2007-2014 Chevrolet Suburban 1500 (Fix Misfire)
Step-by-step DIY instructions with required tools, parts list, safety tips, and 89 in-lb torque spec
How to Replace Ignition Coils on a 2007-2014 Chevrolet Suburban 1500 (Fix Misfire)
Step-by-step DIY instructions with required tools, parts list, safety tips, and 89 in-lb torque spec for 2007, 2008, 2009, 2010, 2011, 2012, 2013, 2014


🔧 Suburban - Ignition Coil Replacement
Your Suburban’s ignition coils create the high voltage that fires the spark plugs. A bad coil can cause a misfire (shaking, flashing check-engine light, low power), and replacing the coil(s) restores smooth running.
Difficulty Level: Beginner | Estimated Time: 0.5-2.0 hours
⚠️ Safety & Precautions
- ⚠️ Work on a cool engine to avoid burns from exhaust and engine parts.
- ⚠️ If the check engine light is flashing, avoid driving until fixed (can damage the catalytic converter).
- ⚠️ Disconnect the negative battery cable before unplugging coil connectors.
- ⚠️ Keep tools and hands clear of the radiator fan area.
🔧 Required Tools
You'll need the following tools for this repair:
- 10mm socket
- 1/4" drive ratchet
- 6" socket extension
- Torque wrench (inch-pound)
- Flat-blade screwdriver
- Needle-nose pliers
- Shop rags
- Nitrile gloves
- Safety glasses
🔩 Required Parts
HowToo sells all the parts you need for this repair:
- Ignition coil - Qty: 1 (or Qty: 8 if replacing all)
- Ignition coil boot - Qty: 1 (or Qty: 8 if replacing all)
- Dielectric grease - Qty: 1
📋 Before You Begin
- Park on level ground, set the parking brake, and open the hood.
- Let the engine cool fully.
- Use a 10mm socket to disconnect the negative battery cable and isolate it so it can’t spring back.
- Tip: Take a quick photo before unplugging anything.
🔨 Step-by-Step Instructions
Follow these steps in order:
Step 1: Remove the engine cover (if equipped)
- Grab the cover with both hands and pull upward to release it from the rubber grommets.
- Set it aside where it won’t get stepped on.
Step 2: Find the coil you’re replacing
- Each cylinder has one coil mounted along the valve covers.
- If you’re chasing a misfire, replace the coil on the cylinder identified by your scan tool (for example P0304 = cylinder 4).
Step 3: Unplug the coil electrical connector
- Use a flat-blade screwdriver to gently lift the connector lock (if present).
- Press the tab and pull the connector straight off by hand.
- Tip: Pull on the connector, not the wires.
Step 4: Remove the spark plug wire from the coil
- Twist the boot back and forth, then pull it off the coil tower.
- If it’s stubborn, use needle-nose pliers carefully on the boot (not the wire itself).
- (The “boot” is the rubber end that seals and grips the coil.)
Step 5: Remove the coil mounting bolts
- Use a 10mm socket, 6" extension, and 1/4" ratchet to remove the coil/bracket bolts.
- Lift the coil and bracket off the valve cover.
- Wipe the mounting area with shop rags.
Step 6: Transfer parts (if needed) and install the new coil
- If your new coil doesn’t include a bracket, move the bracket to the new coil using the same bolts with a 10mm socket.
- Apply a small dab of dielectric grease inside the spark plug wire boot.
- Set the new coil/bracket into place and start bolts by hand to avoid cross-threading.
- Tighten with a torque wrench (inch-pound): Torque to 10 N·m (89 in-lbs).
Step 7: Reconnect the spark plug wire and electrical connector
- Push the spark plug wire boot onto the coil until you feel it seat firmly.
- Plug the electrical connector back in until it clicks.
Step 8: Reinstall the engine cover and reconnect the battery
- Press the engine cover back onto the grommets by hand.
- Reconnect the negative battery cable using a 10mm socket.
✅ After Repair
- Start the engine and let it idle for 1–2 minutes. It should run smoothly.
- If you have a scan tool, clear the misfire code(s) and recheck for pending codes.
- Take a short test drive and confirm no flashing check-engine light.
- If the misfire remains, the next common checks are the spark plug and plug wire for that cylinder.
💰 DIY vs Shop Cost
Shop Cost: $250-$900 (parts + labor, depending on how many coils)
DIY Cost: $35-$480 (parts only, depending on 1 vs 8 coils)
You Save: $150-$420 by doing it yourself!
Shop labor rates vary but typically run $100-$150/hour. This repair takes a shop approximately 0.5-2.0 hours.
🎯 Ready to get started?
HowToo makes it easy: same-day/2-day shipping on every part, plus all the tools and specialty tools you need! Check out the parts and tools sections below to add everything to your cart.
Guide for Ignition Coil replace for these Chevrolet vehicles
| Year Make Model | Sub Model | Engine | Body Style |
|---|---|---|---|
| 2014 Chevrolet Suburban 1500 | - | - | - |
| 2013 Chevrolet Suburban 1500 | - | - | - |
| 2012 Chevrolet Suburban 1500 | - | - | - |
| 2011 Chevrolet Suburban 1500 | - | - | - |
| 2010 Chevrolet Suburban 1500 | - | - | - |
| 2009 Chevrolet Suburban 1500 | - | - | - |
| 2008 Chevrolet Suburban 1500 | - | - | - |
| 2007 Chevrolet Suburban 1500 | - | - | - |