
















How to Replace Headlight Bulbs on a 2018 Hyundai Ioniq (Low Beam & High Beam)
Step-by-step bulb swap from behind the headlamp housing with tools, parts list, and safety tips for 2017, 2018, 2019, 2020, 2021, 2022
How to Replace Headlight Bulbs on a 2018 Hyundai Ioniq (Low Beam & High Beam)
Step-by-step bulb swap from behind the headlamp housing with tools, parts list, and safety tips for 2017, 2018, 2019, 2020, 2021, 2022


🔧 Ioniq - Headlight Bulb Replacement
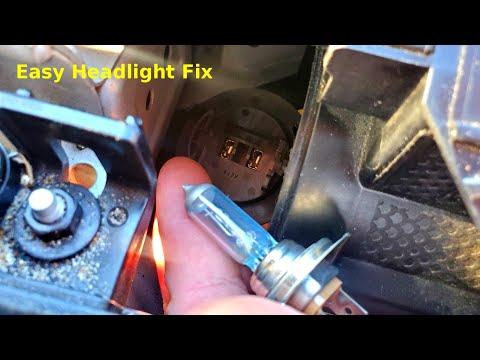
On your Ioniq, the headlight bulbs are serviced from behind each headlamp housing in the engine bay. The key is installing the new bulb without touching the glass and making sure the bulb “locks” in the correct orientation so the beam pattern stays right.
Difficulty Level: Beginner | Estimated Time: 0.5-1.0 hours
⚠️ Safety & Precautions
- ⚠️ Turn the car fully OFF and remove the key fob from the area so the lights can’t turn on unexpectedly.
- ⚠️ Let the headlight area cool first; bulbs and housings can be hot.
- ⚠️ Wear gloves; skin oil on a halogen bulb can shorten its life.
- ⚠️ Avoid pulling on wiring; pull connectors by the plastic body.
- ⚠️ Battery disconnect is optional, but recommended if you’re nervous about shorting connectors.
🔧 Required Tools
You'll need the following tools for this repair:
- Nitrile gloves
- Safety glasses
- Flashlight
- 10mm wrench
- Trim clip remover
🔩 Required Parts
HowToo sells all the parts you need for this repair:
- Low beam headlight bulb (fitment matched) - Qty: 2
- High beam headlight bulb (fitment matched, if applicable) - Qty: 2
- Front turn/parking bulb (fitment matched, if applicable) - Qty: 2
📋 Before You Begin
- Park on level ground, set the parking brake, and switch the lights to OFF.
- Open the hood and use a flashlight to look behind each headlamp for the bulb access cover.
- If you want to disconnect power: use a 10mm wrench to loosen the 12V battery negative terminal and isolate it so it can’t spring back.
- If you see a fully sealed LED module with no removable bulb/cover, stop—those are not bulb-serviceable and the headlamp/module repair is different.
🔨 Step-by-Step Instructions
Follow these steps in order:
Step 1: Confirm which bulb you’re replacing
- Use a flashlight to find the rear access point of the headlamp: there’s typically a round dust cap or a bulb socket you can twist.
- Use your nitrile gloves and locate the bulb position you’re targeting (low beam is usually the larger rear cap; high beam may be a separate smaller access point).
Step 2: Create working room (only if your hands don’t fit)
- Use a trim clip remover to release any nearby plastic push-clips that are blocking access (intake snorkel covers or small shrouds, depending on side).
- Use a flashlight to double-check you can reach the bulb without forcing anything.
Step 3: Remove the rear dust cap or bulb cover
- Use your nitrile gloves to twist the round cap counterclockwise (or pull it straight off if it’s a rubber cap).
- Set the cap aside where it won’t pick up dirt.
Step 4: Disconnect the bulb electrical connector
- Use your nitrile gloves to press the connector tab and pull the connector straight off the bulb base.
- If it’s stubborn, use a flashlight to find the locking tab—don’t yank the wires.
Step 5: Release the bulb retainer and remove the old bulb
- Use your flashlight to identify the retainer style:
- If it’s a spring clip: use your nitrile gloves to press and swing the clip away.
- If it’s a twist-lock socket: use your nitrile gloves to rotate the bulb base counterclockwise and pull it out.
- Pull the bulb straight out and note its orientation (this matters for beam aim).
Step 6: Install the new bulb (do not touch the glass)
- Use your nitrile gloves to handle the new bulb by the base only. If you touch glass, clean with alcohol.
- Install the bulb in the same orientation as the original and fully seat it.
- Re-engage the spring clip (if equipped) using your nitrile gloves, or twist-lock it clockwise until it stops.
Step 7: Reconnect the connector and reinstall the dust cap
- Push the connector on using your nitrile gloves until it clicks/feels fully seated.
- Reinstall the rear cap using your nitrile gloves (twist clockwise or press on evenly) to keep moisture out.
- Reinstall any clips/covers you removed using the trim clip remover.
Step 8: Repeat on the other side
- Use a flashlight and repeat Steps 2–7 for the opposite headlight so both bulbs match brightness and color.
✅ After Repair
- If you disconnected the battery, reconnect it using a 10mm wrench.
- Turn the lights ON and verify: low beams, high beams, and no flicker (use your flashlight to check rear caps are fully sealed).
- At night, confirm both beams look even on a wall; a bulb installed crooked can throw a weird pattern.
💰 DIY vs Shop Cost
Shop Cost: $120-$250 (parts + labor)
DIY Cost: $30-$120 (parts only)
You Save: $90-$130 by doing it yourself!
Shop labor rates vary but typically run $100-$150/hour. This repair takes a shop approximately 0.5-1.0 hours.
🎯 Ready to get started?
HowToo makes it easy: same-day/2-day shipping on every part, plus all the tools and specialty tools you need! Check out the parts and tools sections below to add everything to your cart.