









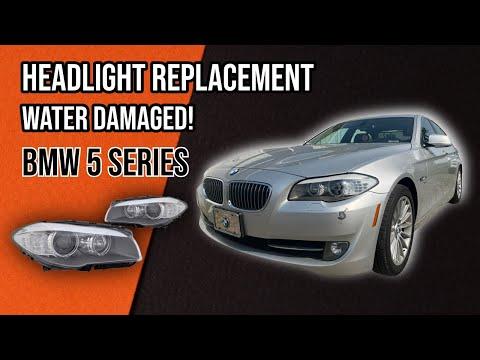






How to Replace Headlight Bulbs on a 2006-2016 BMW 550i (Halogen, HID/Xenon, or LED)
Step-by-step access tips, required tools/parts, safety precautions, and key torque specs
How to Replace Headlight Bulbs on a 2006-2016 BMW 550i (Halogen, HID/Xenon, or LED)
Step-by-step access tips, required tools/parts, safety precautions, and key torque specs for 2006, 2007, 2008, 2009, 2010, 2011, 2012, 2013, 2014, 2015, 2016


🔧 550i - Headlight Bulb Replacement
Replacing headlight bulbs on your 550i usually means accessing the rear of each headlamp housing from inside the engine bay (or through the wheel-well access flap). The exact bulb type depends on which headlight option your car has (Halogen vs Xenon/HID vs LED).
Assumption: Your 550i has either Halogen or Xenon/HID bulbs; if your car has full LED headlights, the “bulb” may not be serviceable separately (it’s often an LED module/assembly repair).
Difficulty Level: Intermediate | Estimated Time: 1.0-2.0 hours
⚠️ Safety & Precautions
- ⚠️ If equipped with Xenon/HID: the igniter/ballast can produce high voltage—turn lights off, remove the key, and disconnect the battery before touching the bulb area.
- ⚠️ Let the headlight housing cool before working; bulbs and nearby parts get very hot.
- ⚠️ Do not touch glass bulbs with bare fingers; skin oils can shorten bulb life.
- ⚠️ Support the car safely if you go through the wheel-well access; never rely on a jack alone.
🔧 Required Tools
You'll need the following tools for this repair:
- 10mm socket
- 3/8" ratchet
- 3" socket extension
- Torx T20 screwdriver
- Torx T25 screwdriver
- Trim clip removal tool
- Flat blade screwdriver (small)
- Nitrile gloves
- Safety glasses
- Flashlight
- Floor jack (rated 3-ton minimum)
- Jack stands (rated 3-ton minimum)
- Wheel chocks
🔩 Required Parts
HowToo sells all the parts you need for this repair:
- Low beam headlight bulbs (Halogen type, if equipped) - Replace in pairs - Qty: 2
- Low beam Xenon/HID bulbs (D-series type, if equipped) - Replace in pairs - Qty: 2
- High beam bulbs (Halogen type, if equipped) - Replace in pairs - Qty: 2
- Headlight rear cover seal (if damaged) - Qty: 2
- Wheel liner clips/screws (as needed) - Qty: 1 set
📋 Before You Begin
- Park on level ground, turn the lights OFF, set the parking brake, and remove the key.
- Chock the rear wheels using wheel chocks.
- Open the hood and set up a flashlight so you can see behind the headlamp.
- If Xenon/HID equipped: disconnect the battery using a 10mm socket (negative terminal first). Wait 5 minutes before opening the headlight rear cover.
- Tip: Replace bulbs in pairs for matching color.
🔨 Step-by-Step Instructions
Follow these steps in order:
Step 1: Create access to the rear of each headlight
- First try engine-bay access: look behind each headlight for a round/oval rear dust cover.
- If space is too tight, use wheel-well access:
- Loosen wheel-well liner fasteners near the front of the tire using a Torx T20 screwdriver and Torx T25 screwdriver.
- Remove any plastic push-clips using a trim clip removal tool.
- Pull the liner back just enough to reach the rear headlight cover. Tip: Don’t crease the liner.
- If you lift the car: raise with a floor jack (rated 3-ton minimum) and support with jack stands (rated 3-ton minimum).
Step 2: Remove the rear headlight dust cover
- Put on nitrile gloves and safety glasses.
- Twist the rear cover counterclockwise by hand and pull it off (some versions use tabs; gently help with a flat blade screwdriver (small)).
- Set the cover somewhere clean so dirt doesn’t get inside.
Step 3: Identify which bulb you’re replacing (Halogen vs Xenon/HID)
- Halogen: usually a simple plug connector on the bulb, with a spring clip or twist-lock retainer.
- Xenon/HID: you’ll see a larger base and an igniter ring/connector (high-voltage component).
- LED headlights: often no removable “bulb” at the rear; you may see sealed modules/heat sinks instead (service is typically module or headlamp assembly).
Step 4 (Halogen path): Remove the old bulb
- Disconnect the electrical plug by pulling it straight off (use a flat blade screwdriver (small) only if the lock tab is stubborn).
- Release the bulb retainer:
- If it’s a spring clip: press and swing the clip away by hand.
- If it’s a twist-lock: rotate the bulb counterclockwise and pull it out.
- Remove the bulb carefully without touching the glass.
Step 5 (Halogen path): Install the new bulb
- Install the new bulb in the same orientation as the old one (tabs must sit fully in the slots).
- Lock the retainer (clip back into place or twist clockwise until fully seated).
- Reconnect the electrical plug firmly.
- Tip: If you touched the glass, clean with alcohol.
Step 6 (Xenon/HID path): Remove the old bulb
- Confirm the battery is disconnected using a 10mm socket.
- Disconnect the igniter/connector (usually a twist-release ring): rotate it counterclockwise by hand and pull it off the bulb base.
- Release the bulb retainer (commonly a metal retaining ring or spring clip) by hand, then remove the bulb.
- Handle the bulb by its base only.
Step 7 (Xenon/HID path): Install the new bulb
- Install the new HID bulb in the exact same orientation (it must sit flat and fully seated).
- Re-lock the retainer ring/clip by hand.
- Reinstall the igniter/connector: push on and twist clockwise until it locks.
Step 8: Reinstall the rear cover and wheel-well liner
- Reinstall the rear dust cover and twist clockwise until fully sealed (this keeps moisture out).
- Reposition the wheel liner.
- Reinstall screws using a Torx T20 screwdriver / Torx T25 screwdriver.
- Torque to 2 Nm (18 in-lbs) for small liner screws (snug only; do not strip plastic).
- Reinstall push-clips using a trim clip removal tool (push center pin to lock).
Step 9: Reconnect battery (if disconnected)
- Reconnect the negative terminal using a 10mm socket.
- Torque to 5 Nm (44 in-lbs).
✅ After Repair
- Turn ignition on and test low beams, high beams, and turn signals.
- Check for a bulb-out warning on the cluster/iDrive.
- At night, verify both beams match in color and brightness, and the pattern looks even.
- If moisture appears in the headlight, recheck the rear cover seal and seating.
💰 DIY vs Shop Cost
Shop Cost: $200-$600 (parts + labor, varies a lot for HID/LED systems)
DIY Cost: $40-$250 (parts only, depends on bulb type)
You Save: $160-$350 by doing it yourself!
Shop labor rates vary but typically run $100-$150/hour. This repair takes a shop approximately 1.0-2.0 hours.
🎯 Ready to get started?
HowToo makes it easy: same-day/2-day shipping on every part, plus all the tools and specialty tools you need! Check out the parts and tools sections below to add everything to your cart.
Guide for Headlight Bulb replace for these BMW vehicles
| Year Make Model | Sub Model | Engine | Body Style |
|---|---|---|---|
| 2016 BMW 550i | - | - | - |
| 2015 BMW 550i | - | - | - |
| 2014 BMW 550i | - | - | - |
| 2013 BMW 550i | - | - | - |
| 2012 BMW 550i | - | - | - |
| 2011 BMW 550i | - | - | - |
| 2010 BMW 550i | - | - | - |
| 2009 BMW 550i | - | - | - |
| 2008 BMW 550i | - | - | - |
| 2007 BMW 550i | - | - | - |
| 2006 BMW 550i | - | - | - |