


How to Replace Headlight Bulbs (Low & High Beam) on a 2016 Hyundai Elantra
Step-by-step DIY guide with bulb types (H11B/9005), tools list, safety tips, and installation checks
How to Replace Headlight Bulbs (Low & High Beam) on a 2016 Hyundai Elantra
Step-by-step DIY guide with bulb types (H11B/9005), tools list, safety tips, and installation checks


🔧 Elantra - Headlight Bulb Replacement
You’ll be replacing the two front headlight bulbs (left and right). On your Elantra, this is usually done from inside the engine bay by removing the rear dust cap, twisting the bulb out, and installing the new one.
Assumption: Your Elantra has halogen low-beam bulbs (most common). If you have HID/Xenon low beams, follow the HID notes in the steps.
Difficulty Level: Beginner | Estimated Time: 0.5-1.0 hours
⚠️ Safety & Precautions
- ⚠️ Turn the lights OFF and let bulbs cool 10+ minutes (they get very hot).
- ⚠️ Do not touch the new bulb glass with bare fingers; skin oils can shorten bulb life.
- ⚠️ If equipped with HID/Xenon, the system can produce high voltage—disconnect the battery negative terminal before touching the bulb/ballast area.
- ⚠️ Keep the dust cap sealed; moisture inside the headlight can fog it and damage bulbs.
🔧 Required Tools
You'll need the following tools for this repair:
- Nitrile gloves
- Safety glasses
- Flashlight
- Small flat trim tool
- 10mm socket
- 3/8" ratchet
🔩 Required Parts
HowToo sells all the parts you need for this repair:
- Low-beam headlight bulbs (H11B) - Qty: 2
- High-beam headlight bulbs (9005) - Qty: 2
- Dielectric grease (electrical) - Qty: 1
📋 Before You Begin
- Park on level ground, shift to Park, and set the parking brake.
- Turn the headlight switch OFF and remove the key/fob from the car.
- If your hands are tight in the rear of the headlight, you may remove the battery hold-down for more room (use a 10mm socket).
- If equipped with HID/Xenon low beams: disconnect the battery negative cable (use a 10mm socket).
🔨 Step-by-Step Instructions
Follow these steps in order:
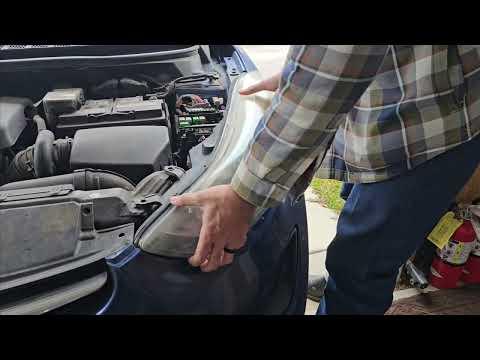
Step 1: Open access to the back of each headlight
- Open the hood.
- Use a flashlight to locate the rear of the headlight housing on the driver side.
- If access is tight: use a 10mm socket and 3/8" ratchet to loosen/remove the battery hold-down and gently reposition the battery slightly for room (do not strain cables).
Step 2: Remove the rear dust cap
- Put on nitrile gloves and safety glasses.
- Twist the round rear dust cap counterclockwise by hand and pull it off.
- If it’s stubborn, use a small flat trim tool to gently help start it—do not crack the plastic.
Step 3: Unplug the bulb connector
- Grab the electrical connector at the bulb.
- Press the locking tab and pull the connector straight back.
- Tip: Wiggle gently—don’t yank wires.
Step 4: Remove the old bulb
- Hold the bulb base and rotate it counterclockwise about 1/8 to 1/4 turn.
- Pull the bulb straight out.
- Set the old bulb aside (don’t drop it).
Step 5: Install the new bulb (low beam or high beam)
- Compare the new bulb to the old bulb to ensure the same type.
- Without touching the glass, insert the new bulb into the housing and line up the tabs.
- Twist clockwise until it locks fully in place.
- Optional: apply a tiny amount of dielectric grease to the connector seal (not on the bulb glass).
Step 6: Reconnect and reseal
- Push the electrical connector on until it clicks.
- Reinstall the dust cap and twist clockwise until fully seated.
- Repeat Steps 2–6 on the passenger side.
Step 7: HID/Xenon note (only if equipped)
- If your low beams are HID/Xenon, you may see a ballast/igniter on the back of the bulb area.
- Disconnect the battery negative terminal using a 10mm socket before removing HID components.
- Handle HID bulbs carefully and install in the same orientation; make sure all covers are sealed tight.
✅ After Repair
- Turn the headlights ON and verify both sides work on low beam (and high beam if you replaced those).
- Check that both dust caps are fully seated to prevent moisture entry.
- If you moved the battery, reinstall/retighten the hold-down using a 10mm socket.
- At night, confirm beam pattern looks even; if it’s unusually high/low, recheck bulb seating.
💰 DIY vs Shop Cost
Shop Cost: $120-$250 (parts + labor)
DIY Cost: $30-$120 (parts only, depends on halogen vs HID)
You Save: $90-$130 by doing it yourself!
Shop labor rates vary but typically run $100-$150/hour. This repair takes a shop approximately 0.5-1.0 hours.
🎯 Ready to get started?
HowToo makes it easy: same-day/2-day shipping on every part, plus all the tools and specialty tools you need! Check out the parts and tools sections below to add everything to your cart.