


How to Replace Headlight Bulbs (Low Beam H11 & High Beam 9005) on a 2019 Chevy Traverse
Step-by-step bulb swap from the engine bay with tools list, parts, safety tips, and 10mm fastener torque specs
How to Replace Headlight Bulbs (Low Beam H11 & High Beam 9005) on a 2019 Chevy Traverse
Step-by-step bulb swap from the engine bay with tools list, parts, safety tips, and 10mm fastener torque specs


🔧 Traverse - Headlight Bulb Replacement
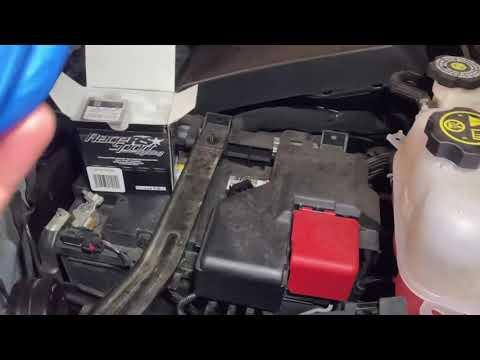
On your Traverse, the “headlight bulbs” usually means the low-beam bulbs (the main headlights). Replacing them is a straightforward job from the engine-bay side of each headlamp housing, but space is tight so take your time.
Difficulty Level: Beginner | Estimated Time: 0.5-1.0 hours
⚠️ Safety & Precautions
- ⚠️ Turn headlights OFF and let bulbs cool 10 minutes (they get very hot).
- ⚠️ Do not touch new bulb glass with bare fingers; skin oil can shorten bulb life.
- ⚠️ Keep keys out of the vehicle so lights can’t turn on unexpectedly.
- ⚠️ Battery disconnect is not required, but it’s OK to disconnect the negative terminal if you want extra safety.
🔧 Required Tools
You'll need the following tools for this repair:
- Nitrile gloves
- Safety glasses
- Flashlight
- Trim clip remover
- 10mm socket
- 1/4" ratchet
- 6" socket extension
- Torque wrench (inch-pound)
- Isopropyl alcohol
- Clean lint-free towel
🔩 Required Parts
HowToo sells all the parts you need for this repair:
- Low-beam headlight bulb (H11) - Qty: 2
- High-beam headlight bulb (9005) - Qty: 2 (only if replacing high beams too)
📋 Before You Begin
- 🅿️ Park on level ground, shift to Park, and set the parking brake.
- 🔦 Open the hood and use a flashlight to locate the rear of each headlamp housing.
- 🧤 Put on nitrile gloves (keeps oils off the bulb).
🔨 Step-by-Step Instructions
Follow these steps in order:
Step 1: Confirm which bulbs you’re replacing
- Use your flashlight to look behind the headlamp.
- The low-beam (H11) is the main headlight used at night.
- The high-beam (9005) is the brighter “brights” bulb.
- If unsure, turn lights on and watch which side is out.
Step 2: Create working room (only if access is tight)
- If a plastic air duct/cover blocks your hand, remove its fasteners using a trim clip remover and/or 10mm socket with a 1/4" ratchet and 6" extension.
- Set clips/bolts aside in a small pile so nothing gets lost.
- If you removed any 10mm bolts, reinstall later and Torque to 89 in-lbs (10 Nm).
- Work slowly—plastic clips break when forced.
Step 3: Remove the electrical connector
- Reach the rear of the headlamp and locate the bulb’s wiring plug.
- Press the lock tab and pull the connector straight off by hand (use nitrile gloves for grip).
- If it’s stuck, gently wiggle—do not pull on the wires.
Step 4: Remove the old bulb
- Hold the bulb base and rotate it counterclockwise about a quarter-turn.
- Pull the bulb straight out of the housing.
- Use your flashlight to confirm the O-ring (rubber seal) came out with the bulb.
Step 5: Install the new bulb (no touching the glass)
- Keep nitrile gloves on and remove the new bulb from its package.
- Align the tabs on the bulb with the slots in the housing, then insert fully.
- Rotate the bulb clockwise until it locks in place.
- If you accidentally touch the glass, clean it with isopropyl alcohol and a clean lint-free towel, then let it dry.
Step 6: Reconnect and reassemble
- Push the wiring connector back on until it clicks (by hand).
- Reinstall any air duct/cover you removed using the 10mm socket, 1/4" ratchet, and trim clip remover.
- If you removed any 10mm bolts, tighten with a torque wrench (inch-pound) to 89 in-lbs (10 Nm).
Step 7: Repeat on the other side
- Do the same steps for the other headlight so brightness and color match.
- Replace bulbs in pairs for even light output.
✅ After Repair
- 🔦 Turn the headlights ON and verify both low beams work.
- Switch to high beams and verify both high beams work (if replaced).
- Walk around the front and confirm the beams look even and not flickering.
- If a bulb doesn’t light, turn lights OFF and re-check the connector is fully seated.
💰 DIY vs Shop Cost
Shop Cost: $120-$250 (parts + labor)
DIY Cost: $30-$120 (parts only, depending on bulb brand/type)
You Save: $90-$130 by doing it yourself!
Shop labor rates vary but typically run $100-$150/hour. This repair takes a shop approximately 0.5-1.0 hours.
🎯 Ready to get started?
HowToo makes it easy: same-day/2-day shipping on every part, plus all the tools and specialty tools you need! Check out the parts and tools sections below to add everything to your cart.
Quick question so I point you to the exact bulbs: Are you replacing the low beams (H11) only, or low + high beams (H11 + 9005)?
