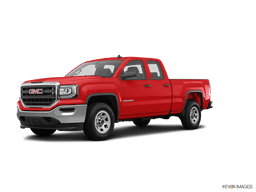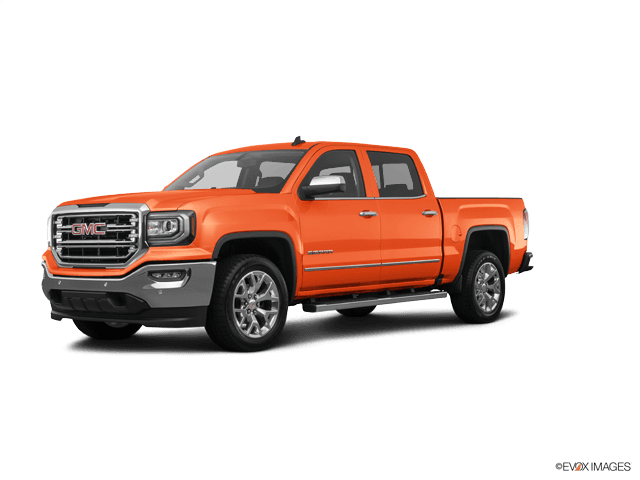









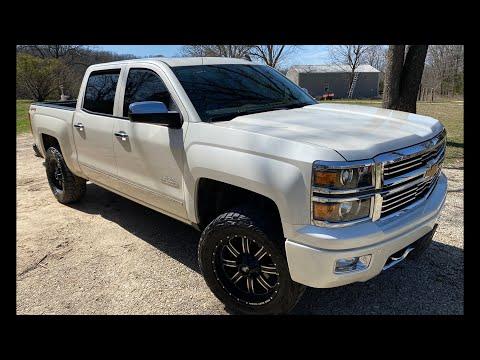






How to Replace Headlight Bulbs and Thermostat on a 2014-2018 GMC Sierra 1500 (Engine: V8 6.2L)
Step-by-step repair guide with tools, parts, safety tips, and torque guidance
How to Replace Headlight Bulbs and Thermostat on a 2014-2018 GMC Sierra 1500 (Engine: V8 6.2L)
Step-by-step repair guide with tools, parts, safety tips, and torque guidance for 2014, 2015, 2016, 2017, 2018


🔧 Headlight Bulbs - Bulb Replacement
Replacing both headlight bulbs on your Sierra is a straightforward job, but the exact bulb type depends on the headlamp package. Some trucks use halogen bulbs, while others use HID bulbs in the projector housing, so I’m listing both paths below.
Difficulty Level: Beginner | Estimated Time: 0.5-1.5 hours
⚠️ Safety & Precautions
- Turn the lights off and remove the key/fob before starting.
- Let the bulbs cool fully before touching the housing.
- Do not touch a halogen bulb glass with bare fingers; oil can shorten bulb life.
- If your truck has HID bulbs, the headlamp system uses high voltage. Do not touch the igniter or ballast connections with the system powered on.
- Disconnecting the battery is not usually required, but it is a safe extra step if you are working slowly around the lamp wiring.
🔧 Required Tools
You'll need the following tools for this repair:
- 7mm socket
- 10mm socket
- Ratchet
- Small extension
- Trim panel tool
- Flat-blade trim tool
- Latex or nitrile gloves
- Safety glasses
- Clean shop towel
🔩 Required Parts
HowToo sells all the parts you need for this repair:
- Headlight bulb set - Qty: 2
- Bulb retaining clips - Qty: 2
- Dust boot seals - Qty: 2
📋 Before You Begin
- Park on level ground and set the parking brake.
- Turn the headlight switch to OFF.
- Open the hood and make sure the engine bay is cool.
- Use clean gloves so you do not contaminate the new bulbs.
🔨 Step-by-Step Instructions
Follow these steps in order:
Step 1: Open access to the headlamp assembly
- Open the hood and locate the rear of the headlight housing.
- Use the 7mm socket to remove any upper radiator cover or access fasteners that block your hand path.
- Use the trim panel tool to release any plastic retainers if equipped.
Step 2: Remove the headlamp assembly if needed
- If you cannot reach the bulb from the rear, use the 10mm socket and ratchet to remove the headlamp mounting bolts.
- Pull the headlamp straight forward carefully.
- Do not force the lens or tabs.
Step 3: Remove the old bulbs
- Twist the bulb socket counterclockwise or release the retaining clip, depending on your lamp type.
- Use your gloved hand to remove the bulb from the housing.
- If your truck has HID bulbs, unplug the connector only after the lamp is fully off and dry.
Step 4: Install the new bulbs
- Install the new bulb in the same position as the old one.
- Use the clean shop towel and gloves to avoid touching the glass.
- Lock the bulb in place by twisting it clockwise or reinstalling the clip.
- Torque to snug only for bulb locks and covers; do not overtighten plastic parts.
Step 5: Reinstall the headlamp assembly
- Slide the headlamp back into position.
- Use the 10mm socket to reinstall and snug the mounting bolts.
- Reinstall any cover fasteners with the 7mm socket.
Step 6: Test both headlights
- Turn the ignition on and switch the headlights on.
- Check low beam, high beam, and parking light function.
- Make sure both sides match in brightness and aim.
✅ After Repair
- Confirm there are no warning messages on the cluster.
- Check that both headlight beams are seated correctly and aimed evenly.
- If one bulb does not light, recheck the connector and retaining lock.
💰 DIY vs Shop Cost
Shop Cost: $120-$350 (parts + labor)
DIY Cost: $40-$180 (parts only)
You Save: $80-$170 by doing it yourself!
Shop labor rates vary but typically run $100-$150/hour. This repair takes a shop approximately 0.5-1.0 hours.
🎯 Ready to get started?
HowToo makes it easy: same-day/2-day shipping on every part, plus all the tools and specialty tools you need! Check out the parts and tools sections below to add everything to your cart.
🔧 Thermostat - Replacement
The thermostat on your Sierra controls coolant flow to help the engine warm up quickly and stay at the right temperature. Replacing it usually means draining some coolant, removing the thermostat housing, and installing a new thermostat and seal so the engine does not overheat or run too cool.
Difficulty Level: Intermediate | Estimated Time: 1.5-2.5 hours
⚠️ Safety & Precautions
- Work only on a completely cool engine. Hot coolant can cause severe burns.
- Keep the radiator cap closed until the engine is cool.
- Drain coolant into a clean pan and keep it away from children and pets.
- Battery disconnect is not required for this repair.
- Assumption: your truck uses the standard front-engine thermostat housing layout for the 6.2L V8.
🔧 Required Tools
You'll need the following tools for this repair:
- 3/8-inch ratchet
- 10mm socket
- 13mm socket
- Extensions
- Torque wrench
- Drain pan
- Pliers
- Flat-blade screwdriver
- Gasket scraper
- Shop towels
- Safety glasses
- Nitrile gloves
- Funnel
🔩 Required Parts
HowToo sells all the parts you need for this repair:
- Thermostat - Qty: 1
- Thermostat housing gasket or seal - Qty: 1
- Engine coolant - Qty: 1-2 gallons as needed
📋 Before You Begin
- Park on level ground and set the parking brake.
- Let the engine cool completely.
- Place a drain pan under the radiator drain area.
- Open the coolant reservoir cap slowly only after the engine is cool.
🔨 Step-by-Step Instructions
Follow these steps in order:
Step 1: Drain enough coolant
- Use the drain pan under the radiator.
- Open the radiator drain or remove the lower hose clamp with pliers if needed.
- Drain the system until the coolant level is below the thermostat housing.
Step 2: Remove intake ducting or covers if needed
- If a cover blocks access, remove it with the 10mm socket and 3/8-inch ratchet.
- Move the intake ducting aside only as far as needed for access.
Step 3: Remove the thermostat housing
- Use the 10mm socket or 13mm socket to remove the thermostat housing bolts, depending on your housing fasteners.
- Lift the housing off carefully.
- Keep track of bolt locations.
Step 4: Remove the old thermostat
- Pull the old thermostat out of the housing or engine recess.
- Note the orientation of the thermostat before removing it.
- Remove the old gasket or seal.
Step 5: Clean the sealing surfaces
- Use the gasket scraper and shop towels to clean both sealing surfaces.
- Do not gouge the aluminum surface.
- Make sure no old gasket material is left behind.
Step 6: Install the new thermostat
- Place the new thermostat in the same orientation as the old one.
- Install the new gasket or seal.
- Set the housing back into place by hand.
Step 7: Reinstall and torque the housing bolts
- Use the 10mm socket or 13mm socket with a torque wrench to tighten the housing bolts evenly.
- Torque to manufacturer specification for the thermostat housing bolts.
- Do not overtighten; the housing can warp or crack.
Step 8: Reassemble removed parts
- Reinstall any intake ducting or covers with the 10mm socket.
- Reconnect any hoses or clamps that were moved.
Step 9: Refill coolant and bleed air
- Use the funnel to refill the cooling system with fresh coolant.
- Fill the reservoir to the proper mark.
- Start the engine and let it idle with the heater on high.
- Watch the coolant level and top off as air purges from the system.
Step 10: Check for leaks and verify temperature
- Inspect the thermostat housing and hose connections for leaks.
- Let the engine reach operating temperature and confirm normal gauge behavior.
- Recheck coolant level after the engine cools again.
✅ After Repair
- Test drive the truck and watch for stable operating temperature.
- Recheck coolant level the next day when cold.
- Look for warning lights or stored cooling system codes if the truck still overheats or runs cold.
💰 DIY vs Shop Cost
Shop Cost: $220-$450 (parts + labor)
DIY Cost: $35-$90 (parts only)
You Save: $185-$360 by doing it yourself!
Shop labor rates vary but typically run $100-$150/hour. This repair takes a shop approximately 1.5-2.0 hours.
🎯 Ready to get started?
HowToo makes it easy: same-day/2-day shipping on every part, plus all the tools and specialty tools you need! Check out the parts and tools sections below to add everything to your cart.
Guide for Engine Coolant Thermostat replace for these GMC vehicles
| Year Make Model | Sub Model | Engine | Body Style |
|---|---|---|---|
| 2018 GMC Sierra 1500 | - | V6 4.3L | - |
| 2018 GMC Sierra 1500 | - | V8 5.3L | - |
| 2018 GMC Sierra 1500 | - | V8 6.2L | - |
| 2017 GMC Sierra 1500 | - | V6 4.3L | - |
| 2017 GMC Sierra 1500 | - | V8 5.3L | - |
| 2017 GMC Sierra 1500 | - | V8 6.2L | - |
| 2016 GMC Sierra 1500 | - | V6 4.3L | - |
| 2016 GMC Sierra 1500 | - | V8 5.3L | - |
| 2016 GMC Sierra 1500 | - | V8 6.2L | - |
| 2015 GMC Sierra 1500 | - | V6 4.3L | - |
| 2015 GMC Sierra 1500 | - | V8 5.3L | - |
| 2015 GMC Sierra 1500 | - | V8 6.2L | - |
| 2014 GMC Sierra 1500 | - | V6 4.3L | - |
| 2014 GMC Sierra 1500 | - | V8 5.3L | - |
| 2014 GMC Sierra 1500 | - | V8 6.2L | - |