









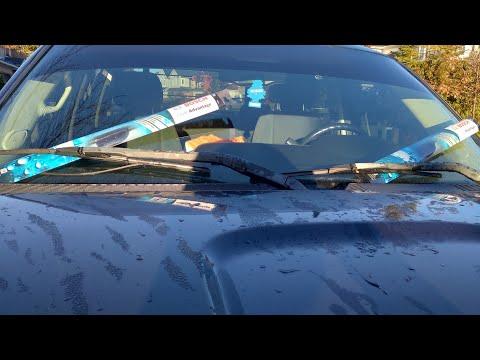




How to Replace Front Windshield Wipers on a 2012 GMC Sierra 1500
Step-by-step blade swap guide with tools, parts sizes, safety tips, and testing for 1999, 2000, 2001, 2002, 2003, 2004, 2005, 2006, 2007, 2008, 2009, 2010, 2011, 2012, 2014, 2015, 2016, 2017, 2018, 2019, 2020, 2021, 2022, 2023, 2024
How to Replace Front Windshield Wipers on a 2012 GMC Sierra 1500
Step-by-step blade swap guide with tools, parts sizes, safety tips, and testing for 1999, 2000, 2001, 2002, 2003, 2004, 2005, 2006, 2007, 2008, 2009, 2010, 2011, 2012, 2014, 2015, 2016, 2017, 2018, 2019, 2020, 2021, 2022, 2023, 2024


🔧 Front Wiper Blade Replacement
Your Sierra uses a simple hook-style wiper arm, so this is a quick blade swap with no special programming or scan tool work. Replacing both blades at the same time keeps streaking and noise from returning unevenly.
Difficulty Level: Beginner | Estimated Time: 0.25-0.5 hours
⚠️ Safety & Precautions
- Turn the ignition off and keep the wipers in the parked position.
- Make sure the wiper arms do not snap back onto the glass while the blade is off.
- If the arms are lifted away from the windshield, hold them firmly to avoid glass damage.
- No battery disconnect is required.
🔧 Required Tools
You'll need the following tools for this repair:
- None required
- Clean microfiber towel
- Safety glasses
🔩 Required Parts
HowToo sells all the parts you need for this repair:
- Front wiper blades - Driver: 22", Passenger: 22" - Qty: 2
📋 Before You Begin
- Park on level ground with the ignition off.
- Lift only one wiper arm at a time.
- Place a towel on the windshield if you want extra protection.
🔨 Step-by-Step Instructions
Follow these steps in order:
Step 1: Lift the wiper arm
- Use your hand to gently lift the front wiper arm away from the windshield.
- Hold the arm steady so it does not spring back.
- Protect the glass while working.
Step 2: Remove the old blade
- Use your fingers to find the small release tab where the blade connects to the hook.
- Press the release tab and slide the blade downward to unhook it from the arm.
- If it is tight, wiggle the blade gently while pulling it off.
Step 3: Install the new blade
- Take the new blade and line up the hook with the adapter opening.
- Slide the blade onto the hook until it clicks into place.
- Pull lightly on the blade to make sure it is locked in.
Step 4: Repeat on the other side
- Repeat the same removal and installation process for the second wiper blade.
- Make sure both blades match side to side and sit flat on the arm.
Step 5: Lower the arms and test
- Carefully lower both wiper arms back onto the windshield.
- Turn the ignition on and run the washer/wiper system for a quick test.
- Check that both blades sweep smoothly and do not chatter or leave streaks.
✅ After Repair
- Spray washer fluid and confirm both blades clear the glass evenly.
- Listen for any clicking, skipping, or squeaking.
- If one blade leaves a streak, make sure it is fully locked onto the hook.
💰 DIY vs Shop Cost
Shop Cost: $60-$120 (parts + labor)
DIY Cost: $25-$60 (parts only)
You Save: $35-$60 by doing it yourself!
Shop labor rates vary but typically run $100-$150/hour. This repair takes a shop approximately 0.2-0.5 hours.
🎯 Ready to get started?
HowToo makes it easy: same-day/2-day shipping on every part, plus all the tools and specialty tools you need! Check out the parts and tools sections below to add everything to your cart.