









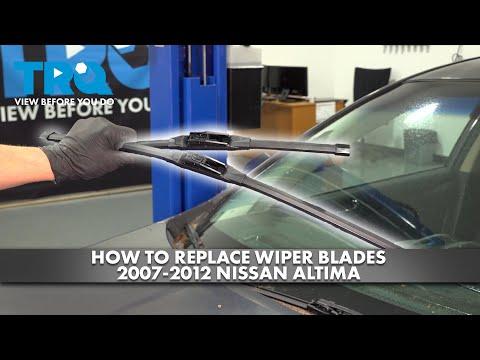






How to Replace Front Windshield Wiper Blades on a 2009 Nissan Altima
Step-by-step J-hook blade removal and install with tools, parts list, and safety tips for 2008, 2009, 2010, 2011, 2012, 2013
How to Replace Front Windshield Wiper Blades on a 2009 Nissan Altima
Step-by-step J-hook blade removal and install with tools, parts list, and safety tips for 2008, 2009, 2010, 2011, 2012, 2013


🔧 Altima - Front Windshield Wiper Blade Replacement
You’ll remove the old wiper blades from the wiper arms and click new blades into the same attachment. Fresh blades improve visibility and reduce streaking and chatter in rain.
Difficulty Level: Beginner | Estimated Time: 0.2-0.5 hours
⚠️ Safety & Precautions
- 🛑 Turn the ignition OFF and remove the key before lifting wiper arms.
- 🛑 Put a towel on the windshield so the metal wiper arm can’t chip or crack the glass if it snaps down.
- 🛑 Don’t force the wiper arm beyond its normal lift range; it can bend.
- 🛑 Battery disconnect is not required for this repair.
🔧 Required Tools
You'll need the following tools for this repair:
- Safety glasses
- Mechanic gloves
- Clean microfiber towel
- Small flathead screwdriver
🔩 Required Parts
HowToo sells all the parts you need for this repair:
- Front windshield wiper blades (driver + passenger) - Qty: 2
📋 Before You Begin
- Park your Altima on level ground and set the parking brake.
- Turn the ignition OFF and make sure the wipers are in their “parked” position at the bottom of the windshield.
- Lay a clean microfiber towel across the lower windshield where the arms could contact.
🔨 Step-by-Step Instructions
Follow these steps in order:
Step 1: Lift the wiper arm
- Use your hands (with mechanic gloves) to lift one wiper arm up off the windshield until it stays up.
- Keep the clean microfiber towel in place to protect the glass.
Step 2: Identify the J-hook connection
- Look where the blade meets the arm; it uses a “J-hook” (a J-shaped metal hook that the blade clips onto).
- Most Altima blades are J-hook style.
Step 3: Release the old blade
- Rotate the blade slightly so you can see the small release tab/clip on the blade adapter.
- Press the tab with your fingers. If it’s stuck, gently help it with a small flathead screwdriver (do not pry hard).
- Slide the blade down toward the open end of the J-hook and unhook it from the arm.
Step 4: Install the new blade
- Take the new blade and make sure it has the correct J-hook adapter installed (most come pre-installed).
- Hook the new blade onto the J-hook and slide it up until it clicks/locks into place.
- Gently tug on the blade to confirm it’s fully latched.
Step 5: Lower the wiper arm safely
- Use your hand to lower the arm back onto the windshield slowly—don’t let it snap down.
- Repeat Steps 1–5 for the other front wiper blade.
✅ After Repair
- Remove the clean microfiber towel from the windshield.
- Turn the ignition ON and run the front wipers on low speed to confirm smooth movement and no streaking.
- If the blades chatter, clean the windshield and blade rubber with glass cleaner and a clean towel.
💰 DIY vs Shop Cost
Shop Cost: $40-$90 (parts + labor)
DIY Cost: $20-$50 (parts only)
You Save: $20-$40 by doing it yourself!
Shop labor rates vary but typically run $100-$150/hour. This repair takes a shop approximately 0.2-0.5 hours.
🎯 Ready to get started?
HowToo makes it easy: same-day/2-day shipping on every part, plus all the tools and specialty tools you need! Check out the parts and tools sections below to add everything to your cart.