
















How to Replace Front Windshield Wiper Blades on a 2009 Ford F-150
Step-by-step wiper blade removal and installation with tips, tools, and fitment checks for 2009, 2010, 2011, 2012, 2013, 2014, 2015, 2016, 2017, 2018, 2019, 2020, 2021, 2022, 2023, 2024
How to Replace Front Windshield Wiper Blades on a 2009 Ford F-150
Step-by-step wiper blade removal and installation with tips, tools, and fitment checks for 2009, 2010, 2011, 2012, 2013, 2014, 2015, 2016, 2017, 2018, 2019, 2020, 2021, 2022, 2023, 2024


🔧 F-150 - Front Windshield Wiper Blade Replacement
Replacing the front wiper blades restores clear vision in rain and prevents the rubber from streaking or chattering on the glass. On your F-150, the blades attach to the wiper arms with a quick-release style connector, so this is usually a fast, tool-light job.
Difficulty Level: Beginner | Estimated Time: 10-20 minutes
⚠️ Safety & Precautions
- ⚠️ Keep the wiper arm from snapping onto the windshield; it can crack the glass.
- ⚠️ Turn the ignition OFF before lifting the wiper arms.
- ⚠️ Support the wiper arm with your hand while swapping the blade.
🔧 Required Tools
You'll need the following tools for this repair:
- Safety glasses
- Nitrile gloves
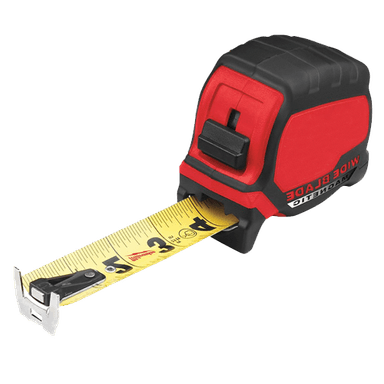
- Tape measure (inch scale)
- Small flathead screwdriver
- Microfiber towel
🔩 Required Parts
HowToo sells all the parts you need for this repair:
- Front wiper blades (match your current blade lengths) - Qty: 2
📋 Before You Begin
- Park your F-150 on level ground and turn the ignition OFF.
- Clean the windshield edge with a microfiber towel so dirt doesn’t get dragged under the new blades.
- Use a tape measure (inch scale) to note the length of each current blade (often printed on the old blade too).
🔨 Step-by-Step Instructions
Follow these steps in order:
Step 1: Lift and protect the wiper arm
- Wear nitrile gloves and safety glasses.
- Lift one wiper arm away from the windshield until it stays up.
- Place a microfiber towel under/near the arm area as a cushion. Prevents glass damage if it slips.
Step 2: Release the old blade from the wiper arm
- At the connection point, find the small release tab/clip.
- Press the tab by hand; if it’s stubborn, gently help it with a small flathead screwdriver (don’t pry hard).
- Slide the blade down/out of the hook/connector and remove it from the arm.
Step 3: Confirm the blade length and connector style
- Use a tape measure (inch scale) to confirm the old blade length end-to-end.
- Check the new blade packaging for included adapters; choose the one that matches the arm connector.
- A “wiper blade adapter” is the small plastic piece that lets the blade lock onto your wiper arm.
Step 4: Install the new blade
- Attach the correct adapter to the new blade (if it isn’t already installed) by hand.
- Slide the new blade onto the wiper arm connector until you hear/feel a click.
- Gently tug the blade to confirm it’s locked in place.
Step 5: Lower the arm and repeat on the other side
- Carefully lower the wiper arm back onto the windshield.
- Repeat Steps 1-4 for the other front wiper blade.
✅ After Repair
- Start the engine and run the washers/wipers for 10–15 seconds to confirm smooth wiping.
- If you see streaking, clean the glass with a microfiber towel and washer fluid, then re-test.
- If one blade “flops” or doesn’t wipe, remove it and re-seat it until it clicks fully.
💰 DIY vs Shop Cost
Shop Cost: ₹500-₹1,500 (parts + labor)
DIY Cost: ₹400-₹1,200 (parts only)
You Save: ₹100-₹900 by doing it yourself!
Shop labor rates vary but typically run ₹500-₹1,500/hour. This repair takes a shop approximately 0.2-0.4 hours.
🎯 Ready to get started?
HowToo makes it easy: same-day/2-day shipping on every part, plus all the tools and specialty tools you need! Check out the parts and tools sections below to add everything to your cart.