









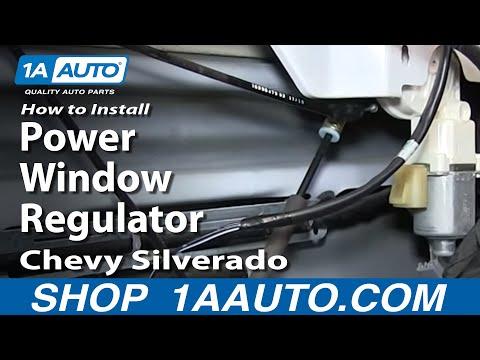





How to Replace Front Window Regulators on a 2012 Chevy Silverado 1500
Step-by-step DIY door panel removal, regulator swap, tools, parts list, safety tips, and torque specs
How to Replace Front Window Regulators on a 2012 Chevy Silverado 1500
Step-by-step DIY door panel removal, regulator swap, tools, parts list, safety tips, and torque specs


🔧 Silverado 1500 - Front Window Regulator Replacement
You’ll be removing the door panel, unbolting the glass from the regulator, then swapping the regulator/motor assembly and reinstalling everything. On this generation of your Silverado, the regulator is mounted behind the large black metal “door module” panel.
Difficulty Level: Intermediate | Estimated Time: 1.5–2.5 hours per door
⚠️ Safety & Precautions
- ⚠️ Your Silverado has side airbags in the front doors; disconnect the negative battery cable before unplugging any door wiring and wait 2–3 minutes.
- ⚠️ Support the glass securely when unbolted from the regulator so it can’t drop and shatter.
- ⚠️ Keep fingers clear of the regulator and gear teeth; never power the motor with the glass unbolted and your hands inside the mechanism.
- ⚠️ Work with the truck on level ground, ignition off, key removed.
- ⚠️ Use proper lighting; dropped screws inside the door are hard to see and retrieve.
🔧 Required Tools
You'll need the following tools for this repair:
- 🛠️ Ratchet handle 3/8"
- 🛠️ 7mm socket
- 🛠️ 10mm socket
- 🛠️ Torx T20 screwdriver
- 🛠️ Torx T30 screwdriver
- 🛠️ Short extension 3"
- 🛠️ Trim removal tool (plastic)
- 🛠️ Flathead screwdriver small
- 🛠️ Phillips screwdriver #2
- 🛠️ Needle-nose pliers
- 🛠️ Painter’s tape 1–2"
- 🛠️ Torque wrench 3/8" (inch-lb and ft-lb)
- 🛠️ Work light or flashlight
- 🛠️ Mechanic gloves
- 🛠️ Safety glasses
🔩 Required Parts
HowToo sells all the parts you need for this repair:
- 🔩 Front window regulator with motor assembly (driver side) - Qty: 1
- 🔩 Front window regulator with motor assembly (passenger side) - Qty: 1 (if doing both)
- 🔩 Front door trim panel push clips - Qty: 6–10 (have spares; some often break)
- 🔩 Butyl door vapor barrier sealer strip - Qty: 1 roll (only if your barrier/seal is damaged)
- 🔩 Blue threadlocker (medium strength) - Qty: 1 small tube
- 🔩 Glass cleaner - Qty: 1
- 🔩 Shop towels - Qty: 1 pack
📋 Before You Begin
- Park the Silverado on a flat surface, set the parking brake, and lower the window until you can see the regulator mounting points through the glass opening if possible. If the regulator has failed with the window fully up or down, that’s fine—you’ll move it by hand later.
- Turn ignition off and remove the key.
- Open the hood and disconnect the negative battery cable using the 10mm socket. Wait at least 2–3 minutes for the airbag system to power down.
- Have a small container ready to keep screws and bolts organized by location.
🔨 Step-by-Step Instructions
Follow these steps in order:
Step 1: Remove window/lock switch panel and trim pieces
- Use the trim removal tool to gently pry up the window/lock switch panel at the front edge of the armrest on the door you’re working on.
- Lift the panel and disconnect the electrical connectors by pressing the small tabs with the flathead screwdriver small, then set the switch panel aside.
- Use the trim removal tool to pop off the small plastic cover behind the interior door handle to expose a hidden screw.
- On some trims, there is also a trim piece at the top of the door pull; use the trim removal tool to lift it and expose additional screws.
Step 2: Remove door panel fasteners
- Use the 7mm socket with the ratchet handle 3/8" to remove the screws at the bottom edge of the door panel (usually two or three).
- Use the 7mm socket to remove the screws inside the door pull/armrest area.
- Use the Torx T20 screwdriver or Phillips screwdriver #2 (depending on your trim) to remove the screw behind the interior handle that you exposed earlier.
- Keep these screws in a labeled group; front door panel screws are different lengths.
Step 3: Remove the door panel
- Starting at the bottom corner of the door, slide the trim removal tool between the panel and the metal door and gently pry to release the push clips. Work your way around the sides and bottom.
- Once all clips are free, lift the panel straight up to unhook it from the top window channel.
- Carefully lean the panel away and reach behind to disconnect the interior door handle cable: use needle-nose pliers to unclip the cable housing and then unhook the cable end from the handle.
- Disconnect any remaining electrical connectors (courtesy light, mirror switch) by pressing their tabs with the flathead screwdriver small.
- Remove the door panel and set it somewhere safe, cloth side down to avoid scratches.
Step 4: Remove vapor barrier / inspect door module
- On many Silverados there is a large black metal inner “door module” panel with the speaker and regulator attached, and a foam or plastic vapor barrier behind the trim panel. Carefully peel back any foam/plastic barrier using your hands; if the adhesive is very sticky, use the trim removal tool to help.
- Try to keep the barrier intact so you can reuse it; if the butyl sealant strings, keep it off the speaker and wiring.
- If your truck has a separate vapor barrier that's already torn, plan on resealing with the new butyl strip later.
Step 5: Secure the glass in place
- If the window is up: use painter’s tape 1–2" to tape the glass to the door frame on the outside. Run several long strips from the glass over the top of the door and down the inside. Use more tape than you think you need.
- If the window is down: gently lift the glass by hand from the top edge until it’s fully up, then tape it in place the same way.
- Confirm the glass does not move when you gently push up and down on it.
Step 6: Position the regulator (if motor still moves)
- Reconnect the window switch temporarily: plug the main power window connector back into the switch panel.
- Reconnect the negative battery cable with the 10mm socket and briefly turn the ignition to RUN.
- Use the switch to move the window until the regulator-to-glass mounting bolts are visible through the large service holes in the inner metal door panel.
- Turn ignition off, disconnect the negative battery cable again, and unplug the switch panel.
- If the regulator is completely dead and won’t move, you will access the glass bolts where it is; you may need to gently lower/raise the glass by hand once unbolted.
Step 7: Unbolt glass from regulator
- Look through the service openings in the inner metal panel to find the two clamps or bolts that hold the bottom of the glass to the regulator track.
- Use the 10mm socket with the ratchet handle 3/8" to loosen and remove these two glass-to-regulator bolts.
- Once the glass is free, gently lift it fully to the top (if it moved) and retape it securely with more painter’s tape 1–2".
- Do not slam the door with the glass only held by tape.
Step 8: Remove the inner door module panel (if equipped)
- Unplug the wiring connectors from the speaker, window motor, and any other components on the inner metal panel using the flathead screwdriver small to press release tabs.
- Use the 10mm socket to remove the bolts around the perimeter of the black inner metal door module panel.
- Support the panel as you remove the last few bolts; it holds the regulator and can be a bit heavy.
- Carefully pull the panel/regulator assembly away from the door shell and maneuver it out through the largest opening. Take your time and watch for wiring still attached.
Step 9: Remove regulator and motor from door module panel
- Place the door module panel on a clean, flat surface.
- Use the Torx T30 screwdriver or 10mm socket (depending on design) to remove the bolts that secure the regulator tracks and motor to the panel.
- Note the routing of the regulator cables and the exact position of the motor. Take a photo with your phone as a reference.
- Remove the old regulator and motor assembly from the panel.
Step 10: Install the new regulator and motor
- Place the new regulator/motor assembly onto the door module panel, aligning it with the original bolt holes and cable routing.
- Apply a small drop of blue threadlocker (medium strength) to each mounting bolt thread.
- Install and hand-tighten all the regulator and motor bolts with the Torx T30 screwdriver or 10mm socket.
- Tighten regulator and motor bolts to 8–10 Nm (71–89 in-lbs) using the torque wrench 3/8".
Step 11: Reinstall door module panel with regulator
- Carefully maneuver the assembled door module panel with the new regulator back into the door opening.
- Align the panel with the original holes and start all the 10mm socket bolts by hand to avoid cross-threading.
- Tighten the module panel bolts evenly around the perimeter to 8–10 Nm (71–89 in-lbs) with the torque wrench 3/8".
- Reconnect the speaker and any other wiring connectors to the panel, but leave the window motor connector for a moment if it’s easier to see the glass alignment first.
Step 12: Attach glass to new regulator
- Reconnect the window motor connector and the main door electrical connector to the switch panel temporarily (you can let the panel hang gently by its cables for now or support it on your knee).
- Reconnect the negative battery cable using the 10mm socket and turn the ignition to RUN.
- While a helper holds the glass lightly (or while you hold it steady), use the window switch to move the regulator clamps to line up with the glass mounting points seen through the access holes.
- Turn ignition off and disconnect the negative battery cable again for safety.
- Remove enough painter’s tape 1–2" so the glass can lower a few centimeters onto the regulator clamps while you still keep a hand on it.
- Lower the glass carefully until the holes in the glass line up with the regulator clamp holes.
- Install the glass-to-regulator bolts using the 10mm socket and tighten to 9–10 Nm (80–89 in-lbs) with the torque wrench 3/8".
- Remove the remaining tape from the window.
Step 13: Test window operation before reassembly
- Reconnect the window switch panel fully and the negative battery cable with the 10mm socket.
- Turn the ignition to RUN and cycle the window up and down several times using the switch.
- Listen for any grinding or binding and watch the glass to be sure it moves smoothly and tracks evenly in the channels.
- If your truck has “auto down”/“express down” on the driver’s window and it doesn’t work correctly after replacement: fully raise the window, then hold the switch in the UP position for about 5 seconds to relearn the top stop.
- Turn ignition off and, if you like, disconnect the battery again while you finish reassembly (optional but safer around airbags).
Step 14: Reinstall vapor barrier
- Press the original vapor barrier back into place, aligning edges with the door frame.
- If the adhesive is weak or torn, use the butyl door vapor barrier sealer strip to reseal gaps by pressing it in with your fingers.
- Make sure all wiring passes through the correct holes and is not pinched.
Step 15: Reinstall the door panel
- Reconnect all electrical connectors to the door panel (courtesy light, mirror control, etc.) using your hands and the flathead screwdriver small if needed on locking tabs.
- Reattach the interior door handle cable: hook the cable end into the handle, then clip the housing back into its bracket using needle-nose pliers if needed.
- Hang the top of the door panel over the top edge of the door so it hooks into the window channel.
- Once aligned, smack around the edges of the panel with the heel of your hand to engage all the push clips. Replace any broken clips with new ones by pushing them into the panel before installing.
Step 16: Reinstall screws and switch panel
- Install the screws behind the door handle and in the armrest/door pull using the Torx T20 screwdriver or Phillips screwdriver #2 and the 7mm socket as applicable.
- Tighten smaller trim screws to about 3–4 Nm (27–35 in-lbs) using the torque wrench 3/8" if possible; snug but not over-tight to avoid cracking plastic.
- Snap any trim covers back over the screws using your fingers.
- Reconnect the window/lock switch electrical connectors and then press the switch panel back into the armrest until it clicks into place.
Step 17: Final electrical and function check
- Reconnect the negative battery cable for the last time with the 10mm socket and tighten the terminal snugly.
- Turn ignition to RUN and test:
- Window up and down (smooth movement).
- Lock and unlock functions.
- Mirror adjustment (if on that door).
- Interior door handle and lock work correctly.
- Close the door and operate the window several times while listening for rattles. If you hear the glass tapping, check that all panel clips are fully seated.
✅ After Repair
- Operate each replaced window 5–10 times from fully closed to fully open to confirm smooth travel with no noises.
- If your driver window has auto/express function, do a simple relearn: fully close the window, then hold the switch in the UP position for about 5 seconds, then release.
- Verify the door locks, mirror adjustment, and interior handle all work correctly before driving.
- Drive on a short, bumpy road with the radio off and listen for any rattles from the repaired door; recheck panel clips if needed.
💰 DIY vs Shop Cost
Shop Cost: $350–$550 per front door (parts + labor)
DIY Cost: $110–$190 per front door (parts only)
You Save: $240–$360 per door by doing it yourself!
Shop labor rates are typically $100–$150/hour, and this job usually bills at about 1.5–2.0 hours per door.
🎯 Ready to get started?
HowToo makes it easy: same-day/2-day shipping on every part, plus all the tools and specialty tools you need! Check out the parts and tools sections above to add everything to your cart.
Guide for replace for these Chevrolet vehicles
| Year Make Model | Sub Model | Engine | Body Style |
|---|