
















How to Replace Front Wheel Bearing Hub on a 2013-2019 Ford Escape (Engine: Inline 4 2.0L)
Step-by-step DIY guide with tools, parts, torque specs, ABS tips, and safety checks
How to Replace Front Wheel Bearing Hub on a 2013-2019 Ford Escape (Engine: Inline 4 2.0L)
Step-by-step DIY guide with tools, parts, torque specs, ABS tips, and safety checks for 2013, 2014, 2015, 2016, 2017, 2018, 2019


🔧 Escape - Wheel Bearing Replacement
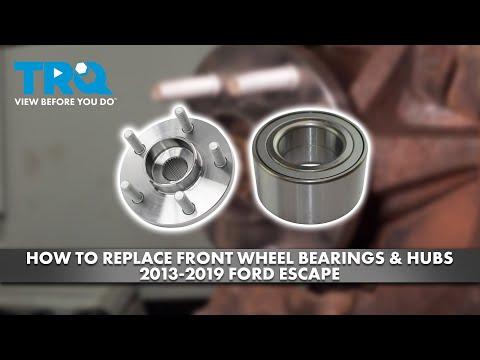
Your Escape uses sealed hub-and-bearing assemblies, so the practical DIY repair is replacing the complete wheel hub/bearing unit rather than pressing the bearing out separately. A bad wheel bearing usually causes a growling or humming noise that changes with road speed, and it should be repaired promptly to avoid wheel looseness or ABS sensor issues.
Assumption: This guide covers one front wheel bearing/hub assembly. Rear AWD hub replacement is similar, but torque values and access differ.
Difficulty Level: Intermediate | Estimated Time: 2-3 hours per side
⚠️ Safety & Precautions
- ⚠️ Work on a flat, solid surface and support your Escape with jack stands before going under or around the wheel area.
- ⚠️ Do not rely on a floor jack alone. A floor jack lifts the vehicle; jack stands hold it safely.
- ⚠️ The axle nut is very tight. Loosen it only with the wheel on the ground or have a helper hold the brake pedal.
- ⚠️ Do not let the brake caliper hang by the rubber brake hose. Support it with wire or a caliper hanger.
- ⚠️ Avoid pulling, twisting, or striking the ABS wheel speed sensor wiring near the hub.
- ⚠️ Replace the axle nut if supplied with the new hub or if the nut is a one-time-use staked style.
- ⚠️ Battery disconnect is not normally required for this repair.
🔧 Required Tools
You'll need the following tools for this repair:
- Safety glasses
- Mechanic gloves
- Wheel chocks
- Floor jack rated 3-ton minimum
- Jack stands rated 3-ton minimum
- 1/2-inch drive breaker bar
- 1/2-inch drive torque wrench rated to 250 ft-lbs
- 19mm lug nut socket
- 32mm axle nut socket
- 13mm socket
- 15mm socket
- 18mm socket
- Ratchet 3/8-inch drive
- Ratchet 1/2-inch drive
- Flathead screwdriver
- Needle-nose pliers
- Rubber mallet
- Dead blow hammer
- Hub puller kit (specialty)
- Caliper hanger hook
- Wire brush
- Brake cleaner spray
- Anti-seize compound
🔩 Required Parts
HowToo sells all the parts you need for this repair:
- Front wheel hub and bearing assembly - Qty: 1 per side
- Front axle nut - Qty: 1 per side
- Brake caliper bracket bolts - Qty: 2 per side if corroded or specified one-time-use
- Brake cleaner - Qty: 1 can
- Anti-seize compound - Qty: 1 small tube
📋 Before You Begin
- 🚗 Park your Escape on level ground, shift to Park, and apply the parking brake.
- 🧱 Place wheel chocks behind the rear wheels.
- 🔩 Slightly loosen the front lug nuts before lifting the vehicle.
- 📌 A hub puller is a tool that bolts to the wheel studs and helps pull a stuck hub out evenly.
- 📌 Anti-seize is a paste that helps prevent metal parts from rusting together later.
- 📌 If replacing both front wheel bearings, do one side at a time so the other side can be used as a visual reference.
🔨 Step-by-Step Instructions
Follow these steps in order:
Step 1: Loosen the axle nut and lug nuts
- Use the 19mm lug nut socket and 1/2-inch drive breaker bar to loosen each lug nut about half a turn.
- Use the 32mm axle nut socket and 1/2-inch drive breaker bar to loosen the axle nut while the tire is still on the ground.
- If the axle nut is staked into a groove, use a flathead screwdriver to carefully lift the staked area first.
- Break it loose before lifting.
Step 2: Raise and support the vehicle
- Use the floor jack rated 3-ton minimum at the front jacking point to lift your Escape.
- Place jack stands rated 3-ton minimum under the proper front support points.
- Gently lower the vehicle onto the jack stands using the floor jack rated 3-ton minimum.
- Lightly shake the vehicle by hand to make sure it is stable before continuing.
Step 3: Remove the wheel
- Use the 19mm lug nut socket and ratchet 1/2-inch drive to remove the lug nuts.
- Remove the wheel and place it flat under the side of the vehicle as an extra safety backup.
Step 4: Remove the brake caliper
- Use the 13mm socket and ratchet 3/8-inch drive to remove the two brake caliper slide pin bolts.
- Slide the caliper off the brake rotor.
- Hang the caliper from the strut spring using the caliper hanger hook.
- Do not stretch or twist the brake hose.
Step 5: Remove the caliper bracket and rotor
- Use the 18mm socket and 1/2-inch drive breaker bar to remove the two caliper bracket bolts.
- Remove the caliper bracket and set it aside.
- Slide the brake rotor off the hub by hand.
- If the rotor is stuck, tap around the rotor hat with the rubber mallet.
- Do not hit the braking surface hard.
Step 6: Remove the axle nut
- Use the 32mm axle nut socket and ratchet 1/2-inch drive to remove the loosened axle nut.
- Push the axle inward slightly by hand.
- If it is stuck, thread the old axle nut on a few turns and tap it gently with the dead blow hammer.
- Do not damage the axle threads.
Step 7: Disconnect the ABS wheel speed sensor wiring from the hub area
- Use needle-nose pliers to release any ABS wire retaining clips attached near the hub or steering knuckle.
- Move the wire aside carefully so it cannot be pulled while the hub is removed.
- Do not yank on the ABS wire.
Step 8: Remove the hub mounting bolts
- From the back side of the steering knuckle, use the 15mm socket and ratchet 1/2-inch drive to remove the hub mounting bolts.
- If the bolts are rusty, use the 1/2-inch drive breaker bar for extra leverage.
- Support the hub with one hand as the final bolt comes out.
Step 9: Remove the old hub and bearing assembly
- Pull the old hub straight out by hand.
- If it is stuck in the knuckle, attach the hub puller kit (specialty) to the wheel studs and tighten it evenly.
- Use the dead blow hammer to tap around the hub flange if needed.
- Remove the hub and guide the axle shaft through the center opening.
Step 10: Clean the mounting surface
- Use the wire brush to clean rust and debris from the steering knuckle where the hub sits.
- Spray the area with brake cleaner spray and let it dry.
- Apply a very thin film of anti-seize compound to the hub bore using a gloved finger.
- Keep anti-seize away from the wheel studs, brake rotor surface, and ABS sensor tip.
Step 11: Install the new hub and bearing assembly
- Guide the axle shaft through the new hub center by hand.
- Seat the new hub squarely into the steering knuckle.
- Install the hub mounting bolts by hand first to avoid cross-threading.
- Use the 15mm socket and torque wrench rated to 250 ft-lbs to tighten the hub bolts to Torque to 115 Nm (85 ft-lbs).
Step 12: Reinstall the ABS wire routing
- Use needle-nose pliers to secure the ABS wire retaining clips back into their original positions.
- Make sure the wire is not touching the axle, rotor, or tire path.
Step 13: Install the new axle nut
- Thread the new axle nut on by hand.
- Use the 32mm axle nut socket and ratchet 1/2-inch drive to snug the nut.
- Final axle nut torque is done after the wheel is installed and the vehicle is on the ground.
Step 14: Reinstall the brake rotor and caliper bracket
- Slide the brake rotor onto the new hub by hand.
- Install the caliper bracket over the rotor.
- Use the 18mm socket and torque wrench rated to 250 ft-lbs to tighten the caliper bracket bolts to Torque to 175 Nm (129 ft-lbs).
Step 15: Reinstall the brake caliper
- Remove the caliper hanger hook and place the caliper back over the rotor and bracket.
- Install the caliper slide pin bolts by hand.
- Use the 13mm socket and torque wrench rated to 250 ft-lbs to tighten the slide pin bolts to Torque to 35 Nm (26 ft-lbs).
Step 16: Reinstall the wheel
- Place the wheel back onto the hub.
- Install the lug nuts by hand.
- Use the 19mm lug nut socket and ratchet 1/2-inch drive to snug the lug nuts in a star pattern.
Step 17: Lower the vehicle and torque the fasteners
- Use the floor jack rated 3-ton minimum to lift slightly, remove the jack stands rated 3-ton minimum, and lower your Escape to the ground.
- Use the 19mm lug nut socket and torque wrench rated to 250 ft-lbs to tighten the lug nuts in a star pattern to Torque to 135 Nm (100 ft-lbs).
- Use the 32mm axle nut socket and torque wrench rated to 250 ft-lbs to tighten the axle nut to Torque to 258 Nm (190 ft-lbs).
- If the new axle nut is a staked style, use the flathead screwdriver to stake the nut into the axle groove.
✅ After Repair
- ✅ Pump the brake pedal several times before driving. This seats the brake caliper back into place.
- ✅ Start with a slow test drive in a quiet area and listen for grinding, humming, clicking, or rubbing.
- ✅ Check that the ABS warning light stays off.
- ✅ After 25-50 miles, recheck lug nut torque with the 19mm lug nut socket and torque wrench rated to 250 ft-lbs to Torque to 135 Nm (100 ft-lbs).
- ✅ If the steering wheel is off-center or the vehicle pulls, have the alignment checked.
💰 DIY vs Shop Cost
Shop Cost: $450-$750 per front side (parts + labor)
DIY Cost: $130-$280 per front side (parts only)
You Save: $320-$470 by doing it yourself!
Shop labor rates vary but typically run $100-$150/hour. This repair takes a shop approximately 1.5-2.5 hours.
🎯 Ready to get started?
HowToo makes it easy: same-day/2-day shipping on every part, plus all the tools and specialty tools you need! Check out the parts and tools sections below to add everything to your cart.
Guide for Wheel Hub replace for these Ford vehicles
| Year Make Model | Sub Model | Engine | Body Style |
|---|---|---|---|
| 2019 Ford Escape | - | Inline 4 2.5L | - |
| 2019 Ford Escape | - | Inline 4 2.0L | - |
| 2019 Ford Escape | - | Inline 4 1.5L | - |
| 2018 Ford Escape | - | Inline 4 2.5L | - |
| 2018 Ford Escape | - | Inline 4 2.0L | - |
| 2018 Ford Escape | - | Inline 4 1.5L | - |
| 2017 Ford Escape | - | Inline 4 2.5L | - |
| 2017 Ford Escape | - | Inline 4 2.0L | - |
| 2017 Ford Escape | - | Inline 4 1.5L | - |
| 2016 Ford Escape | - | Inline 4 2.5L | - |
| 2016 Ford Escape | - | Inline 4 1.6L | - |
| 2016 Ford Escape | - | Inline 4 2.0L | - |
| 2015 Ford Escape | - | Inline 4 2.5L | - |
| 2015 Ford Escape | - | Inline 4 1.6L | - |
| 2015 Ford Escape | - | Inline 4 2.0L | - |
| 2014 Ford Escape | - | Inline 4 2.5L | - |
| 2014 Ford Escape | - | Inline 4 1.6L | - |
| 2014 Ford Escape | - | Inline 4 2.0L | - |
| 2013 Ford Escape | - | Inline 4 2.5L | - |
| 2013 Ford Escape | - | Inline 4 1.6L | - |
| 2013 Ford Escape | - | Inline 4 2.0L | - |