
















How to Replace Front Turn Signal Bulbs on a 2019 Jeep Grand Cherokee
Step-by-step wheel-well access guide with tools, parts, safety tips, and testing for 2011, 2012, 2013, 2014, 2015, 2016, 2017, 2018, 2019, 2020
How to Replace Front Turn Signal Bulbs on a 2019 Jeep Grand Cherokee
Step-by-step wheel-well access guide with tools, parts, safety tips, and testing for 2011, 2012, 2013, 2014, 2015, 2016, 2017, 2018, 2019, 2020


🔧 Grand Cherokee - Front Turn Signal Bulb Replacement
This repair replaces the front turn signal bulbs on your Grand Cherokee. Access is through the front wheel-well liner, so you’ll open the liner, remove the bulb socket from the headlamp housing, and install the new amber bulbs.
Difficulty Level: Beginner | Estimated Time: 30-60 minutes
⚠️ Safety & Precautions
- ⚠️ Turn the lights off and remove the key before starting.
- ⚠️ Let the headlamp area cool for at least 10 minutes if the lights were recently on.
- ⚠️ Do not work near a vehicle supported only by a jack. Use jack stands if lifting.
- ⚠️ If equipped with Quadra-Lift air suspension, enable Tire/Jack Mode before lifting.
- ⚠️ Wear gloves and safety glasses. Wheel-well clips can pop loose suddenly.
🔧 Required Tools
You'll need the following tools for this repair:
- 8mm socket
- 1/4-inch ratchet
- Flat trim clip removal tool
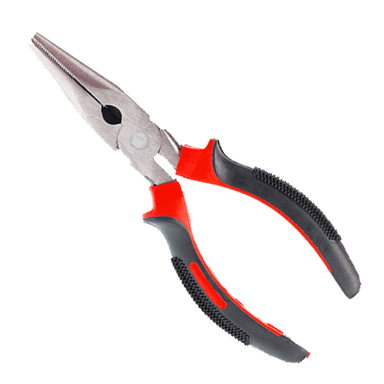
- Needle-nose pliers
- Floor jack (rated 3-ton minimum)
- Jack stands (rated 3-ton minimum)
- Wheel chocks
- Nitrile gloves
- Safety glasses
- Clean microfiber towel
🔩 Required Parts
HowToo sells all the parts you need for this repair:
- Front amber turn signal bulbs - Qty: 2
- Fender liner push clips - Qty: 4-8
📋 Before You Begin
- Park your Grand Cherokee on level ground.
- Set the parking brake.
- Place wheel chocks behind the rear wheels.
- Turn all exterior lights off.
- If equipped with Quadra-Lift, use the center screen: Controls > Suspension > Tire/Jack Mode.
- A trim clip removal tool is a small fork-shaped tool that helps remove plastic clips without breaking them.
🔨 Step-by-Step Instructions
Follow these steps in order:
Step 1: Make Space in the Wheel Well
- Put on safety glasses and nitrile gloves.
- Turn the steering wheel fully away from the side you are working on.
- For the left bulb, turn the wheel to the right. For the right bulb, turn the wheel to the left.
- If you need more space, use the floor jack to raise the front corner.
- Support the vehicle with jack stands before reaching into the wheel-well area.
- Turning the wheel often gives enough room.
Step 2: Open the Front Fender Liner
- Use the flat trim clip removal tool to remove the plastic push clips at the front of the inner fender liner.
- Use the 8mm socket and 1/4-inch ratchet to remove the small screws holding the liner near the front bumper edge.
- Pull the liner back gently by hand to expose the rear of the headlamp housing.
- If a clip breaks, replace it with a new fender liner push clip.
Step 3: Find the Turn Signal Bulb Socket
- Reach behind the headlamp housing through the wheel-well opening.
- Locate the smaller twist-lock bulb socket for the front turn signal.
- The socket will sit in the headlamp housing and have wires attached to it.
- Use a clean microfiber towel if the area is dirty before opening the socket.
Step 4: Remove the Bulb Socket
- Grip the turn signal bulb socket by hand.
- Turn the socket counterclockwise about one quarter turn.
- Pull the socket straight out of the headlamp housing.
- If it is tight, use needle-nose pliers gently on the socket body only.
- Do not pull on the wires.
Step 5: Remove the Old Bulb
- Hold the socket firmly in one hand.
- Pull the old bulb straight out of the socket by hand.
- If the bulb is stuck, use a clean microfiber towel for grip.
- Check the socket for melting, green corrosion, or loose terminals.
- If the socket is burned or corroded, the socket should be replaced before installing the bulb.
Step 6: Install the New Bulb
- Push the new front amber turn signal bulb straight into the socket until fully seated.
- Do not force the bulb. It should slide in smoothly.
- Keep fingers off the glass when possible by wearing nitrile gloves.
- If you touch the glass, wipe it gently with a clean microfiber towel.
Step 7: Test Before Reassembly
- Keep the bulb and socket away from moving parts.
- Turn the ignition to RUN.
- Switch on the turn signal for the side you are repairing.
- Confirm the new bulb flashes normally.
- Turn the ignition off and turn the lights off before continuing.
- If it does not light, remove the bulb by hand, rotate it 180 degrees, reinstall it, and test again.
Step 8: Reinstall the Bulb Socket
- Line up the tabs on the socket with the slots in the headlamp housing.
- Push the socket straight into the housing.
- Turn the socket clockwise about one quarter turn until it locks.
- Make sure it sits flat so water cannot enter the headlamp.
Step 9: Reinstall the Fender Liner
- Move the fender liner back into place by hand.
- Use the 8mm socket and 1/4-inch ratchet to reinstall the screws.
- Torque small fender liner screws snug only, about 2-3 Nm (18-27 in-lbs).
- Push the plastic clips back in by hand until flush.
Step 10: Repeat on the Other Side
- Turn the steering wheel the opposite direction to create access.
- Repeat Steps 2-9 for the other front turn signal bulb.
- Replace both bulbs as a pair for even age and brightness.
✅ After Repair
- Turn on the left turn signal and confirm the front, rear, and dash indicator flash normally.
- Turn on the right turn signal and confirm the front, rear, and dash indicator flash normally.
- Press the hazard switch and confirm both front turn signals flash.
- If the signal flashes very fast, one bulb is not working or the wrong bulb type is installed.
- If Tire/Jack Mode was turned on, turn it off using Controls > Suspension > Tire/Jack Mode.
💰 DIY vs Shop Cost
Shop Cost: $90-$180 (parts + labor)
DIY Cost: $10-$35 (parts only)
You Save: $80-$145 by doing it yourself!
Shop labor rates vary but typically run $100-$150/hour. This repair takes a shop approximately 0.5-1.0 hours.
🎯 Ready to get started?
HowToo makes it easy: same-day/2-day shipping on every part, plus all the tools and specialty tools you need! Check out the parts and tools sections below to add everything to your cart.