









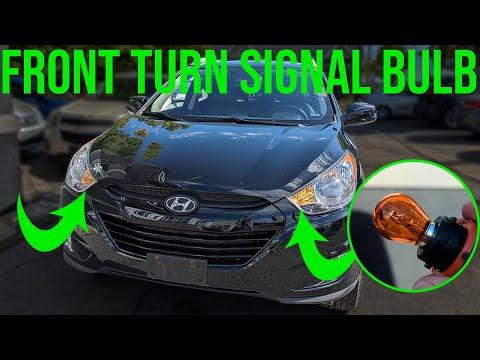






How to Replace Front Turn Signal Bulbs on a 2017 Hyundai Tucson (Step-by-Step)
Beginner-friendly guide with tools/parts list, engine-bay vs fender-liner access, and safety tips
How to Replace Front Turn Signal Bulbs on a 2017 Hyundai Tucson (Step-by-Step)
Beginner-friendly guide with tools/parts list, engine-bay vs fender-liner access, and safety tips


🔧 Tucson - Front Turn Signal Bulb Replacement
Your Tucson’s front turn signal bulb sits in the headlamp housing. Replacing it is usually a quick “twist the socket out, swap the bulb” job, but access can be from the engine bay or through the front fender liner depending on the headlamp setup.
Difficulty Level: Beginner | Estimated Time: 0.5-1.0 hours
⚠️ Safety & Precautions
- ⚠️ Turn the lights OFF and remove the key before starting.
- ⚠️ Let the headlamp area cool if it was recently on.
- ⚠️ Wear gloves—skin oils can shorten bulb life if you touch the glass.
- ⚠️ If you work through the fender liner, keep hands clear of sharp plastic edges.
🔧 Required Tools
You'll need the following tools for this repair:
- Nitrile gloves
- Safety glasses
- Flashlight
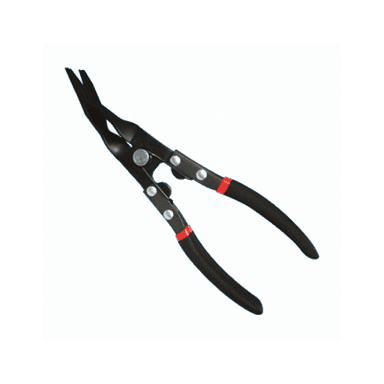
- Trim clip remover (specialty)
- Flat trim tool
- Phillips screwdriver #2
- 10mm socket
- 1/4" ratchet
🔩 Required Parts
HowToo sells all the parts you need for this repair:
- Front turn signal bulb (amber) (match the bulb number from your old bulb) - Qty: 2
- Fender liner push clips - Qty: 2-6
📋 Before You Begin
- Park on level ground and set the parking brake.
- Turn the steering wheel away from the side you’re working on (gives more room at the fender liner).
- Open the hood and have your flashlight ready to identify the correct bulb socket.
🔨 Step-by-Step Instructions
Follow these steps in order:
Step 1: Confirm which socket is the turn signal
- Use a helper to switch the turn signal on, or turn on the hazard lights, then switch them back OFF before touching anything.
- Use a flashlight to locate the blinking bulb area inside the headlamp.
- From behind the headlamp, find the matching bulb socket (the socket closest to the blinking reflector area).
Step 2: Choose your access path
- If you can clearly reach the turn signal socket from the engine bay, use Path A.
- If your hand can’t reach it, use Path B (through the fender liner).
Step 3 (Path A): Access from the engine bay
- Use a flashlight to see the socket locking tabs.
- Grip the socket firmly and rotate it about 1/4 turn counterclockwise by hand, then pull it straight out.
- If something blocks your hand, remove the nearest small air duct/cover fasteners using a 10mm socket and 1/4" ratchet, then try again.
Step 4 (Path B): Access through the front fender liner
- Turn the front wheel outward for the side you’re working on.
- Remove the front portion of the fender liner fasteners:
- Use a trim clip remover (specialty) or flat trim tool to pop out plastic push clips.
- Use a Phillips screwdriver #2 for any screws.
- Use a 10mm socket and 1/4" ratchet for any 10mm bolts.
- Pull the liner back just enough to reach the back of the headlamp (don’t force it).
- Rotate the turn signal socket about 1/4 turn counterclockwise, then pull it out.
Step 5: Remove the old bulb from the socket
- Wear nitrile gloves.
- Pull the bulb straight out of the socket (most are a simple pull-fit).
- Tip: Wiggle gently—don’t yank.
- Look at the old bulb and note the printed bulb number so you buy the exact match.
Step 6: Install the new bulb
- With nitrile gloves on, push the new bulb straight into the socket until fully seated.
- If you accidentally touch the glass, wipe it clean (use a lint-free cloth lightly dampened with rubbing alcohol, then let it dry).
Step 7: Reinstall the socket and reassemble
- Insert the socket back into the headlamp housing and rotate clockwise until it locks.
- If you used Path B, reinstall the fender liner fasteners using the Phillips screwdriver #2 and/or 10mm socket and 1/4" ratchet.
- Make sure the liner sits flat so it won’t rub the tire.
✅ After Repair
- Test left and right turn signals, then hazards.
- Verify the flash rate is normal (very fast flashing usually means a bulb isn’t working or isn’t seated).
- Check that the socket is fully locked (no moisture gap).
💰 DIY vs Shop Cost
Shop Cost: $60-$140 (parts + labor)
DIY Cost: $6-$30 (parts only)
You Save: $54-$110 by doing it yourself!
Shop labor rates vary but typically run $100-$150/hour. This repair takes a shop approximately 0.3-0.7 hours.
🎯 Ready to get started?
HowToo makes it easy: same-day/2-day shipping on every part, plus all the tools and specialty tools you need! Check out the parts and tools sections below to add everything to your cart.
Guide for replace for these Hyundai vehicles
| Year Make Model | Sub Model | Engine | Body Style |
|---|