









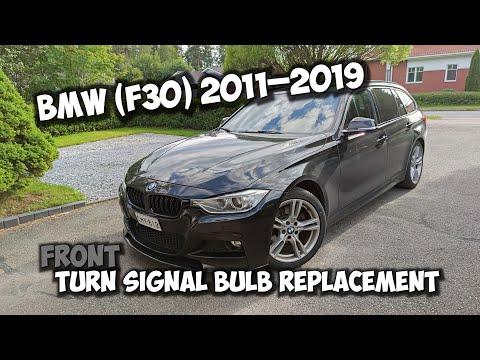







How to Replace Front Turn Signal Bulbs on a 2016 BMW 340i (Halogen vs LED)
Step-by-step wheel-well access instructions, required tools/parts, and what to do if your turn signal is a sealed LED module for 2016, 2017, 2018
How to Replace Front Turn Signal Bulbs on a 2016 BMW 340i (Halogen vs LED)
Step-by-step wheel-well access instructions, required tools/parts, and what to do if your turn signal is a sealed LED module for 2016, 2017, 2018


🔧 340i - Front Turn Signal Bulb Replacement
On your 340i, front turn signals are either a replaceable bulb (on halogen headlamps) or a non-serviceable LED built into the headlamp (on xenon/LED headlamps). I’ll show the bulb-replacement method, plus what to do if your turn signal is LED.
Difficulty Level: Beginner | Estimated Time: 0.3-0.8 hours
⚠️ Safety & Precautions
- ⚠️ Turn ignition off and remove the key/fob from the car.
- ⚠️ Let the headlamp area cool if lights were recently on.
- ⚠️ Don’t touch a new bulb’s glass with bare fingers; skin oils can shorten bulb life.
- ⚠️ If equipped with xenon/LED headlamps, avoid opening any high-voltage components; the turn signal is typically not a replaceable bulb.
🔧 Required Tools
You'll need the following tools for this repair:
- Nitrile gloves
- Safety glasses
- Flashlight
- Trim removal tool
- Torx T20 screwdriver
- Torx T25 screwdriver
🔩 Required Parts
HowToo sells all the parts you need for this repair:
- Front turn signal bulb (amber, halogen-headlamp type) - Qty: 1 Replace in pairs recommended
- Headlamp rear access cover gasket (if damaged) - Qty: 1
📋 Before You Begin
- Park on level ground, shift to Park, and set the parking brake.
- Turn the steering wheel away from the side you’re working on (more room in the fender liner).
- A “trim removal tool” is a plastic pry tool used to pop clips without scratching.
🔨 Step-by-Step Instructions
Follow these steps in order:
Step 1: Verify which headlamp type you have
- Turn the hazard lights on briefly, then turn them back off.
- If you can see a normal bulb socket area behind the headlamp with a removable round/oval cap, you likely have halogen headlamps (bulb is replaceable).
- If your headlamp is a sealed-looking unit with LED “light pipes” and no obvious bulb access, your front turn signal is likely LED (not a bulb).
Step 2: Create access (wheel-well method)
- Use the flashlight to locate the front portion of the fender liner behind the bumper/headlamp area.
- Use the trim removal tool to pop out the plastic push-clips (center pin style) along the front edge of the liner.
- If your liner uses screws, remove them with a Torx T20 screwdriver or Torx T25 screwdriver.
- Pull the liner back just enough to reach the rear of the headlamp.
Step 3: Remove the headlamp rear access cover (halogen headlamps)
- Put on nitrile gloves and safety glasses.
- Find the rear access cover on the back of the headlamp.
- Twist the cover counterclockwise by hand and remove it. If it’s tight, use your grip (avoid tools that can crack plastic).
- Set the cover somewhere clean so dirt doesn’t get inside it.
Step 4: Remove the turn signal bulb/socket (halogen headlamps)
- Locate the turn signal bulb holder (it will be near the outer side of the headlamp).
- Twist the bulb holder counterclockwise by hand and pull it straight out.
- Remove the bulb from the holder (most styles pull straight out; some require a gentle twist).
- Don’t force it—wiggle gently to avoid cracking the holder.
Step 5: Install the new bulb (halogen headlamps)
- Install the new amber bulb into the holder using nitrile gloves.
- Reinsert the bulb holder into the headlamp.
- Twist clockwise by hand until it fully seats (snug, not over-tight).
Step 6: Reinstall the access cover and fender liner
- Reinstall the rear access cover and twist clockwise by hand until fully seated.
- Reposition the fender liner.
- Reinstall screws with the Torx T20 screwdriver or Torx T25 screwdriver.
- Reinstall push-clips by pushing the clip body in, then pressing the center pin flush using the trim removal tool.
Step 7: If your front turn signal is LED (no bulb)
- If there is no bulb holder/access cap, the turn signal is typically an LED inside the headlamp and is not serviced as a bulb.
- Common fixes are replacing the headlamp turn-signal LED module (if applicable) or replacing/repairing the headlamp assembly.
- Use the flashlight to look for a small bolted-on module on the rear/bottom of the headlamp; if present, it may be replaceable with Torx T20 screwdriver/Torx T25 screwdriver (varies by headlamp version).
✅ After Repair
- Turn ignition on and test: left signal, right signal, and hazards.
- Walk around the car to confirm flash rate is normal (a fast flash usually means a bulb is still out).
- Make sure the headlamp rear cover is fully sealed to prevent moisture/fogging.
💰 DIY vs Shop Cost
Shop Cost: $80-$180 (parts + labor)
DIY Cost: $10-$40 (parts only)
You Save: $70-$140 by doing it yourself!
Shop labor rates vary but typically run $100-$150/hour. This repair takes a shop approximately 0.3-0.8 hours.
🎯 Ready to get started?
HowToo makes it easy: same-day/2-day shipping on every part, plus all the tools and specialty tools you need! Check out the parts and tools sections below to add everything to your cart.