









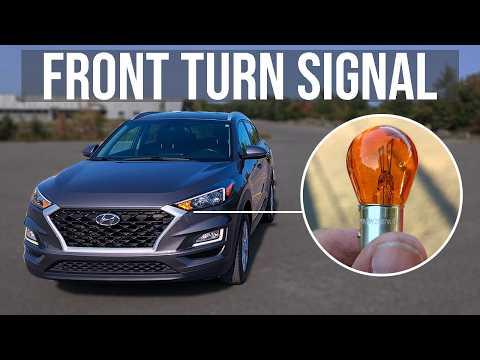






How to Replace Front Turn Signal Bulbs on a 2015-2024 Hyundai Tucson
Step-by-step DIY guide with 2357A amber bulb, tools, safety tips, and testing
How to Replace Front Turn Signal Bulbs on a 2015-2024 Hyundai Tucson
Step-by-step DIY guide with 2357A amber bulb, tools, safety tips, and testing for 2015, 2016, 2017, 2018, 2019, 2020, 2021, 2022, 2023, 2024


🔧 Tucson - Front Turn Signal Bulb Replacement
This repair replaces the front turn signal bulbs in your Tucson. A burned-out turn signal bulb can cause fast blinking, reduced visibility, or a warning from other drivers because the front signal is not flashing properly.
Difficulty Level: Beginner | Estimated Time: 15-30 minutes
⚠️ Safety & Precautions
- ⚠️ Turn the ignition off and remove the key or keep the smart key away from the vehicle before working near the lamps.
- ⚠️ Let the headlamp area cool if the lights were recently on.
- ⚠️ Do not touch the glass part of the new bulb with bare fingers. Skin oil can create hot spots and shorten bulb life.
- ⚠️ Battery disconnect is not required for this bulb replacement.
🔧 Required Tools
You'll need the following tools for this repair:
- Nitrile gloves
- Safety glasses
- Clean microfiber towel
- Small flashlight
🔩 Required Parts
HowToo sells all the parts you need for this repair:
- Front turn signal bulb 2357A amber - Qty: 1 per side
- Front turn signal bulbs 2357A amber - Qty: 2 if replacing both sides
📋 Before You Begin
- 🅿️ Park your Tucson on level ground and set the parking brake.
- 💡 Turn the headlight switch and hazard lights off.
- 🧤 Put on nitrile gloves before handling the new bulb.
- 🔎 Open the hood and locate the rear of the headlamp assembly on the side you are replacing.
- 📌 The bulb socket is the plastic holder that twists into the back of the headlamp and holds the bulb.
🔨 Step-by-Step Instructions
Follow these steps in order:
Step 1: Open the Hood
- Use your hand to pull the hood release lever inside the cabin.
- Use your hand to release the hood safety latch at the front of the hood.
- Lift the hood and secure it with the hood prop rod if equipped.
- Use a small flashlight to look behind the front headlamp assembly.
Step 2: Find the Front Turn Signal Bulb Socket
- Use a small flashlight to identify the turn signal bulb socket at the rear of the headlamp assembly.
- The front turn signal bulb socket is separate from the headlight bulb socket and twists into the lamp housing.
- Look for the socket leading to the amber turn signal section of the headlamp.
- Work slowly; space is tight.
Step 3: Remove the Bulb Socket
- Use your gloved hand to grip the turn signal bulb socket firmly.
- Turn the socket counterclockwise about a quarter turn.
- Pull the socket straight out of the headlamp housing.
- No bolts are used here, so there is no torque specification for removal.
Step 4: Remove the Old Bulb
- Use your gloved hand to press the old bulb slightly into the socket.
- Turn the bulb counterclockwise to unlock it.
- Pull the bulb straight out of the socket.
- If the bulb is broken, use safety glasses and remove glass pieces carefully with a clean microfiber towel.
Step 5: Install the New Bulb
- Use nitrile gloves to handle the new 2357A amber front turn signal bulb.
- Line up the small locking pins on the bulb with the slots in the socket.
- Push the bulb gently into the socket.
- Turn the bulb clockwise until it locks in place.
- If you touch the glass by mistake, use a clean microfiber towel to wipe it before installation.
Step 6: Reinstall the Bulb Socket
- Use your gloved hand to insert the bulb socket back into the headlamp housing.
- Line up the tabs on the socket with the openings in the housing.
- Turn the socket clockwise about a quarter turn until it locks.
- Do not overtighten it. It only needs to be snug by hand.
- No torque specification applies because this socket is hand-tightened only.
Step 7: Test the Turn Signal
- Use your hand to turn the ignition to accessory or start the vehicle.
- Switch on the left or right turn signal for the side you repaired.
- Walk to the front and confirm the new bulb flashes normally.
- Turn on the hazard lights and confirm both front signals flash.
- If the signal flashes very fast, the bulb may not be seated correctly or the wrong bulb may be installed.
Step 8: Close the Hood
- Use your hand to lower the hood carefully.
- Make sure no tools or towels are left in the engine bay.
- Close the hood firmly and confirm it latches.
✅ After Repair
- ✅ Confirm the repaired turn signal flashes at the same speed as the opposite side.
- ✅ Check the front hazard lights again before driving.
- ✅ No scan tool reset, coding, or infotainment reset is required.
- ✅ Dispose of the old bulb safely, especially if the glass is cracked.
💰 DIY vs Shop Cost
Shop Cost: $40-$90 per side (parts + labor)
DIY Cost: $5-$20 per bulb (parts only)
You Save: $35-$70 by doing it yourself!
Shop labor rates vary but typically run $100-$150/hour. This repair takes a shop approximately 0.2-0.5 hours.
🎯 Ready to get started?
HowToo makes it easy: same-day/2-day shipping on every part, plus all the tools and specialty tools you need! Check out the parts and tools sections below to add everything to your cart.
Guide for Turn Signal Light Bulb replace for these Hyundai vehicles
| Year Make Model | Sub Model | Engine | Body Style |
|---|---|---|---|
| 2024 Hyundai Tucson | - | - | - |
| 2023 Hyundai Tucson | - | - | - |
| 2022 Hyundai Tucson | - | - | - |
| 2021 Hyundai Tucson | - | - | - |
| 2020 Hyundai Tucson | - | - | - |
| 2019 Hyundai Tucson | - | - | - |
| 2018 Hyundai Tucson | - | - | - |
| 2017 Hyundai Tucson | - | - | - |
| 2016 Hyundai Tucson | - | - | - |
| 2015 Hyundai Tucson | - | - | - |