









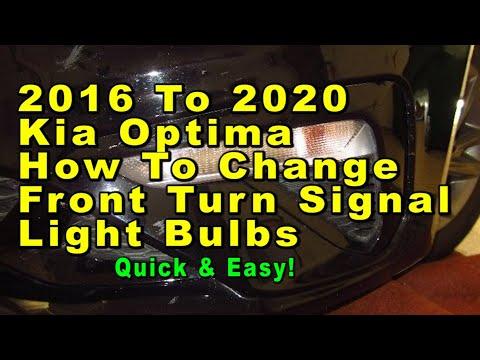







How to Replace Front Turn Signal Bulbs on a 2014-2016 Kia Cadenza
Step-by-step wheel-well access instructions with required tools, parts, safety tips, and testing
How to Replace Front Turn Signal Bulbs on a 2014-2016 Kia Cadenza
Step-by-step wheel-well access instructions with required tools, parts, safety tips, and testing for 2014, 2015, 2016


🔧 Cadenza - Front Turn Signal Bulb Replacement
Your front turn signal bulbs are service items that can burn out over time. Replacing them restores turn signal visibility and keeps you road-legal.
Difficulty Level: Beginner | Estimated Time: 0.5-1.0 hours
⚠️ Safety & Precautions
- ⚠️ Turn the lights off and remove the key before starting.
- ⚠️ Let the headlamp area cool if you were just driving (bulbs get hot).
- ⚠️ Do not touch the new bulb’s glass with bare fingers; skin oils can shorten bulb life.
- ⚠️ Support the splash shield so it doesn’t tear when clips are removed.
- ⚠️ Battery disconnect is not required for this repair.
🔧 Required Tools
You'll need the following tools for this repair:
- Safety glasses
- Nitrile gloves
- Flashlight
- Trim clip removal tool
- Phillips screwdriver #2
- 10mm socket
- 1/4" drive ratchet
🔩 Required Parts
HowToo sells all the parts you need for this repair:
- Front turn signal bulb (amber) - Replace in pairs - Qty: 2
📋 Before You Begin
- Park on level ground and set the parking brake.
- Turn the steering wheel fully away from the side you’re working on (this creates more room at the wheel well).
- Tip: Do one side first, then mirror it.
🔨 Step-by-Step Instructions
Follow these steps in order:
Assumption: Bulb access is through the front wheel-well splash shield (common on the Cadenza). If yours has easy rear-of-headlamp access from the engine bay, use the “Engine-bay access” steps below.
Step 1: Create access at the wheel well
- Turn the steering wheel fully to the opposite side to open up space.
- Use a flashlight to locate the small front section of the inner fender liner (splash shield).
Step 2: Remove the splash shield fasteners
- Use a trim clip removal tool to pop out the plastic push-clips.
- If equipped with screws/bolts, remove them with a Phillips screwdriver #2 or 10mm socket with a 1/4" drive ratchet.
- Pull the splash shield back just enough to get your hand to the back of the front lamp area. Tip: Don’t fully remove the liner.
Step 3: Find the turn signal bulb socket
- Reach behind the front lamp and find the turn signal bulb socket (it will twist into the housing).
- Use a flashlight to confirm you’re on the correct socket (turn signal is typically an amber bulb).
Step 4: Remove the bulb socket
- Twist the socket counterclockwise (about a quarter-turn) by hand and pull it straight out.
- If it’s tight, wear nitrile gloves for grip and wiggle gently—don’t force the housing.
Step 5: Remove the old bulb
- Pull the bulb straight out of the socket (most are push-in style).
- If it’s a twist-lock bulb (less common), twist the bulb slightly to release it.
Step 6: Install the new bulb
- Put on nitrile gloves so you don’t touch the bulb glass.
- Install the new amber bulb into the socket the same way the old one came out.
- Tip: Compare old and new bases before installing.
Step 7: Reinstall the socket and test
- Reinsert the socket into the housing and twist clockwise until it locks.
- Before buttoning up the liner, turn the ignition on and test the signal and hazards.
- If it doesn’t work, remove the socket and rotate the bulb in the socket to ensure it’s fully seated.
Step 8: Reattach the splash shield
- Reposition the liner.
- Reinstall clips using the trim clip removal tool (press the clip body in, then lock the center pin).
- Reinstall screws/bolts with a Phillips screwdriver #2 or 10mm socket and 1/4" drive ratchet until snug.
Engine-bay access (if your Cadenza has it):
- Open the hood and use a flashlight to look behind the headlamp assembly.
- Remove any small duct/cover fasteners using a 10mm socket and 1/4" drive ratchet.
- Twist the turn signal socket counterclockwise by hand, replace the bulb, then reinstall and test.
✅ After Repair
- Verify left and right turn signals flash at a normal rate.
- Turn on hazards to confirm both front turn signals work.
- At night, confirm the bulb is bright and the lens looks evenly lit.
- If you still get fast-flash, recheck the bulb seating and that the bulb type matches the original.
💰 DIY vs Shop Cost
Shop Cost: $60-$140 (parts + labor)
DIY Cost: $8-$30 (parts only)
You Save: $50-$110 by doing it yourself!
Shop labor rates vary but typically run $100-$150/hour. This repair takes a shop approximately 0.5-1.0 hours.
🎯 Ready to get started?
HowToo makes it easy: same-day/2-day shipping on every part, plus all the tools and specialty tools you need! Check out the parts and tools sections below to add everything to your cart.
Guide for Turn Signal Light Bulb replace for these Kia vehicles
| Year Make Model | Sub Model | Engine | Body Style |
|---|---|---|---|
| 2016 Kia Cadenza | - | - | - |
| 2015 Kia Cadenza | - | - | - |
| 2014 Kia Cadenza | - | - | - |