















How to Replace Front Struts & Rear Shock Absorbers on a 2017 GMC Sierra 1500
Step-by-step suspension replacement with required tools, parts list, torque specs, safety tips, and alignment notes
How to Replace Front Struts & Rear Shock Absorbers on a 2017 GMC Sierra 1500
Step-by-step suspension replacement with required tools, parts list, torque specs, safety tips, and alignment notes


🔧 Sierra 1500 - Shock Absorber Replacement
On your Sierra 1500, the “shocks” can mean the rear shock absorbers and/or the front strut assemblies (front shocks are built into the struts). Replacing worn shocks/struts restores ride control, braking stability, and reduces bouncing and uneven tire wear.
Difficulty Level: Intermediate | Estimated Time: Rear: 1-2 hours | Front struts: 3-5 hours
⚠️ Safety & Precautions
- 🛑 Support the truck with jack stands; never rely on a jack.
- 🧱 Chock wheels and work on level ground.
- 🔥 Let suspension/brakes cool before working near them.
- ⚡ If your Sierra 1500 has electronically-controlled shocks (wires going to the shock/strut), do not pull on the wiring—unplug connectors carefully.
- 🌀 If replacing front struts: avoid swapping only the strut insert with a spring compressor unless you’re experienced; the spring stores a lot of force.
🔧 Required Tools
You'll need the following tools for this repair:
- Floor jack (rated 3-ton minimum)
- Jack stands (rated 3-ton minimum)
- Wheel chocks
- Safety glasses
- Mechanic gloves
- 22mm socket
- 1/2" drive ratchet
- 1/2" drive breaker bar
- Torque wrench (20-250 ft-lbs range)
- Socket set (10mm-24mm)
- Wrench set (10mm-24mm)
- Pry bar
- Needle-nose pliers
- Trim clip tool
- Penetrating oil
- Paint marker
- Spring compressor (specialty)
🔩 Required Parts
HowToo sells all the parts you need for this repair:
- Rear shock absorbers - Replace in pairs - Qty: 2
- Front complete strut assemblies (quick-struts) - Replace in pairs - Qty: 2
- Front strut-to-steering knuckle bolts/nuts (recommended) - Qty: 1 set
- Rear shock mounting hardware (recommended) - Qty: 1 set
📋 Before You Begin
- ✅ Quick check: Are we replacing the rear shocks, the front struts, or all four?
- ✅ Look at the shocks/struts: do you see an electrical connector going into them?
- Park on level ground, shift to Park, and set the parking brake.
- Loosen lug nuts 1/2 turn using a 22mm socket before lifting.
- Tip: Spray bolts with penetrating oil first.
🔨 Step-by-Step Instructions
Follow these steps in order:
Step 1: Lift and secure the truck
- Use a floor jack (rated 3-ton minimum) to lift the end you’re working on.
- Set the frame on jack stands (rated 3-ton minimum) and keep the floor jack lightly supporting.
- Remove the wheels with a 22mm socket and 1/2" drive ratchet.
Step 2: Rear shocks (typical rear shock absorber replacement)
- Support the rear axle with the floor jack (rated 3-ton minimum) so it can’t drop suddenly.
- If equipped, unplug the shock electrical connector using needle-nose pliers (only for the lock tab) and your fingers to separate the connector.
- Remove the lower shock bolt using a socket set (10mm-24mm) and 1/2" drive breaker bar.
- Remove the upper shock nut/bolt using a wrench set (10mm-24mm) and socket set (10mm-24mm).
- Remove the shock. You may need a pry bar to slide the lower bushing off the mount.
- Install the new shock in the same orientation.
- Snug hardware first, then final tighten with a torque wrench (20-250 ft-lbs range):
- Torque to 100 Nm (74 ft-lbs) for the rear lower shock bolt.
- Torque to 25 Nm (18 ft-lbs) for the rear upper shock nut/bolt.
- Reconnect the electrical connector (if equipped) by pushing until it clicks.
- Repeat on the other side (replace rear shocks in pairs).
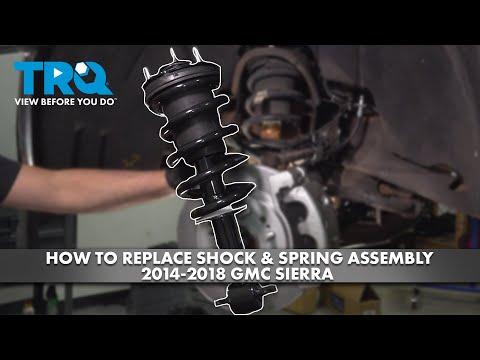
Step 3: Front struts (replace complete strut assemblies)
- Open the hood. Locate the strut top mount nuts at the top of the strut tower.
- Remove any wire/brake hose brackets attached to the strut using a socket set (10mm-24mm) and a trim clip tool for clips.
- If equipped, unplug the strut electrical connector carefully using needle-nose pliers (tab only).
- Disconnect the sway bar end link from the strut using a wrench set (10mm-24mm) and socket set (10mm-24mm).
- Mark the strut-to-knuckle area with a paint marker so you can reinstall similarly.
- Remove the strut-to-steering knuckle bolts/nuts using a socket set (10mm-24mm) and 1/2" drive breaker bar.
- Support the lower control arm/knuckle area lightly with the floor jack (rated 3-ton minimum) to reduce tension.
- From the engine bay, remove the strut top mount nuts using a socket set (10mm-24mm).
- Remove the strut assembly from the wheel well. A pry bar helps guide it out.
- Install the new complete strut assembly. Start the top nuts by hand first.
- Reinstall the strut-to-knuckle bolts/nuts and tighten with a torque wrench (20-250 ft-lbs range):
- Torque to 175 Nm (129 ft-lbs) for the front strut-to-steering knuckle bolts/nuts.
- Torque to 25 Nm (18 ft-lbs) for the front strut top mount nuts.
- Reinstall the sway bar end link and tighten with a torque wrench (20-250 ft-lbs range):
- Torque to 65 Nm (48 ft-lbs) for the sway bar end link nut.
- Reinstall brackets/clips using a socket set (10mm-24mm) and trim clip tool.
- Reconnect the electrical connector (if equipped) until it clicks.
- Repeat on the other side (replace front struts in pairs).
Step 4: Reinstall wheels and lower the truck
- Install wheels and hand-tighten lug nuts.
- Lower the truck using the floor jack (rated 3-ton minimum).
- Tighten lug nuts in a star pattern using a torque wrench (20-250 ft-lbs range):
- Torque to 190 Nm (140 ft-lbs) for the wheel lug nuts.
✅ After Repair
- 🔍 Do a quick visual check that brake hoses and ABS wires are clipped back into place and not stretched.
- 🚗 Test drive at low speed first. Listen for clunks over small bumps.
- 🧭 If you replaced front struts: get a 4-wheel alignment as soon as possible.
- If you have electronic shocks and a warning light appears, a scan may be needed to check for stored suspension codes.
💰 DIY vs Shop Cost
Shop Cost: $700-$2,000 (parts + labor)
DIY Cost: $250-$1,200 (parts only)
You Save: $450-$800 by doing it yourself!
Shop labor rates vary but typically run $100-$150/hour. This repair takes a shop approximately 2-5 hours.
🎯 Ready to get started?
HowToo makes it easy: same-day/2-day shipping on every part, plus all the tools and specialty tools you need! Check out the parts and tools sections below to add everything to your cart.
Guide for replace for these GMC vehicles
| Year Make Model | Sub Model | Engine | Body Style |
|---|