









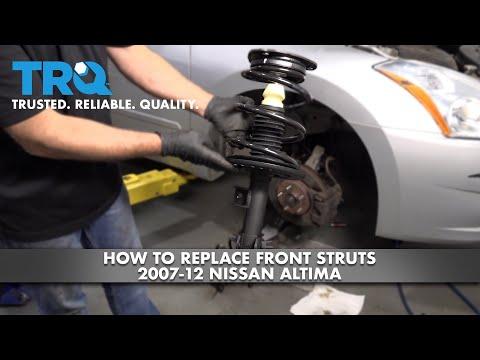







How to Replace Front Struts & Rear Shock Absorbers on a 2007 Nissan Altima
Step-by-step DIY instructions with required tools, parts list, safety tips, and alignment notes for 2007, 2008, 2009, 2010, 2011, 2012
How to Replace Front Struts & Rear Shock Absorbers on a 2007 Nissan Altima
Step-by-step DIY instructions with required tools, parts list, safety tips, and alignment notes for 2007, 2008, 2009, 2010, 2011, 2012


🔧 Altima - Shock/Strut Replacement
Your Altima uses front struts (shock + spring assembly) and rear shocks (separate from the spring). The steps and required tools change a lot depending on whether you’re doing the front, rear, or all four—and whether you’re swapping complete assemblies or transferring the spring.
Difficulty Level: Intermediate | Estimated Time: 2-6 hours
I need 2 quick details before I give the exact step-by-step:
- ❓ Are you replacing front struts, rear shocks, or all four?
- ❓ For the front, are you installing complete “quick-strut” assemblies (pre-assembled), or reusing your springs (requires a coil spring compressor)?
⚠️ Safety & Precautions
- ⚠️ Never remove the top strut nut with the spring loaded unless the spring is safely compressed.
- ⚠️ Support the car with jack stands; never rely on a floor jack alone.
- ⚠️ If you disconnect any brake hose/ABS wire brackets, re-secure them exactly as factory to avoid rubbing or failure.
🔧 Required Tools
You'll need the following tools for this repair:
- Floor jack (rated 3-ton minimum)
- Jack stands (rated 3-ton minimum)
- Wheel chocks
- Breaker bar (1/2")
- Torque wrench (10-150 ft-lbs range)
- Socket set (10mm-22mm, 1/2")
- Wrench set (10mm-22mm)
- Pry bar (18")
- Needle-nose pliers
- Flat trim tool
- Penetrating oil
- Paint marker
- Rubber mallet
- Coil spring compressor (specialty)
- Safety glasses
- Mechanic gloves
🔩 Required Parts
HowToo sells all the parts you need for this repair:
- Front strut assemblies - Replace in pairs - Qty: 2
- Rear shock absorbers - Replace in pairs - Qty: 2
- Front strut mount/bearing kit - If reusing springs - Qty: 2
- Front bump stop and dust boot kit - If not included - Qty: 2
- Rear upper shock mount kit - If worn/noisy - Qty: 2
- Replacement self-locking nuts/bolts (strut/shock hardware) - As needed - Qty: 1 set
📋 Before You Begin
- Park on level ground, set the parking brake, and chock the rear wheels (or front wheels if working on the rear).
- Loosen lug nuts with a breaker bar before lifting the car.
- Spray penetrating oil on strut-to-knuckle bolts and rear shock bolts 10–15 minutes before removal.
- Plan an alignment: any front strut replacement typically requires a professional wheel alignment afterward.
🔨 Step-by-Step Instructions
Follow these steps in order:
Pending your answers to the 2 questions above
- Once you tell me front/rear/all four and quick-strut vs spring transfer, I’ll give you the exact Nissan-correct procedure with the correct torque specs and the cleanest beginner-friendly workflow.
✅ After Repair
- Double-check all fasteners are torqued, and that brake hose/ABS wire brackets are secured.
- Test drive slowly at first and listen for clunks over bumps.
- Get an alignment after front struts to prevent tire wear and pulling.
💰 DIY vs Shop Cost
Shop Cost: $700-$1,800 (parts + labor)
DIY Cost: $180-$900 (parts only)
You Save: $520-$900 by doing it yourself!
Shop labor rates vary but typically run $100-$150/hour. This repair takes a shop approximately 2-6 hours.
🎯 Ready to get started?
HowToo makes it easy: same-day/2-day shipping on every part, plus all the tools and specialty tools you need! Check out the parts and tools sections below to add everything to your cart.