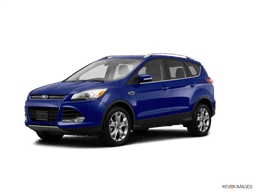









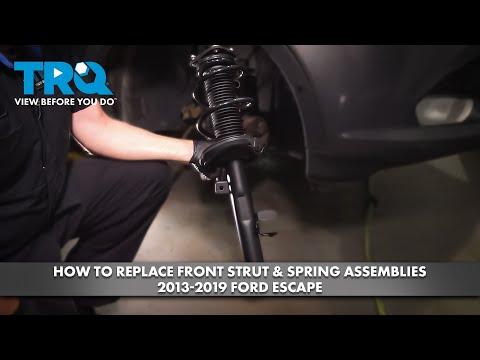







How to Replace Front Struts on a 2014 Ford Escape (MacPherson Quick-Strut Guide)
Step-by-step DIY instructions with required tools/parts, safety tips, and key torque specs
How to Replace Front Struts on a 2014 Ford Escape (MacPherson Quick-Strut Guide)
Step-by-step DIY instructions with required tools/parts, safety tips, and key torque specs


🔧 Escape - Strut Replacement
On your Escape, the front uses MacPherson struts (spring + shock as one unit). Replacing them restores ride control, steering stability, and braking stability—especially if you have clunking, bouncing, or uneven tire wear.
Difficulty Level: Advanced | Estimated Time: 3-6 hours (front pair)
⚠️ Safety & Precautions
- ⚠️ The coil spring is under extreme tension—never remove the top nut without a spring compressor or a complete pre-assembled strut.
- ⚠️ Support the vehicle on jack stands; never rely on a floor jack alone.
- ⚠️ Keep hands clear of pinch points at the steering knuckle and lower control arm.
- ⚠️ After strut replacement, you need a 4-wheel alignment as soon as possible to avoid tire wear and pulling.
- ⚠️ If you unplug ABS/brake sensor wiring or move it incorrectly, you can damage it—route and clip it exactly as original.
🔧 Required Tools
You'll need the following tools for this repair:
- Floor jack (rated 3-ton minimum)
- Jack stands (rated 3-ton minimum)
- Wheel chocks
- Safety glasses
- Mechanic gloves
- Breaker bar (1/2")
- Torque wrench (20-250 ft-lbs)
- Socket set (8mm-24mm, 1/2")
- Wrench set (8mm-24mm)
- Torx bit set (T25-T55)
- Allen key set (metric)
- Pry bar (18")
- Hammer (2 lb)
- Punch set
- Needle-nose pliers
- Trim clip removal tool
- Penetrating oil
- Paint marker
- Strut spring compressor (specialty)
- Strut spreader bit (specialty)
🔩 Required Parts
HowToo sells all the parts you need for this repair:
- Front strut assemblies - Replace in pairs - Qty: 2
- Front strut mount/bearing kit - Replace in pairs - Qty: 2
- Front sway bar end links - Optional but recommended if worn - Qty: 2
- Front strut pinch bolt and nut kit - Optional (recommended if corroded) - Qty: 2
📋 Before You Begin
- Park on level ground, set the parking brake, and chock the rear wheels.
- Crack the front lug nuts loose 1/2 turn before lifting (do not remove yet).
- Spray penetrating oil on the strut-to-knuckle pinch bolt and sway bar end link nuts.
- Decide which method you’re using:
- Complete quick-strut (pre-assembled): no spring compressor needed.
- Reuse your spring: you must use a spring compressor (a clamp tool that safely squeezes the spring).
🔨 Step-by-Step Instructions
Follow these steps in order:
Step 1: Lift and remove the front wheel
- Use a 19mm socket and breaker bar to loosen lug nuts (if not already).
- Use a floor jack (rated 3-ton minimum) to lift the front of your Escape at the proper jacking point.
- Place jack stands (rated 3-ton minimum) under the front support points, then lower onto stands.
- Remove the wheel using a 19mm socket.
Step 2: Free the brake hose/ABS wire from the strut
- Locate the brake hose bracket and ABS wire clips on the strut body.
- Use needle-nose pliers and a trim clip removal tool to remove clips (don’t yank the wire).
- If there’s a small bracket bolt, remove it using an appropriate socket set (8mm-24mm).
- Tip: Take a photo for re-routing later.
Step 3: Disconnect the sway bar end link from the strut
- Hold the end link stud with an Allen key set (metric) (or Torx, depending on your hardware) to keep it from spinning.
- Remove the nut using a wrench set (8mm-24mm) or socket set (8mm-24mm).
- If it’s stuck, apply penetrating oil and use a breaker bar (1/2").
Step 4: Mark the strut-to-knuckle position
- Use a paint marker to mark the relationship between the strut and steering knuckle.
- This helps keep alignment close enough to drive to the alignment shop.
Step 5: Remove the strut-to-knuckle pinch bolt
- Support the lower control arm/knuckle area lightly with the floor jack so it doesn’t drop suddenly.
- Remove the pinch bolt and nut using a socket set (8mm-24mm) and breaker bar (1/2").
- If the bolt is seized, use penetrating oil, a hammer (2 lb), and punch set to drive it out carefully.
Step 6: Spread the knuckle and separate the strut
- Insert a strut spreader bit (specialty) into the knuckle slot and rotate to open the clamp slightly.
- Use a pry bar (18") to help work the strut out while keeping the knuckle supported.
- Go slowly to avoid over-stressing the CV axle (AWD axle) or pulling the inner joint apart.
Step 7: Remove the upper strut mount nuts
- Open the hood and locate the strut tower.
- Remove any covers using a trim clip removal tool.
- Remove the upper mount nuts using a socket set (8mm-24mm).
- Hold the strut from below as you remove the last nut, then lower the strut out.
Step 8: If using complete quick-struts, skip to Step 10
- If you are reusing the spring, continue to Step 9.
Step 9: Transfer spring and mount (only if not using quick-struts)
- Install a strut spring compressor (specialty) on opposite sides of the spring and tighten evenly until the spring is loose from the mount.
- Remove the strut shaft top nut using a socket set (8mm-24mm) while holding the shaft with an Allen key set (metric) (method varies by strut design).
- Transfer the mount/bearing, spring isolators, and dust boot/bump stop as needed.
- Reassemble and slowly release the compressor evenly, making sure the spring ends seat correctly in their pockets.
- Tip: If anything looks cracked, replace it now.
Step 10: Install the strut into the tower and start the top nuts
- Position the strut up into the tower and hand-start the top nuts using your fingers.
- Snug them using a socket set (8mm-24mm), but do not fully torque yet.
Step 11: Seat the strut into the steering knuckle
- Use the floor jack under the knuckle/lower control arm to raise it until the strut slides into place.
- Remove the strut spreader bit (specialty) and align your paint marks.
- Install the pinch bolt and nut using a socket set (8mm-24mm).
- Torque to 85 Nm (63 ft-lbs)
Step 12: Reconnect the sway bar end link
- Install the end link into the strut bracket.
- Hold the stud with the Allen key set (metric) and tighten the nut with a wrench set (8mm-24mm).
- Torque to 55 Nm (41 ft-lbs)
Step 13: Reattach brake hose bracket and ABS wire clips
- Reinstall any bracket bolts using a socket set (8mm-24mm).
- Reinstall clips using needle-nose pliers.
- Make sure the hose/wire does not rub the tire at full steering lock.
Step 14: Torque the upper strut mount nuts
- Under the hood, torque the upper mount nuts using a torque wrench (20-250 ft-lbs) and socket set (8mm-24mm).
- Torque to 35 Nm (26 ft-lbs)
Step 15: Reinstall wheel and lower the vehicle
- Install the wheel and hand-thread lug nuts.
- Lower the vehicle off the jack stands using the floor jack.
- Torque lug nuts in a star pattern using a torque wrench (20-250 ft-lbs).
- Torque to 135 Nm (100 ft-lbs)
Step 16: Repeat on the other side
- Use the same steps for the opposite front strut.
- Replace struts in pairs for balanced handling.
✅ After Repair
- Start your Escape and turn the steering wheel lock-to-lock to confirm nothing binds or rubs.
- Road test at low speed first; listen for clunks over bumps.
- Get a professional 4-wheel alignment as soon as possible.
- Recheck lug nut torque after 50-100 miles using a torque wrench.
💰 DIY vs Shop Cost
Shop Cost: $900-$1,700 (parts + labor)
DIY Cost: $350-$900 (parts only)
You Save: $550-$800 by doing it yourself!
Shop labor rates vary but typically run $100-$150/hour. This repair takes a shop approximately 3-5 hours.
🎯 Ready to get started?
Before I tailor this perfectly: are you replacing the front struts or the rear shocks, and are you using complete quick-strut assemblies or reusing your springs with a compressor?
HowToo makes it easy: same-day/2-day shipping on every part, plus all the tools and specialty tools you need! Check out the parts and tools sections below to add everything to your cart.
Guide for replace for these Ford vehicles
| Year Make Model | Sub Model | Engine | Body Style |
|---|