









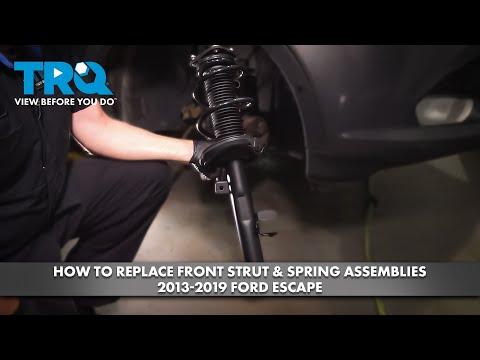







How to Replace Front Struts on a 2014-2019 Ford Escape (Engine: Inline 4 2.0L)
Step-by-step loaded strut assembly guide with tools, parts, torque specs, and safety tips
How to Replace Front Struts on a 2014-2019 Ford Escape (Engine: Inline 4 2.0L)
Step-by-step loaded strut assembly guide with tools, parts, torque specs, and safety tips for 2014, 2015, 2016, 2017, 2018, 2019


🔧 Escape - Front Strut Assembly Replacement
This repair replaces the front strut assemblies on your Escape. The front struts help support the vehicle, control bouncing, and keep the front tires firmly on the road.
Difficulty Level: Advanced | Estimated Time: 3-5 hours
Assumption: This guide covers front loaded strut assemblies. Loaded means the spring, mount, and strut are preassembled, which is the safest choice for a beginner.
⚠️ Safety & Precautions
- ⚠️ Never work under your Escape supported only by a jack. Always use jack stands.
- ⚠️ The strut assembly contains a very strong compressed coil spring. Do not remove the large center nut on the strut mount.
- ⚠️ Replace front struts in pairs so the suspension feels even side to side.
- ⚠️ Support the steering knuckle during the repair. The steering knuckle is the heavy metal part that holds the wheel hub and brake rotor.
- ⚠️ Do not stretch the brake hose or ABS wheel speed sensor wire.
- ⚠️ A wheel alignment is required after replacing front struts.
🔧 Required Tools
You'll need the following tools for this repair:
- Floor jack (rated 3-ton minimum)
- Jack stands (rated 3-ton minimum)
- Wheel chocks
- 1/2-inch drive breaker bar
- 1/2-inch drive torque wrench
- 3/8-inch drive ratchet
- 19mm socket
- 21mm socket
- 18mm socket
- 15mm socket
- 13mm socket
- 10mm socket
- 21mm wrench
- 18mm wrench
- 15mm wrench
- Trim clip removal tool
- Flathead screwdriver
- Needle-nose pliers
- Rubber mallet
- Pry bar 18-inch
- Paint marker
- Penetrating oil
- Safety glasses
- Mechanic gloves
🔩 Required Parts
HowToo sells all the parts you need for this repair:
- Front loaded strut assembly - Left: 1, Right: 1
- Front strut-to-knuckle bolts and nuts - Qty: 4
- Front stabilizer bar link nuts - Qty: 2
- Cowl panel push clips - Qty: As needed
📋 Before You Begin
- Park your Escape on level ground.
- Set the parking brake.
- Place wheel chocks behind the rear wheels. Wheel chocks are wedges that help stop the vehicle from rolling.
- Spray penetrating oil on the lower strut bolts and stabilizer link nuts. Let it soak for 10-15 minutes.
- Open the hood. The upper strut mount nuts are near the base of the windshield under the cowl area.
- Plan for a professional alignment after the repair.
🔨 Step-by-Step Instructions
Follow these steps in order:
Step 1: Loosen the Front Wheel Lug Nuts
- Use a 19mm socket and 1/2-inch drive breaker bar to loosen each front wheel lug nut about half a turn.
- Do not remove the lug nuts yet.
- Loosen before lifting.
Step 2: Raise and Support the Front of the Vehicle
- Use the floor jack to raise the front of your Escape at an approved front jacking point.
- Place jack stands under the approved front support points.
- Lower the vehicle gently onto the jack stands.
- Leave the floor jack nearby as backup support only.
Step 3: Remove the Front Wheels
- Use a 19mm socket to remove the lug nuts.
- Remove both front wheels.
- Set the wheels flat on the ground so they cannot roll away.
Step 4: Mark the Strut Position
- Use a paint marker to draw an alignment line across the strut bracket and steering knuckle.
- This helps keep the alignment close enough for a slow drive to the alignment shop.
Step 5: Remove the Brake Hose and ABS Wire Brackets
- Use a 10mm socket or 13mm socket to remove the brake hose bracket bolt from the strut.
- Use a trim clip removal tool or flathead screwdriver to release the ABS wire clip from the strut.
- Move the hose and wire aside gently.
- Do not let the brake hose or wire hang tight.
Step 6: Disconnect the Stabilizer Bar Link
- Use a 15mm socket and 15mm wrench to remove the stabilizer bar link nut from the strut bracket.
- The stabilizer bar link is a short rod that helps reduce body lean during turns.
- If the stud spins, use the pry bar 18-inch to apply light pressure while removing the nut with the 15mm socket.
Step 7: Support the Steering Knuckle
- Place the floor jack lightly under the lower control arm near the outer ball joint area.
- Raise it just enough to support the suspension.
- Do not lift your Escape off the jack stands.
Step 8: Remove the Lower Strut Bolts
- Use an 18mm wrench or 21mm wrench to hold the bolt head.
- Use an 18mm socket or 21mm socket with the 1/2-inch drive breaker bar to loosen the lower strut nuts.
- Remove the two lower strut-to-knuckle bolts and nuts.
- If the bolts stick, tap them out with a rubber mallet.
- Keep one hand on the knuckle so it does not swing outward.
Step 9: Access the Upper Strut Mount Nuts
- Open the hood.
- If the cowl trim blocks access, use a trim clip removal tool to remove the plastic push clips.
- Use a 10mm socket or 13mm socket to remove any small cowl fasteners needed for access.
- Move the cowl panel only as much as needed.
Step 10: Remove the Strut Assembly
- Hold the strut from inside the wheel well.
- Use a 13mm socket to remove the three upper strut mount nuts.
- Do not remove the large center nut.
- Lower the strut assembly out through the wheel opening.
Step 11: Compare the New and Old Struts
- Set the old and new loaded strut assemblies side by side.
- Make sure the lower bracket, upper studs, spring direction, and hose bracket match.
- Do not loosen the center nut on either strut.
Step 12: Install the New Strut Assembly
- Guide the new strut up through the wheel well.
- Line up the three upper studs with the holes in the strut tower.
- Hand-start the three upper nuts.
- Use a 13mm socket and 1/2-inch drive torque wrench to tighten the upper strut nuts.
- Torque to 35 Nm (26 ft-lbs).
Step 13: Attach the Strut to the Steering Knuckle
- Use the floor jack to raise or lower the steering knuckle until the bolt holes line up.
- Install the new strut-to-knuckle bolts and nuts by hand.
- Line up the paint marks made earlier.
- Use an 18mm wrench or 21mm wrench to hold the bolt head.
- Use an 18mm socket or 21mm socket with the 1/2-inch drive torque wrench to tighten the nuts.
- Torque to 175 Nm (129 ft-lbs).
Step 14: Reconnect the Stabilizer Bar Link
- Insert the stabilizer bar link stud into the strut bracket.
- Install the new nut by hand.
- Use a 15mm socket and 15mm wrench to tighten the nut.
- Torque to 55 Nm (41 ft-lbs).
Step 15: Reattach the Brake Hose and ABS Wire
- Place the brake hose bracket back onto the strut.
- Use a 10mm socket or 13mm socket to install the bracket bolt.
- Torque to 10 Nm (89 in-lbs).
- Push the ABS wire clip back into the strut bracket using your fingers or needle-nose pliers.
- Check that the hose and wire cannot rub on the tire, spring, or axle.
Step 16: Repeat on the Other Side
- Repeat Steps 4-15 on the opposite front strut.
- Use the same tools and safety checks.
- Keep the vehicle supported on jack stands the whole time.
Step 17: Reinstall Any Cowl Pieces
- Set the cowl trim back into place.
- Use a trim clip removal tool if needed to align the clips.
- Use a 10mm socket or 13mm socket to reinstall any cowl fasteners.
- Press the push clips in by hand.
Step 18: Reinstall the Front Wheels
- Place each wheel back on the hub.
- Install the lug nuts by hand first.
- Use a 19mm socket to snug the lug nuts in a star pattern.
Step 19: Lower the Vehicle and Torque the Lug Nuts
- Use the floor jack to raise your Escape slightly off the jack stands.
- Remove the jack stands.
- Lower the vehicle fully to the ground.
- Use a 19mm socket and 1/2-inch drive torque wrench to tighten the lug nuts in a star pattern.
- Torque to 135 Nm (100 ft-lbs).
✅ After Repair
- ✅ Bounce each front corner by hand. It should settle quickly without repeated bouncing.
- ✅ Turn the steering wheel fully left and right while parked. Listen for rubbing or clunking.
- ✅ Drive slowly at first and listen for loose hardware noises.
- ✅ Get a professional four-wheel alignment as soon as possible.
- ✅ Recheck lug nut torque after 25-50 miles: Torque to 135 Nm (100 ft-lbs).
💰 DIY vs Shop Cost
Shop Cost: $850-$1,400 (parts + labor + alignment)
DIY Cost: $300-$650 (parts only, alignment extra)
You Save: $400-$750 by doing it yourself!
Shop labor rates vary but typically run $100-$150/hour. This repair takes a shop approximately 2.5-4.0 hours.
🎯 Ready to get started?
HowToo makes it easy: same-day/2-day shipping on every part, plus all the tools and specialty tools you need! Check out the parts and tools sections below to add everything to your cart.
Guide for Suspension Strut and Coil Spring Assembly replace for these Ford vehicles
| Year Make Model | Sub Model | Engine | Body Style |
|---|---|---|---|
| 2019 Ford Escape | - | Inline 4 2.5L | - |
| 2019 Ford Escape | - | Inline 4 2.0L | - |
| 2019 Ford Escape | - | Inline 4 1.5L | - |
| 2018 Ford Escape | - | Inline 4 2.5L | - |
| 2018 Ford Escape | - | Inline 4 2.0L | - |
| 2018 Ford Escape | - | Inline 4 1.5L | - |
| 2017 Ford Escape | - | Inline 4 2.5L | - |
| 2017 Ford Escape | - | Inline 4 2.0L | - |
| 2017 Ford Escape | - | Inline 4 1.5L | - |
| 2016 Ford Escape | - | Inline 4 2.5L | - |
| 2016 Ford Escape | - | Inline 4 1.6L | - |
| 2016 Ford Escape | - | Inline 4 2.0L | - |
| 2015 Ford Escape | - | Inline 4 2.5L | - |
| 2015 Ford Escape | - | Inline 4 1.6L | - |
| 2015 Ford Escape | - | Inline 4 2.0L | - |
| 2014 Ford Escape | - | Inline 4 2.5L | - |
| 2014 Ford Escape | - | Inline 4 1.6L | - |
| 2014 Ford Escape | - | Inline 4 2.0L | - |