








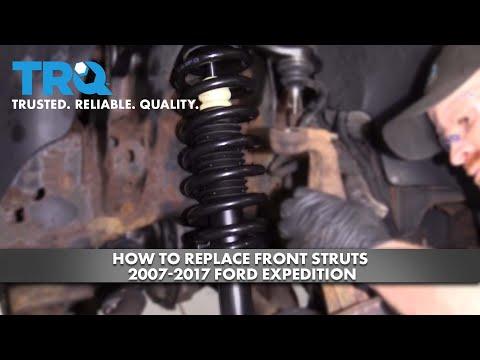







How to Replace Front Struts on a 2014-2017 Ford Expedition (Quick-Strut Install Guide)
Step-by-step instructions with required tools/parts, safety tips, and torque specs for a smooth DIY repair
How to Replace Front Struts on a 2014-2017 Ford Expedition (Quick-Strut Install Guide)
Step-by-step instructions with required tools/parts, safety tips, and torque specs for a smooth DIY repair for 2014, 2017


🔧 Expedition - Front Strut Replacement
On your Expedition, the “struts” are the front shock/spring assemblies that support the vehicle and control bouncing. Replacing worn struts restores ride comfort, braking stability, and steering control.
Assumption: You’re replacing the front strut assemblies (rear uses shocks + separate springs, not struts).
Difficulty Level: Intermediate | Estimated Time: 3-5 hours (both sides)
⚠️ Safety & Precautions
- Work on a flat, solid surface and support the frame with jack stands (never rely on a jack).
- If you are not installing a complete quick-strut (pre-assembled strut + spring + mount), using a spring compressor can be dangerous—springs store a lot of energy.
- Do not let the steering knuckle hang by the brake hose or ABS wire.
- After strut replacement, a 4-wheel alignment is strongly recommended.
- Battery disconnect is not required for this job.
🔧 Required Tools
You'll need the following tools for this repair:
- Floor jack (rated 3-ton minimum)
- Jack stands (rated 3-ton minimum)
- Wheel chocks
- 21mm socket
- 1/2" drive breaker bar
- 1/2" drive torque wrench (30-250 ft-lbs range)
- Socket set 10mm-24mm
- Wrench set 10mm-24mm
- Torx bit set (T30-T50)
- Pry bar (18-24")
- Hammer (2-3 lb)
- Needle-nose pliers
- Penetrating oil
- Paint marker
- Spring compressor (specialty)
- Safety glasses
- Mechanic gloves
🔩 Required Parts
HowToo sells all the parts you need for this repair:
- Front strut assembly (quick-strut recommended) - Replace in pairs - Qty: 2
- Front strut mount hardware kit - Qty: 1
- Front sway bar end links - Optional if worn - Qty: 2
📋 Before You Begin
- Park on level ground, steering wheel straight, and set the parking brake.
- Place wheel chocks behind the rear tires.
- Break loose the front lug nuts 1/2 turn using a 21mm socket and breaker bar (do not remove yet).
- Spray penetrating oil on the lower strut-to-knuckle bolts and sway bar end link nut.
- If reusing springs (not recommended for beginners), set up the spring compressor (a tool that safely squeezes the spring shorter for removal).
🔨 Step-by-Step Instructions
Follow these steps in order:
Step 1: Lift and secure the front
- Lift the front using a floor jack (rated 3-ton minimum) at the front jacking point.
- Support the frame with jack stands (rated 3-ton minimum).
- Remove the front wheel using a 21mm socket.
Step 2: Unbolt brackets from the strut
- Remove the brake hose/ABS wire brackets from the strut using the appropriate 10mm socket or Torx bit (varies by bracket fastener).
- Tip: Take a quick photo for routing.
Step 3: Disconnect the sway bar end link (if it attaches to the strut)
- Remove the sway bar end link nut using a 18mm wrench and a Torx bit in the stud (commonly required to keep the stud from spinning).
- If the link is seized, use penetrating oil and a breaker bar.
Step 4: Support the knuckle and remove the lower strut bolts
- Place a floor jack (rated 3-ton minimum) lightly under the lower control arm/knuckle area to support it.
- Mark the relationship of the strut to the knuckle using a paint marker (helps keep camber close).
- Remove the two lower strut-to-knuckle nuts/bolts using a 21mm socket and breaker bar.
- If the bolts are tight in the knuckle, tap them out with a hammer (2-3 lb) and use a pry bar (18-24") for gentle leverage.
Step 5: Remove the upper mount nuts and take out the strut
- Open the hood and locate the strut mount at the top of the strut tower.
- Remove the upper mount nuts using a 15mm socket, leaving one nut threaded on a few turns until you’re ready to catch the strut.
- Hold the strut from below, remove the last upper nut with the 15mm socket, then lower the strut assembly out of the wheel well.
Step 6: Install the new strut assembly
- Guide the new strut into place and start the upper mount nuts by hand.
- Align the lower strut to the knuckle and install the lower bolts by hand, then install the nuts.
- Reconnect the sway bar end link using the 18mm wrench and Torx bit.
- Reinstall the brake hose/ABS brackets using the 10mm socket or Torx bit.
Step 7: Torque fasteners (with the suspension supported)
- With the knuckle/control arm supported at normal ride position using the floor jack, torque the fasteners using a 1/2" drive torque wrench:
- Upper strut mount nuts: Torque to 40 Nm (30 ft-lbs)
- Lower strut-to-knuckle bolts/nuts: Torque to 250 Nm (184 ft-lbs)
- Sway bar end link nut: Torque to 115 Nm (85 ft-lbs)
Step 8: Reinstall the wheel and repeat on the other side
- Reinstall the wheel and hand-tighten lug nuts using a 21mm socket.
- Lower the vehicle off the jack stands using the floor jack.
- Torque the lug nuts in a star pattern using a 1/2" drive torque wrench: Torque to 203 Nm (150 ft-lbs)
- Repeat the same procedure on the other front side.
✅ After Repair
- Road test at low speed first. Listen for clunks and confirm straight braking.
- Get a 4-wheel alignment as soon as possible (same day is best).
- Recheck lug nut torque after 25-50 miles using a 1/2" drive torque wrench: Torque to 203 Nm (150 ft-lbs)
- If the steering wheel is off-center or it pulls, do not ignore it—get alignment corrected.
💰 DIY vs Shop Cost
Shop Cost: $900-$1,600 (parts + labor)
DIY Cost: $350-$900 (parts only)
You Save: $550-$700 by doing it yourself!
Shop labor rates vary but typically run $100-$150/hour. This repair takes a shop approximately 3-5 hours.
🎯 Ready to get started?
HowToo makes it easy: same-day/2-day shipping on every part, plus all the tools and specialty tools you need! Check out the parts and tools sections below to add everything to your cart.
Guide for Suspension Strut and Coil Spring Assembly replace for these Ford vehicles
| Year Make Model | Sub Model | Engine | Body Style |
|---|---|---|---|
| 2017 Ford Expedition | - | - | - |
| 2014 Ford Expedition | - | - | - |