


How to Replace Front Struts on a 2012 Ford F-150
Step-by-step instructions with tools, parts, torque specs, and alignment tips for 2009, 2010, 2011, 2012, 2013
How to Replace Front Struts on a 2012 Ford F-150
Step-by-step instructions with tools, parts, torque specs, and alignment tips for 2009, 2010, 2011, 2012, 2013
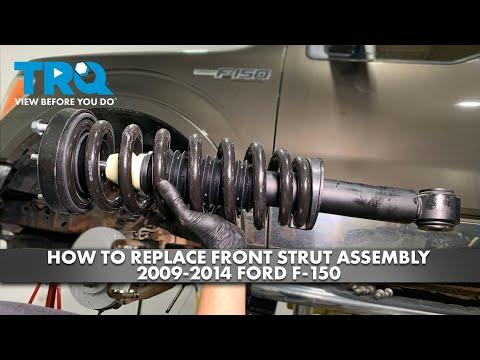
🔧 Front Strut - Replacement
On your F-150, the front strut is part of the front suspension and supports the truck’s weight while helping control bounce and steering feel. Replacing the strut assembly is the right fix when you have leaking struts, clunking, poor ride control, or uneven tire wear.
Difficulty Level: Advanced | Estimated Time: 2-4 hours
⚠️ Safety & Precautions
- Lift the truck on level ground and support it with jack stands. Never work under a truck supported only by a jack.
- The front suspension is under heavy spring load. A coil spring compressor (specialty) is required if you are rebuilding the strut instead of replacing the complete assembly.
- If your truck has a brake hose or ABS wire bracket attached to the strut, do not let the hose or wire hang loose.
- After strut replacement, the truck will need a wheel alignment.
- No battery disconnect is required for this repair.
🔧 Required Tools
You'll need the following tools for this repair:
- Floor jack (rated 3-ton minimum)
- Jack stands (rated for truck weight)
- Wheel chocks
- Safety glasses
- Mechanic gloves
- 1/2-inch drive ratchet
- 1/2-inch drive breaker bar
- Torque wrench
- Socket set: 10mm, 13mm, 15mm, 18mm, 21mm
- Combination wrench set: 13mm, 15mm, 18mm, 21mm
- Trim clip removal tool
- Penetrating oil
- Ball joint separator (specialty)
- Coil spring compressor (specialty)
- Paint marker
🔩 Required Parts
HowToo sells all the parts you need for this repair:
- Front strut assembly - Qty: 2
- Front strut mounting nuts - Qty: 6
- Front sway bar end link nuts - Qty: 2
- Front alignment - Qty: 1
📋 Before You Begin
- Park on level ground.
- Set the parking brake.
- Chock the rear wheels.
- Loosen the front lug nuts slightly before lifting.
- Replace front struts in pairs for even ride quality.
🔨 Step-by-Step Instructions
Follow these steps in order:
Step 1: Raise and secure the truck
- Use a floor jack to lift the front of the truck at the approved frame lift points.
- Support it with jack stands under the frame.
- Remove the front wheels using a 21mm socket.
Step 2: Remove the sway bar end link from the strut area
- Use a 15mm socket and matching wrench to remove the sway bar end link hardware if it blocks access to the strut.
- If the stud spins, hold it with the matching wrench while loosening the nut.
- Spray penetrating oil first.
Step 3: Free the brake hose and ABS wire brackets
- Use a 10mm socket to remove any bracket bolts attached to the strut body.
- Move the brake hose and ABS wire aside carefully.
- Do not twist or stretch the hose.
Step 4: Mark the strut position
- Use a paint marker to mark the relationship between the strut and steering knuckle.
- This helps keep the knuckle close to its original position during assembly.
Step 5: Separate the strut from the steering knuckle
- Use a 21mm socket and breaker bar to remove the lower strut bolts.
- Support the lower control arm or knuckle as needed so it does not drop suddenly.
- If the knuckle is stuck, use a ball joint separator (specialty) only as needed to gain clearance.
- Torque on reassembly: tighten the lower strut-to-knuckle bolts to factory specification.
Step 6: Remove the upper strut mount nuts
- Open the hood and locate the top of the strut tower.
- Use a 13mm socket to remove the upper mount nuts.
- Hold the strut from below as you remove the last nut so it does not fall.
- Torque on reassembly: tighten the upper strut mount nuts to factory specification.
Step 7: Remove the strut assembly
- Lower the strut assembly out of the wheel well.
- If space is tight, gently move the knuckle outward by hand to clear the assembly.
Step 8: Install the new strut assembly
- Place the new strut into the tower from below.
- Start the upper mount nuts by hand using a 13mm socket.
- Align the bottom of the strut with the steering knuckle.
- Install the lower bolts using a 21mm socket.
- Torque the upper mount nuts and lower strut bolts to factory specification.
Step 9: Reinstall brackets and sway bar link
- Use a 10mm socket to reinstall the brake hose and ABS wire brackets.
- Use a 15mm socket to reinstall the sway bar end link hardware.
- Make sure nothing is pinched or rubbing.
Step 10: Reinstall the wheel and lower the truck
- Install the wheel and snug the lug nuts with a 21mm socket.
- Lower the truck with the floor jack.
- Torque the lug nuts to factory specification in a star pattern.
Step 11: Repeat on the other side
- Replace the opposite front strut the same way.
- Do both sides so the suspension stays balanced.
✅ After Repair
- Start the truck and listen for clunks or rubbing.
- Turn the steering wheel lock-to-lock and make sure nothing binds.
- Check that the brake hose and ABS wire are routed correctly.
- Schedule a front end alignment before normal driving.
- Recheck lug nut torque after the first short drive.
💰 DIY vs Shop Cost
Shop Cost: $700-$1,200 (parts + labor)
DIY Cost: $250-$500 (parts only)
You Save: $450-$700 by doing it yourself!
Shop labor rates vary but typically run $100-$150/hour. This repair takes a shop approximately 2-4 hours.
🎯 Ready to get started?
HowToo makes it easy: same-day/2-day shipping on every part, plus all the tools and specialty tools you need! Check out the parts and tools sections below to add everything to your cart.
