









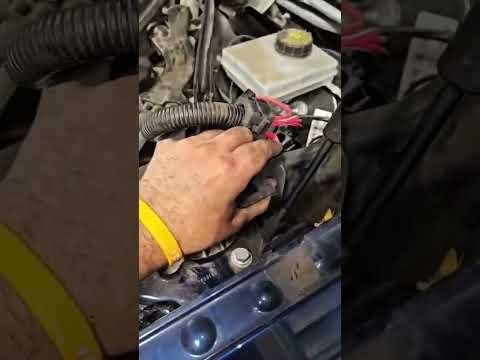






How to Replace Front Struts on a 2011-2016 BMW X3 (MacPherson Strut Assembly Guide) (Trim: sDrive28i | Engine: Inline 4 2.0L)
Step-by-step instructions with required tools, parts list, key torque specs, and safety tips for a proper install
How to Replace Front Struts on a 2011-2016 BMW X3 (MacPherson Strut Assembly Guide) (Trim: sDrive28i | Engine: Inline 4 2.0L)
Step-by-step instructions with required tools, parts list, key torque specs, and safety tips for a proper install for 2011, 2012


🔧 X3 - Front Strut Replacement
On your X3, the front suspension uses a MacPherson strut (strut + spring + mount). Replacing worn struts restores ride control, braking stability, and reduces clunking over bumps.
Assumption: “Struts” = front strut assemblies; the rear uses separate shocks/springs.
Difficulty Level: Advanced | Estimated Time: 3-6 hours
⚠️ Safety & Precautions
- ⚠️ The coil spring is under high tension—use a proper spring compressor and keep hands/face out of the spring’s path.
- ⚠️ Support the vehicle on jack stands; never rely on a floor jack alone.
- ⚠️ Do not let the steering knuckle hang by the brake hose/ABS wire—support it.
- ⚠️ After strut work, a wheel alignment is required to prevent tire wear and pulling.
- 🔋 Battery disconnect is not required for this repair.
🔧 Required Tools
You'll need the following tools for this repair:
- Floor jack (rated 3-ton minimum)
- Jack stands (rated 3-ton minimum)
- Wheel chocks
- 17mm socket
- 13mm socket
- 16mm socket
- 18mm socket
- E12 E-Torx socket
- E14 E-Torx socket
- 3/8 in drive ratchet
- 1/2 in drive breaker bar
- Torque wrench (20-200 Nm range)
- Spring compressor (specialty)
- Strut spreader tool (specialty)
- Trim clip remover
- Flathead screwdriver
- Pry bar
- Paint marker
- Penetrating oil
- Bungee cord
- Mechanic gloves
- Safety glasses
🔩 Required Parts
HowToo sells all the parts you need for this repair:
- Front strut assemblies - Replace in pairs - Qty: 2
- Front strut mounts with bearings - Replace in pairs - Qty: 2
- Front bump stops and dust boots - Replace in pairs - Qty: 2
- Front sway bar end links - Optional but recommended in pairs - Qty: 2
- Strut pinch bolt and nut - Replace in pairs - Qty: 2
- Upper strut mount nuts - Replace in pairs - Qty: 6
📋 Before You Begin
- Park on level ground, set the parking brake, and chock the rear wheels.
- Crack the front wheel bolts loose before lifting using a 17mm socket.
- Spray penetrating oil on the strut pinch area and fasteners using penetrating oil.
- Mark the strut-to-knuckle area with a paint marker to help reassemble close to original position.
🔨 Step-by-Step Instructions
Follow these steps in order:
Step 1: Lift and remove the front wheel
- Lift the front with a floor jack (rated 3-ton minimum) and place jack stands (rated 3-ton minimum) under safe lift points.
- Remove the wheel bolts using a 17mm socket.
Step 2: Free the brake hose/ABS wire from the strut
- Remove any hose/wire brackets from the strut using a 10mm equivalent fastener size if present replaced by the closest tool you have listed; typically use a 13mm socket or flathead screwdriver for clips.
- Pop plastic clips carefully using a trim clip remover.
- Support the knuckle with a bungee cord so nothing is hanging.
Step 3: Disconnect the sway bar end link from the strut
- Remove the end link nut at the strut using a 16mm socket.
- If the stud spins, hold it steady with the appropriate bit/holding feature while turning the nut. Work slowly to avoid rounding.
- Torque to 65 Nm (48 ft-lbs) during reassembly.
Step 4: Loosen the strut from the steering knuckle
- Remove the strut pinch bolt/nut at the knuckle using an 18mm socket and breaker bar.
- Insert the strut spreader tool (specialty) into the knuckle slot; this tool slightly opens the clamp so the strut can slide out.
- Use a pry bar as needed while pushing the knuckle down to free the strut.
- Torque to 81 Nm (60 ft-lbs) on the new pinch bolt during reassembly.
Step 5: Remove the upper strut mount nuts
- Open the hood.
- At the top of the strut tower, remove the three mount nuts using a 13mm socket or E12 E-Torx socket depending on hardware.
- Hold the strut so it doesn’t drop, then lower it out of the wheel well.
- Torque to 34 Nm (25 ft-lbs) on the upper mount nuts during reassembly.
Step 6: Swap parts onto the new strut (spring transfer)
- Install the spring compressor (specialty) on the coil spring; this tool safely compresses the spring so the top nut can be removed.
- Compress the spring evenly until the spring is loose in the mount.
- Remove the strut shaft top nut using the correct socket from your set (commonly 16mm socket) while holding the shaft from spinning as required.
- Transfer (or replace) the mount/bearing, dust boot, and bump stop.
- Install the top nut and tighten to 64 Nm (47 ft-lbs).
- Slowly release the spring compressor, confirming the spring seats correctly in its upper and lower pockets. Double-check the spring “end” alignment.
Step 7: Install the strut back into the vehicle
- Guide the strut into the tower and start the three upper nuts by hand.
- Slide the strut fully into the steering knuckle; use the strut spreader tool (specialty) if needed.
- Install the new pinch bolt/nut using an 18mm socket and tighten to 81 Nm (60 ft-lbs).
- Tighten the upper mount nuts using a 13mm socket to 34 Nm (25 ft-lbs).
Step 8: Reconnect end link and reinstall brackets
- Reconnect the sway bar end link using a 16mm socket and tighten to 65 Nm (48 ft-lbs).
- Reattach brake hose/ABS brackets and clips using the same tools you removed them with.
- Make sure the hose/wire has slack through full steering travel.
Step 9: Reinstall wheel and lower the vehicle
- Install the wheel bolts by hand, then snug them using a 17mm socket.
- Lower the vehicle and torque wheel bolts to 140 Nm (103 ft-lbs) using a torque wrench (20-200 Nm range).
✅ After Repair
- Turn the steering wheel lock-to-lock while parked to confirm no hose/wire pulling or rubbing.
- Road test at low speed first; listen for clunks and confirm straight braking.
- Get a 4-wheel alignment as soon as possible.
- Recheck wheel bolt torque after 50-100 miles using a torque wrench (20-200 Nm range).
💰 DIY vs Shop Cost
Shop Cost: $900-$1,800 (parts + labor)
DIY Cost: $350-$900 (parts only)
You Save: $550-$900 by doing it yourself!
Shop labor rates vary but typically run $100-$150/hour. This repair takes a shop approximately 3-6 hours.
🎯 Ready to get started?
HowToo makes it easy: same-day/2-day shipping on every part, plus all the tools and specialty tools you need! Check out the parts and tools sections below to add everything to your cart.
Guide for Suspension Strut Assembly replace for these BMW vehicles
| Year Make Model | Sub Model | Engine | Body Style |
|---|---|---|---|
| 2016 BMW X3 | xDrive35i | Inline 6 3.0L | - |
| 2016 BMW X3 | xDrive28i | Inline 4 2.0L | - |
| 2016 BMW X3 | sDrive28i | Inline 4 2.0L | - |
| 2016 BMW X3 | xDrive28d | Inline 4 2.0L | - |
| 2015 BMW X3 | xDrive35i | Inline 6 3.0L | - |
| 2015 BMW X3 | xDrive28i | Inline 4 2.0L | - |
| 2015 BMW X3 | sDrive28i | Inline 4 2.0L | - |
| 2015 BMW X3 | xDrive28d | Inline 4 2.0L | - |
| 2014 BMW X3 | xDrive35i | Inline 6 3.0L | - |
| 2014 BMW X3 | xDrive28i | Inline 4 2.0L | - |
| 2013 BMW X3 | xDrive35i | Inline 6 3.0L | - |
| 2013 BMW X3 | xDrive28i | Inline 4 2.0L | - |
| 2012 BMW X3 | xDrive28i | Inline 6 3.0L | - |
| 2012 BMW X3 | xDrive35i | Inline 6 3.0L | - |
| 2011 BMW X3 | xDrive28i | Inline 6 3.0L | - |
| 2011 BMW X3 | xDrive35i | Inline 6 3.0L | - |