









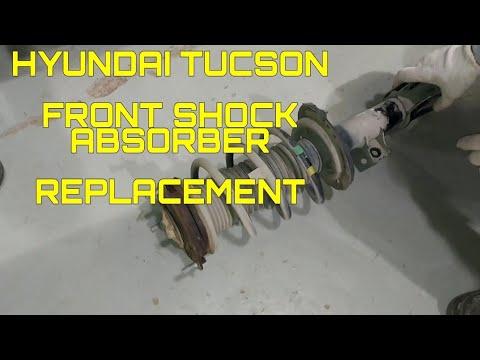







How to Replace Front Struts on a 2010-2015 Hyundai Tucson (Trim: GLS)
Step-by-step loaded strut assembly guide with tools, torque specs, safety tips, and alignment notes
How to Replace Front Struts on a 2010-2015 Hyundai Tucson (Trim: GLS)
Step-by-step loaded strut assembly guide with tools, torque specs, safety tips, and alignment notes for 2010, 2011, 2012, 2013, 2014, 2015


🔧 Tucson - Front Strut Assembly Replacement
This repair replaces the front strut assemblies on your Tucson. The strut supports the vehicle’s weight, controls bouncing, and helps keep the tire planted on the road.
Assumption: This guide covers complete front loaded strut assemblies, not rebuilding the strut with a spring compressor.
Difficulty Level: Intermediate | Estimated Time: 2-4 hours
⚠️ Safety & Precautions
- ⚠️ Always support your Tucson with jack stands. Never work under or around a vehicle supported only by a jack.
- ⚠️ Replace struts in pairs on the same axle. If one front strut is replaced, replace the other front strut too.
- ⚠️ Do not remove the center nut on the strut shaft unless using proper spring-compressing equipment. The coil spring is under dangerous tension.
- ⚠️ Keep the brake hose and ABS wheel speed sensor wire from stretching when the strut is loose.
- ⚠️ A wheel alignment is required after front strut replacement.
- ⚠️ Battery disconnect is not required for this repair.
🔧 Required Tools
You'll need the following tools for this repair:
- Floor jack (rated 2-ton minimum)
- Jack stands (rated 2-ton minimum)
- Wheel chocks
- Safety glasses
- Mechanic gloves
- 21mm lug nut socket
- Breaker bar 1/2-inch drive
- Ratchet 1/2-inch drive
- Ratchet 3/8-inch drive
- 10mm socket
- 12mm socket
- 14mm socket
- 17mm socket
- 19mm socket
- 21mm socket
- 17mm wrench
- 19mm wrench
- Torque wrench 1/2-inch drive
- Torque wrench 3/8-inch drive
- Pry bar 18-inch
- Hammer 2-lb
- Paint marker
- Penetrating oil spray
🔩 Required Parts
HowToo sells all the parts you need for this repair:
- Front loaded strut assembly - Left: 1, Right: 1
- Front strut-to-knuckle bolts and nuts - Qty: 4
- Front stabilizer link nuts - Qty: 2
- Front strut upper mounting nuts - Qty: 6
📋 Before You Begin
- Park your Tucson on level ground and set the parking brake.
- Place wheel chocks behind the rear wheels.
- Open the hood so you can reach the upper strut mounting nuts.
- Spray penetrating oil on the lower strut bolts, stabilizer link nut, and brake hose bracket bolts.
- A “loaded strut assembly” means the strut, coil spring, mount, and bearing are already assembled, so you do not need to compress the spring.
🔨 Step-by-Step Instructions
Follow these steps in order:
Step 1: Loosen the Front Wheel Lug Nuts
- Use a 21mm lug nut socket and breaker bar 1/2-inch drive to loosen the front lug nuts about half a turn.
- Do this while the tires are still on the ground so the wheels do not spin.
- Do not remove them yet.
Step 2: Raise and Support the Front of the Vehicle
- Use a floor jack to lift the front of your Tucson at the front center jacking point.
- Place jack stands under the front pinch welds or approved side support points.
- Gently lower the vehicle onto the jack stands.
- Give the vehicle a small push to confirm it is stable before removing the wheels.
Step 3: Remove the Front Wheels
- Use the 21mm lug nut socket and ratchet 1/2-inch drive to remove the lug nuts.
- Remove both front wheels and place them flat under the vehicle as an extra safety backup.
Step 4: Mark the Strut Position
- Use a paint marker to mark around the lower strut where it meets the steering knuckle.
- The steering knuckle is the large metal part that holds the wheel hub and connects to the strut.
- This mark helps you get the new strut close enough to drive safely to an alignment shop.
Step 5: Remove the Brake Hose and ABS Wire Brackets
- Use a 12mm socket and ratchet 3/8-inch drive to remove the brake hose bracket bolt from the strut.
- Use a 10mm socket or 12mm socket and ratchet 3/8-inch drive to remove the ABS wire bracket from the strut if equipped.
- Move the hose and wire aside gently. Do not pull or kink them.
Step 6: Disconnect the Stabilizer Link from the Strut
- Use a 17mm socket and ratchet 3/8-inch drive to remove the stabilizer link nut from the strut bracket.
- If the stud spins, hold the back side with a 17mm wrench while turning the nut with the 17mm socket.
- The stabilizer link connects the strut to the sway bar, which helps reduce body roll during turns.
Step 7: Support the Steering Knuckle
- Place the floor jack lightly under the lower control arm or steering knuckle area.
- Lift just enough to support the suspension. Do not raise the vehicle off the jack stands.
- This prevents the axle, brake hose, and ABS wire from being pulled when the strut bolts are removed.
Step 8: Remove the Lower Strut-to-Knuckle Bolts
- Use a 19mm socket or 21mm socket with a breaker bar 1/2-inch drive to loosen the lower strut nuts.
- Hold the bolt heads with a 19mm wrench if they spin.
- Remove the two lower strut-to-knuckle bolts and nuts.
- Use a hammer 2-lb to tap stuck bolts out carefully if needed.
- Use a pry bar 18-inch only gently if the knuckle is stuck to the strut.
Step 9: Remove the Upper Strut Mounting Nuts
- From under the hood, locate the three upper strut mounting nuts on the strut tower.
- Use a 14mm socket and ratchet 3/8-inch drive to remove the three upper mounting nuts.
- Support the strut with one hand while removing the last nut.
- Do not remove the center strut shaft nut.
Step 10: Remove the Old Strut Assembly
- Guide the old strut assembly down and out through the wheel opening by hand.
- Use the floor jack to slightly adjust the knuckle height if the strut is difficult to remove.
- Keep the brake hose and ABS wire clear while removing the strut.
Step 11: Install the New Loaded Strut Assembly
- Place the new loaded strut assembly into the wheel well by hand.
- Line up the top studs with the holes in the strut tower.
- Install the upper mounting nuts by hand first to prevent cross-threading.
- Use a 14mm socket and torque wrench 3/8-inch drive to tighten the upper mounting nuts to Torque to 45 Nm (33 ft-lbs).
Step 12: Attach the Strut to the Steering Knuckle
- Use the floor jack to raise or lower the knuckle until the bolt holes line up.
- Install the lower strut-to-knuckle bolts and nuts by hand.
- Use a 19mm socket or 21mm socket, 19mm wrench, and torque wrench 1/2-inch drive to tighten the lower bolts to Torque to 160 Nm (118 ft-lbs).
- Match the strut position to your paint marks as closely as possible.
Step 13: Reconnect the Stabilizer Link
- Insert the stabilizer link stud into the strut bracket.
- Install the nut by hand first.
- Use a 17mm socket, 17mm wrench, and torque wrench 3/8-inch drive to tighten the stabilizer link nut to Torque to 98 Nm (72 ft-lbs).
Step 14: Reinstall the Brake Hose and ABS Wire Brackets
- Use a 12mm socket and ratchet 3/8-inch drive to reinstall the brake hose bracket bolt.
- Use a 10mm socket or 12mm socket and ratchet 3/8-inch drive to reinstall the ABS wire bracket if equipped.
- Tighten the small bracket bolts snugly to Torque to 9 Nm (80 in-lbs).
Step 15: Repeat on the Other Side
- Repeat Steps 4 through 14 on the opposite front strut.
- Use the same tools and torque specs.
- Take pictures before removing parts.
Step 16: Reinstall the Front Wheels
- Install the front wheels by hand.
- Thread all lug nuts by hand first to avoid damaging the studs.
- Use a 21mm lug nut socket and ratchet 1/2-inch drive to snug the lug nuts in a star pattern.
Step 17: Lower the Vehicle and Torque the Lug Nuts
- Use the floor jack to raise the vehicle slightly off the jack stands.
- Remove the jack stands.
- Lower your Tucson fully to the ground.
- Use a 21mm lug nut socket and torque wrench 1/2-inch drive to tighten the lug nuts in a star pattern to Torque to 88-107 Nm (65-79 ft-lbs).
✅ After Repair
- ✅ Turn the steering wheel fully left and right while parked. Listen for rubbing, clunks, or binding.
- ✅ Bounce each front corner by hand. The body should settle quickly without repeated bouncing.
- ✅ Drive slowly at first and listen for clunks over small bumps.
- ✅ Get a professional wheel alignment as soon as possible. Front strut removal changes alignment angles.
- ✅ Recheck the lug nut torque after 50-100 miles.
💰 DIY vs Shop Cost
Shop Cost: $650-$1,050 (parts + labor)
DIY Cost: $250-$550 (parts only)
You Save: $400-$500 by doing it yourself!
Shop labor rates vary but typically run $100-$150/hour. This repair takes a shop approximately 2-3 hours, plus alignment.
🎯 Ready to get started?
HowToo makes it easy: same-day/2-day shipping on every part, plus all the tools and specialty tools you need! Check out the parts and tools sections below to add everything to your cart.
Guide for Suspension Strut replace for these Hyundai vehicles
| Year Make Model | Sub Model | Engine | Body Style |
|---|---|---|---|
| 2015 Hyundai Tucson | GLS | - | - |
| 2015 Hyundai Tucson | Limited | - | - |
| 2015 Hyundai Tucson | SE | - | - |
| 2014 Hyundai Tucson | GLS | - | - |
| 2014 Hyundai Tucson | Limited | - | - |
| 2014 Hyundai Tucson | SE | - | - |
| 2013 Hyundai Tucson | GLS | - | - |
| 2013 Hyundai Tucson | Limited | - | - |
| 2013 Hyundai Tucson | GL | - | - |
| 2012 Hyundai Tucson | GLS | - | - |
| 2012 Hyundai Tucson | Limited | - | - |
| 2012 Hyundai Tucson | GL | - | - |
| 2011 Hyundai Tucson | GLS | - | - |
| 2011 Hyundai Tucson | Limited | - | - |
| 2011 Hyundai Tucson | GL | - | - |
| 2010 Hyundai Tucson | GLS | - | - |
| 2010 Hyundai Tucson | Limited | - | - |