















How to Replace Front Struts on a 2007 Nissan Altima (MacPherson Strut Guide)
Step-by-step instructions with tools, parts list, safety tips, and factory torque specs + alignment notes for 2007, 2008, 2009, 2010, 2011, 2012
How to Replace Front Struts on a 2007 Nissan Altima (MacPherson Strut Guide)
Step-by-step instructions with tools, parts list, safety tips, and factory torque specs + alignment notes for 2007, 2008, 2009, 2010, 2011, 2012


🔧 Altima - Front Strut Replacement
On your Altima, the front suspension uses MacPherson struts (strut + spring together). Replacing worn struts restores ride control, braking stability, and reduces clunking/bouncing.
Difficulty Level: Advanced | Estimated Time: 3-6 hours
⚠️ Safety & Precautions
- ⚠️ The coil spring is under high force—if you are not using complete “quick strut” assemblies, use a proper spring compressor and keep hands/face away from the spring path.
- ⚠️ Support the steering knuckle so it doesn’t pull on the axle/CV joint or brake hose when the strut is removed.
- ⚠️ Always use jack stands; never work under a car supported only by a floor jack.
- ⚠️ After strut replacement, you should get a front wheel alignment to prevent tire wear and pulling.
- Disconnecting the battery is not required for this job.
🔧 Required Tools
You'll need the following tools for this repair:
- Floor jack (rated 2-ton minimum)
- Jack stands (rated 2-ton minimum)
- Wheel chocks
- Safety glasses
- Mechanic gloves
- Breaker bar (18" or longer)
- Torque wrench (10–200 ft-lbs range)
- Ratchet
- Socket set: 12mm, 14mm, 17mm, 19mm, 21mm, 22mm
- Wrench set: 12mm, 14mm, 17mm, 19mm, 21mm, 22mm
- Pass-through strut nut socket set (specialty)
- Hex key set (for sway bar end link stud)
- Pry bar (18")
- Hammer (2 lb)
- Penetrating oil
- Paint marker
- Spring compressor (specialty)
🔩 Required Parts
HowToo sells all the parts you need for this repair:
- Front quick strut assemblies (recommended) - Replace in pairs - Qty: 2
- OR front struts (damper inserts) - Replace in pairs - Qty: 2
- Front strut mounts with bearings - Replace in pairs - Qty: 2
- Front bump stops and dust boots - Qty: 2
- Front strut-to-knuckle bolts and nuts (recommended) - Qty: 2-4
- Anti-seize compound - Qty: 1
📋 Before You Begin
- Park on level ground, set the parking brake, and place wheel chocks behind the rear tires.
- Spray penetrating oil on the strut-to-knuckle bolts/nuts and sway bar end link nut 10–15 minutes before removal.
- If you are not using quick struts: a “spring compressor” clamps the coil spring so you can safely remove the top nut—inspect the tool carefully before use.
🔨 Step-by-Step Instructions
Follow these steps in order:
Step 1: Loosen the wheel lug nuts and raise the front
- Use a 21mm socket and breaker bar to loosen (do not remove) the front lug nuts.
- Use a floor jack to lift the front jacking point, then set the car securely on jack stands.
- Remove the wheels with a 21mm socket.
- Reinstall later: Torque to 113 Nm (83 ft-lbs).
Step 2: Unbolt brackets from the strut body
- Use a 12mm socket to remove the brake hose/ABS wire brackets from the strut (if equipped).
- Don’t let hoses hang by tension.
Step 3: Disconnect the sway bar end link from the strut
- Use a 14mm wrench on the nut while holding the stud with the correct hex key (if the stud spins).
- Move the end link aside.
- Reinstall later: Torque to 65 Nm (48 ft-lbs).
Step 4: Mark camber position (if applicable) and support the knuckle
- Use a paint marker to mark the strut-to-knuckle bolt positions so you can reassemble close to the original alignment.
- Use a floor jack to lightly support the steering knuckle/lower control arm area.
Step 5: Remove the strut-to-knuckle bolts
- Use 19mm/21mm sockets (and matching wrenches) with a breaker bar to remove the two large bolts/nuts holding the strut to the steering knuckle.
- If the bolts are stuck, use penetrating oil and tap them out with a hammer.
- Reinstall later: Torque to 125 Nm (92 ft-lbs).
Step 6: Remove the strut mount nuts at the top
- Open the hood.
- At the strut tower, use a 14mm socket to remove the strut mount nuts (typically 3 nuts).
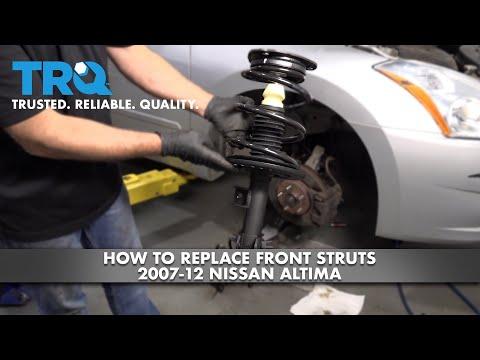
- Hold the strut so it doesn’t drop, then remove the strut assembly from the wheel well.
Step 7A: If installing quick strut assemblies (recommended path)
- Compare old vs new: spring orientation, mount stud pattern, and overall length.
- Place the new quick strut into the tower and hand-start the top nuts using a 14mm socket.
- Slide the knuckle onto the strut and install the two lower bolts/nuts using 19mm/21mm sockets and wrenches.
- Reconnect the sway bar end link using a 14mm wrench and hex key if needed.
Step 7B: If reusing the spring (spring compressor path)
- Install the spring compressor (specialty) onto opposite sides of the spring and tighten evenly until the spring is loose in the seats.
- Remove the center top nut using a pass-through strut nut socket set (specialty).
- Transfer the spring, isolators, dust boot, bump stop, and mount/bearing as needed onto the new strut.
- Install the top nut with the pass-through strut nut socket set (specialty): Torque to 59 Nm (44 ft-lbs).
- Slowly and evenly release the compressor, ensuring the spring ends sit correctly in the upper/lower seats.
Step 8: Final tighten all fasteners
- Top mount nuts at the tower using a 14mm socket: Torque to 44 Nm (33 ft-lbs).
- Strut-to-knuckle bolts using 19mm/21mm sockets and a torque wrench: Torque to 125 Nm (92 ft-lbs).
- Sway bar end link nut using a 14mm wrench: Torque to 65 Nm (48 ft-lbs).
- Brake hose/ABS brackets using a 12mm socket: Torque to 10 Nm (89 in-lbs).
Step 9: Reinstall wheels and lower the car
- Install the wheels and hand-tighten lug nuts using a 21mm socket.
- Lower the car with the floor jack.
- Tighten lug nuts in a star pattern using a torque wrench: Torque to 113 Nm (83 ft-lbs).
✅ After Repair
- Road test at low speed first. Listen for clunks and verify straight braking.
- Recheck all visible fasteners and bracket routing after the test drive.
- Get a front wheel alignment as soon as possible (recommended same day/within 50 km).
- New struts can feel firmer at first.
💰 DIY vs Shop Cost
Shop Cost: ₹12,000–₹25,000 (parts + labor, front pair)
DIY Cost: ₹6,000–₹18,000 (parts only, front pair)
You Save: ₹6,000–₹10,000 by doing it yourself!
Shop labor rates vary; this repair takes a shop approximately 2.5–4.0 hours.
🎯 Ready to get started?
HowToo makes it easy: same-day/2-day shipping on every part, plus all the tools and specialty tools you need! Check out the parts and tools sections below to add everything to your cart.