


How to Replace Front & Rear Shock Absorbers on a 2018 Ford Expedition (DIY Guide)
Step-by-step instructions, safety tips for struts/coil springs, tools/parts list, and torque specs notes
How to Replace Front & Rear Shock Absorbers on a 2018 Ford Expedition (DIY Guide)
Step-by-step instructions, safety tips for struts/coil springs, tools/parts list, and torque specs notes


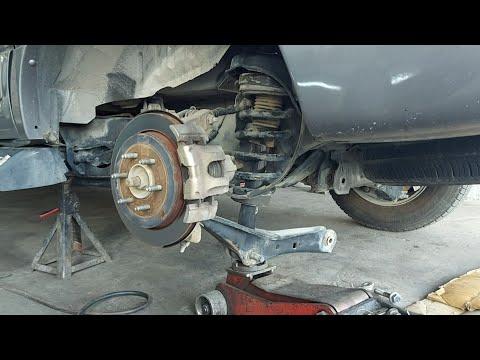
🔧 Expedition - Shock Absorber Replacement
Your Expedition uses different hardware depending on whether you’re replacing the rear shocks (typically a simple shock) or the front (usually a strut assembly, which is a shock with a coil spring mounted around it). The exact steps and torque specs also change if your Expedition has an air-leveling rear suspension or adaptive/controlled damping.
Difficulty Level: Intermediate | Estimated Time: 1.5-4.0 hours
⚠️ Safety & Precautions
- 🔺 Never work under a vehicle supported only by a jack; always use jack stands on the frame.
- 🔺 Suspension bolts can be very tight; keep hands clear in case a tool slips.
- 🔺 If the front strut is being replaced: the coil spring is under high tension and can cause serious injury if released incorrectly.
- 🔺 If equipped with rear air-leveling: the system must be disabled before lifting to prevent self-leveling movements.
🔧 Required Tools
You'll need the following tools for this repair:
- TBD after you confirm front vs rear
- TBD after you confirm air-leveling/adaptive suspension
🔩 Required Parts
HowToo sells all the parts you need for this repair:
- TBD: Rear shock absorbers (pair) - Qty: 2
- TBD: Front strut assemblies (pair) or front shocks (if applicable) - Qty: 2
- TBD: New mounting nuts/bolts (recommended if one-time-use) - Qty: as needed
📋 Before You Begin
- ✅ Confirm what you’re replacing: Front, Rear, or All four?
- ✅ Does your Expedition have rear air-leveling suspension or adaptive/controlled damping (electrical connector at the shock/strut)?
🔨 Step-by-Step Instructions
Follow these steps in order:
I can give you the exact Expedition procedure with correct tools and factory torque specs as soon as you answer the two questions above (front/rear, and air-leveling/adaptive yes/no).
✅ After Repair
- After installation, you’ll do a road test and recheck for any looseness/noises.
- If equipped with air-leveling or adaptive damping, you may need an on-board setting and/or a scan tool check after replacement.
💰 DIY vs Shop Cost
Shop Cost: $500-$1,800 (parts + labor)
DIY Cost: $150-$900 (parts only)
You Save: $350-$900 by doing it yourself!
Shop labor rates vary but typically run $100-$150/hour. This repair takes a shop approximately 1.5-4.0 hours.
🎯 Ready to get started?
HowToo makes it easy: same-day/2-day shipping on every part, plus all the tools and specialty tools you need! Check out the parts and tools sections below to add everything to your cart.