


How to Replace Front or Rear Struts on a 2018 GMC Acadia (DIY Guide)
Step-by-step strut replacement with required tools/parts, safety tips, torque specs, and alignment notes
How to Replace Front or Rear Struts on a 2018 GMC Acadia (DIY Guide)
Step-by-step strut replacement with required tools/parts, safety tips, torque specs, and alignment notes for 2018
🔧 Acadia - Strut Replacement
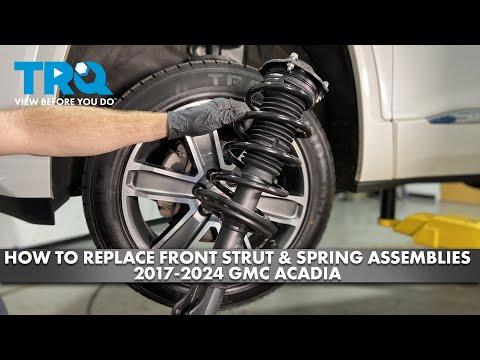
On your Acadia, “struts” can mean the front MacPherson strut assemblies (common) and/or the rear shock/strut units (varies by suspension). The exact steps and torque specs change depending on whether you’re doing the front or rear, and whether you’re swapping in a complete pre-assembled unit or reusing your coil spring.
Before I give the exact step-by-step with correct torque specs, I need 2 quick details: (1) Front struts, rear, or all four? (2) Are you installing complete pre-assembled “quick strut” assemblies, or reusing your springs (requires a spring compressor)?
Difficulty Level: Intermediate | Estimated Time: 2.5-5.0 hours (pair)
⚠️ Safety & Precautions
- ⚠️ Support the Acadia with jack stands on the pinch welds/subframe; never rely on a jack.
- ⚠️ If reusing springs: a coil spring compressor stores serious energy—keep hands/face out of the spring path and compress evenly. (A spring compressor clamps the coil so it can be removed safely.)
- ⚠️ Do not let the steering knuckle hang by the brake hose/ABS wire; support it with a bungee cord.
- ⚠️ Mark camber bolt positions (if equipped) before loosening; alignment will be required after front strut work.
- 🔋 Battery disconnect is typically not required for this mechanical job.
🔧 Required Tools
You'll need the following tools for this repair:
- Floor jack (rated 3-ton minimum)
- Jack stands (rated 3-ton minimum)
- Wheel chocks
- Safety glasses
- Mechanic gloves
- Breaker bar 1/2"
- Torque wrench 3/8"
- Torque wrench 1/2"
- Socket set 3/8" (10mm-19mm)
- Socket set 1/2" (15mm-24mm)
- Deep socket set (15mm-21mm)
- Wrench set (10mm-24mm)
- Torx bit set (T20-T50)
- Pry bar
- Needle-nose pliers
- Hammer (2 lb)
- Punch set
- Penetrating oil
- Paint marker
- Bungee cord
- Coil spring compressor (specialty)
- Strut spreader tool (specialty)
🔩 Required Parts
HowToo sells all the parts you need for this repair:
- Front strut assemblies - Replace in pairs - Qty: 2
- Front strut mount/bearing kit - Replace in pairs - Qty: 1
- Front strut dust boot & bump stop kit - Replace in pairs - Qty: 1
- Front sway bar end links - Optional if worn - Qty: 2
- Rear shocks/struts - Replace in pairs - Qty: 2
- Rear upper shock mounts/bushings - Optional if worn - Qty: 1
- Replacement strut-to-knuckle bolts/nuts - Optional if one-time-use on your setup - Qty: 1
📋 Before You Begin
- Park on level ground, set the parking brake, and place wheel chocks on the opposite axle.
- Loosen wheel lug nuts 1/2 turn using a breaker bar and correct lug socket before lifting.
- Spray penetrating oil on lower strut bolts and sway bar end link nuts; let it soak 10–15 minutes.
- If doing front struts, plan on a professional alignment afterward.
- If you are reusing springs, inspect the spring for cracks and the top mount bearing for grinding.
🔨 Step-by-Step Instructions
Follow these steps in order:
Step 1: Confirm which struts you’re replacing
- Reply with: front, rear, or all four.
- Reply with: quick struts (complete assemblies) or reuse springs (spring compressor).
Step 2: Lift and secure the Acadia
- Use a floor jack (rated 3-ton minimum) to lift the correct corner.
- Place jack stands (rated 3-ton minimum) under the proper support points and lower onto them.
- Remove the wheel using the correct lug socket and a breaker bar 1/2".
Step 3: Take reference marks (front only)
- Use a paint marker to mark the relationship of the strut-to-knuckle area (and cam bolts if present).
- Helps you drive to alignment safely.
Step 4: Pause here to avoid wrong torque specs
- Once you answer the 2 questions above, I’ll give the exact removal/installation steps for your axle (front vs rear) and include all required Torque to XX Nm (YY ft-lbs) values for every fastener.
✅ After Repair
- Double-check that brake hoses/ABS wires are clipped back into their brackets.
- Road test at low speed first; listen for clunks over bumps.
- If front struts were replaced, get a 4-wheel alignment as soon as possible.
- Recheck lug nut torque after 25–50 miles using a torque wrench.
💰 DIY vs Shop Cost
Shop Cost: $900-$2,000 (parts + labor, varies by axle and parts type)
DIY Cost: $300-$900 (parts only, varies by axle and parts type)
You Save: $600-$1,100 by doing it yourself!
Shop labor rates vary but typically run $100-$150/hour. This repair takes a shop approximately 2.5-5.0 hours.
🎯 Ready to get started?
HowToo makes it easy: same-day/2-day shipping on every part, plus all the tools and specialty tools you need! Check out the parts and tools sections below to add everything to your cart.
Guide for Suspension Strut and Coil Spring Assembly replace for these GMC vehicles
| Year Make Model | Sub Model | Engine | Body Style |
|---|---|---|---|
| 2018 GMC Acadia | - | - | - |