


How to Replace Front Lower Ball Joints on a 2020 Chevrolet Equinox
Step-by-step DIY ball joint replacement with tools, parts list, torque specs, costs, and safety tips
How to Replace Front Lower Ball Joints on a 2020 Chevrolet Equinox
Step-by-step DIY ball joint replacement with tools, parts list, torque specs, costs, and safety tips


🔧 Equinox - Ball Joint Replacement
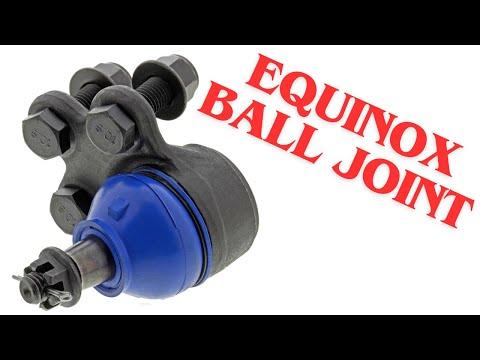
You’ll be removing the steering knuckle from the front suspension and pressing the lower ball joint out, then pressing a new one in. On this generation of your Equinox the front lower ball joint is pressed into the steering knuckle, not bolted, so a press tool is required.
Difficulty Level: Advanced | Estimated Time: 3–5 hours (per side for a beginner)
⚠️ Safety & Precautions
- ⚠️ Always support the Equinox with jack stands; never rely only on a floor jack.
- ⚠️ You will be working very close to the brake lines and CV axle; avoid striking them with tools.
- ⚠️ Wear safety glasses and gloves; pressing and hammering parts can send metal chips flying.
- ⚠️ After this repair, a four-wheel alignment is strongly recommended to avoid tire wear and pulling.
- ⚠️ Disconnecting the battery is not required, but keep ignition OFF and key away from the vehicle while the front is in the air.
- ⚠️ If any fastener threads are damaged or heavily rusted, replace the bolt/nut—do not reuse questionable hardware.
🔧 Required Tools
You'll need the following tools for this repair:
- 🛠️ Floor jack (rated 3-ton minimum)
- 🛠️ Jack stands (rated 3-ton minimum, set of 2)
- 🛠️ Wheel chocks
- 🛠️ Lug wrench 22mm
- 🛠️ Socket set (8mm–24mm)
- 🛠️ Metric combination wrench set (8mm–24mm)
- 🛠️ Breaker bar 1/2" drive
- 🛠️ Torque wrench 1/2" drive (10–200 Nm range)
- 🛠️ Torque wrench 3/8" drive (5–80 Nm range)
- 🛠️ Pry bar 18"
- 🛠️ Ball joint separator fork 21mm (specialty)
- 🛠️ Ball joint press kit (C-frame press with adapters) (specialty)
- 🛠️ Hammer 2–3 lb
- 🛠️ Needle-nose pliers
- 🛠️ Side cutters
- 🛠️ Pick tool
- 🛠️ Pry bar 24"
- 🛠️ Torx T30 bit
- 🛠️ Hex bit sockets (6mm–10mm)
- 🛠️ Wire brush
- 🛠️ Penetrating oil spray
- 🛠️ Paint marker or scribe
- 🛠️ Bungee cord
- 🛠️ Shop rags
- 🛠️ Safety glasses
- 🛠️ Mechanic gloves
🔩 Required Parts
HowToo sells all the parts you need for this repair:
- 🔩 Front lower ball joint (left) - Qty: 1
- 🔩 Front lower ball joint (right) - Qty: 1 (replace in pairs)
- 🔩 Ball joint pinch bolt and nut set - Qty: 2
- 🔩 Lower control arm to subframe bolts (one-time-use if stretched) - Qty: 4
- 🔩 Wheel hub/knuckle mounting bolts (if removed and corroded) - Qty: 4
- 🔩 Penetrating oil - Qty: 1
- 🔩 Anti-seize compound - Qty: 1
- 🔩 Brake cleaner spray - Qty: 1
📋 Before You Begin
- 📝 Park the Equinox on level ground, engage the parking brake, and place wheel chocks behind the rear wheels.
- 📝 Loosen (do not remove) the front wheel lug nuts 1/2 turn with the 22mm lug wrench before lifting.
- 📝 Check that your ball joint press kit includes cups that fit the diameter of the ball joint and knuckle on your Equinox.
- 📝 Spray penetrating oil on the ball joint pinch bolt, lower control arm bolts, and tie rod end nut 10–15 minutes before starting.
🔨 Step-by-Step Instructions
Follow these steps in order:
Step 1: Raise and Support the Front of the Equinox
- Use the floor jack (3-ton) under the front subframe center to lift the front of your Equinox.
- Place jack stands under the factory pinch welds or subframe points on both sides, then slowly lower the vehicle onto the stands.
- Verify stability by gently pushing on the body; if it moves, reposition the stands.
- Use the 22mm lug wrench to remove the front wheel lug nuts and remove both front wheels.
- Keep wheels under car as backup safety.
Step 2: Remove the Brake Caliper and Rotor
- Use a socket (usually 13mm–15mm) to remove the caliper guide pin bolts from the caliper on the knuckle.
- Slide the caliper off the rotor and hang it from the strut spring using a bungee cord so it does not hang by the hose.
- Use a socket (18mm or 21mm) to remove the caliper bracket bolts, then remove the bracket.
- If the rotor has a retaining screw, remove it with a Torx T30 bit, then pull the rotor off the hub. Tap with a hammer if rusted.
Step 3: Disconnect the Outer Tie Rod End
- Use a paint marker to mark the position of the tie rod stud relative to the knuckle as a rough reference.
- Use a socket (usually 18mm) to remove the tie rod end nut from the steering knuckle.
- Strike the side of the knuckle where the tie rod passes through with a hammer to release the taper, or use the ball joint separator fork 21mm if needed.
- Move the tie rod away from the knuckle.
Step 4: Disconnect the Lower Ball Joint from the Knuckle
- Locate the ball joint pinch bolt that clamps the joint stud in the bottom of the steering knuckle.
- Use a socket and wrench (likely 18mm) to remove the nut and slide out the bolt. Spray more penetrating oil if tight.
- Insert the ball joint separator fork 21mm between the lower control arm and knuckle area and tap with a hammer to separate.
- If stuck, use a pry bar 18" to press the lower control arm down while pulling the knuckle up to free the ball joint stud from the knuckle.
Step 5: Free the Steering Knuckle (as Needed)
- On your Equinox, it is usually easier to remove the knuckle to press the ball joint.
- Use a socket (usually 21mm) to remove the two bolts holding the strut to the knuckle. Mark the strut-to-knuckle position with a paint marker to keep camber close.
- Gently push the CV axle spline inward with your thumbs; do not overextend the inner joint.
- Slide the knuckle off the CV axle and set it on a sturdy work surface.
Step 6: Press Out the Old Ball Joint
- Clean the area around the ball joint with a wire brush and brake cleaner.
- Set up the ball joint press kit (C-frame press) so that:
- The receiving cup is on the side where the joint will exit.
- The press adapter pushes squarely on the underside of the ball joint.
- Use a breaker bar 1/2" drive on the C-frame screw to slowly press the old ball joint out of the knuckle.
- Keep press aligned to avoid damaging knuckle.
Step 7: Prepare and Press In the New Ball Joint
- Clean the ball joint bore again with the wire brush and wipe with a shop rag.
- Apply a very light coat of anti-seize compound to the outer surface of the new ball joint body (not on the stud or boot).
- Position the new ball joint in the knuckle in the same orientation as the old one (note any flats or notches).
- Set up the ball joint press with an adapter that presses on the outer metal shell of the joint, not the rubber boot or stud.
- Use the breaker bar to slowly press the joint fully into the knuckle until the shoulder seats flush.
Step 8: Reinstall the Steering Knuckle
- Slide the knuckle back onto the CV axle splines, supporting the weight with your hand.
- Align the knuckle with the strut and reinstall the two strut-to-knuckle bolts using a socket (21mm).
- Match your paint marks as closely as possible.
- Tighten the strut-to-knuckle bolts with a torque wrench 1/2" to 140 Nm (103 ft-lbs).
Step 9: Reconnect Ball Joint and Tie Rod
- Guide the new ball joint stud into the bottom of the knuckle.
- Install the new pinch bolt and nut using a socket and wrench (18mm) and torque to 70 Nm (52 ft-lbs) plus an additional 90° turn if using torque-to-yield hardware.
- Reinsert the outer tie rod stud into the knuckle and install the nut using a socket (18mm); torque to 60 Nm (44 ft-lbs).
Step 10: Reinstall Brakes and Wheel
- Install the brake rotor on the hub. If it uses a retaining screw, tighten with a Torx T30 bit to 9 Nm (80 in-lbs).
- Reinstall the caliper bracket using a socket (18mm or 21mm) and torque the bolts to 170 Nm (125 ft-lbs).
- Slide the caliper over the pads and install the guide pin bolts with a socket (13mm–15mm); torque to 35 Nm (26 ft-lbs).
- Reinstall the wheel and hand-tighten the lug nuts.
Step 11: Lower Vehicle and Final Torque
- Use the floor jack to lift the Equinox slightly, remove the jack stands, and lower it to the ground.
- Use a torque wrench 1/2" with a 22mm socket to torque the lug nuts in a star pattern to 140 Nm (103 ft-lbs).
- Repeat the same process on the other side if you are replacing both front ball joints.
✅ After Repair
- ✅ Pump the brake pedal several times until it feels firm before driving.
- ✅ Take a short, slow test drive. Listen for any clunks or unusual noises when turning or going over bumps.
- ✅ Check that the steering wheel is centered and the Equinox tracks straight. If not, schedule a four-wheel alignment as soon as possible.
- ✅ After the first drive, recheck the lug nut torque and visually inspect the ball joint area for movement or loose hardware.
💰 DIY vs Shop Cost
Shop Cost: $650–$900 (parts + labor, both front ball joints)
DIY Cost: $120–$250 (parts only, both front ball joints)
You Save: $500–$650 by doing it yourself!
Shop labor rates vary but typically run $100–$150/hour. This repair takes a shop approximately 2–3 hours.
🎯 Ready to get started?
HowToo makes it easy: same-day/2-day shipping on every part, plus all the tools and specialty tools you need! Check out the parts and tools sections above to add everything to your cart.
