








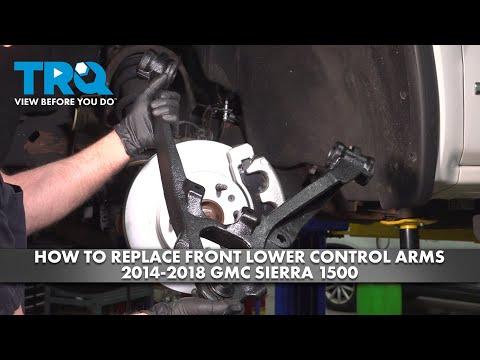







How to Replace Front Control Arms on a 2019-2025 GMC Sierra 1500
Step-by-step suspension repair guide with tools, parts, torque specs, and alignment tips
How to Replace Front Control Arms on a 2019-2025 GMC Sierra 1500
Step-by-step suspension repair guide with tools, parts, torque specs, and alignment tips for 2019, 2020, 2021, 2022, 2023, 2024, 2025


🔧 Control Arms - Front Suspension Replacement
This guide covers replacing the front control arm assembly on your Sierra. Control arms hold the wheel in the correct position and keep the suspension aligned, so a worn or bent arm can cause clunks, uneven tire wear, or loose steering.
Difficulty Level: Advanced | Estimated Time: 3-5 hours
⚠️ Safety & Precautions
- Work on a flat surface and support the truck with jack stands, never just a jack.
- Keep hands clear of the spring and suspension arms. Stored spring force can move parts suddenly.
- If your Sierra has electronic stability or steering angle faults after repair, a scan tool may be needed to clear codes.
- Loosen and tighten final suspension bolts with the suspension at normal ride height to avoid bushing preload.
- Disconnect the negative battery cable only if you must unplug sensors near the repair area.
🔧 Required Tools
You'll need the following tools for this repair:
- Floor jack (rated 3-ton minimum)
- Jack stands (rated for truck weight)
- Wheel chocks
- Lug wrench
- Metric socket set
- Metric wrench set
- Breaker bar
- Torque wrench
- Ball joint separator tool (specialty)
- Penetrating oil
- Bungee cord or wire hanger
- Safety glasses
- Mechanic gloves
🔩 Required Parts
HowToo sells all the parts you need for this repair:
- Front upper control arm - Qty: 1 per side
- Front lower control arm - Qty: 1 per side
- Control arm bolts and nuts - Qty: 1 set per side
- Stabilizer bar link nuts or hardware - Qty: 1 set as needed
- Front wheel alignment - Qty: 1
📋 Before You Begin
- Park on level ground, set the parking brake, and chock the rear wheels.
- Break the front lug nuts loose before lifting the truck.
- If replacing both sides, do one side at a time so you can use the other side as a reference.
- Do not skip the alignment.
🔨 Step-by-Step Instructions
Follow these steps in order:
Step 1: Raise and secure the front end
- Use a floor jack to lift the front of the truck by the proper frame lift point.
- Set the truck on jack stands and keep the floor jack lightly supporting the frame.
- Remove the wheel with a lug wrench.
Step 2: Remove parts blocking the control arm
- Use the appropriate metric socket set and metric wrench set to remove the sway bar link, brake hose brackets, or ABS wire brackets if they block access.
- Support the brake caliper if it must be moved aside using a bungee cord or wire hanger.
- Do not let the caliper hang by the hose.
Step 3: Separate the ball joint
- Use a metric socket set and metric wrench set to remove the ball joint nut from the control arm.
- Use a ball joint separator tool (specialty) to free the ball joint from the knuckle.
- If needed, tap the side of the knuckle lightly while supporting it by hand.
Step 4: Remove the control arm mounting bolts
- Use a breaker bar and metric socket set to remove the inner control arm bolts.
- Note the position of any cam bolts or alignment shims before removal.
- Remove the control arm from the truck.
Step 5: Install the new control arm
- Position the new control arm in place and start all bolts by hand.
- Use the metric socket set and metric wrench set to install the ball joint into the knuckle.
- Install all hardware finger-tight first, then snug it down.
- Torque to factory specification for the control arm pivot bolts and ball joint fastener.
Step 6: Final-torque at ride height
- Raise the suspension with the floor jack until the control arm is at normal ride height.
- Use a torque wrench to final-tighten the inner control arm bolts at ride height.
- Torque to factory specification for all fasteners.
- This protects the rubber bushings.
Step 7: Reassemble and repeat if needed
- Reinstall any brackets, sway bar links, and the wheel using the metric socket set.
- Lower the truck and torque the lug nuts with a torque wrench to factory specification.
- If replacing the other side, repeat the same steps.
✅ After Repair
- Test drive slowly and listen for clunks or pulling.
- Check for steering wheel center and straight tracking.
- Schedule a full front-end alignment right away.
- Recheck all fasteners after the first drive if any unusual noise appears.
💰 DIY vs Shop Cost
Shop Cost: $700-$1,600 (parts + labor)
DIY Cost: $180-$700 (parts only)
You Save: $520-$900 by doing it yourself!
Shop labor rates vary but typically run $100-$150/hour. This repair takes a shop approximately 3-5 hours.
🎯 Ready to get started?
HowToo makes it easy: same-day/2-day shipping on every part, plus all the tools and specialty tools you need! Check out the parts and tools sections below to add everything to your cart.
Guide for Suspension Control Arm and Ball Joint Assembly replace for these GMC vehicles
| Year Make Model | Sub Model | Engine | Body Style |
|---|---|---|---|
| 2025 GMC Sierra 1500 | - | - | - |
| 2024 GMC Sierra 1500 | - | - | - |
| 2023 GMC Sierra 1500 | - | - | - |
| 2022 GMC Sierra 1500 | - | - | - |
| 2021 GMC Sierra 1500 | - | - | - |
| 2020 GMC Sierra 1500 | - | - | - |
| 2019 GMC Sierra 1500 | - | - | - |