








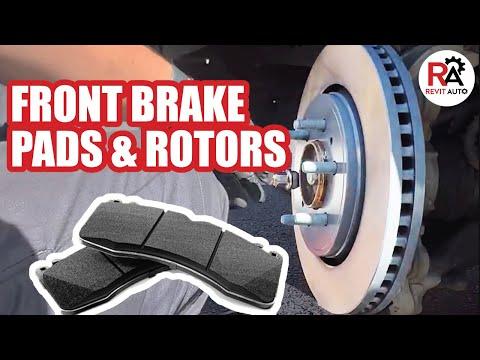






How to Replace Front Brakes and Rotors on a 2015 Ford F-150
Step-by-step instructions with tools, parts, torque specs, and safety tips for 2010, 2011, 2012, 2013, 2014, 2015, 2016, 2017
How to Replace Front Brakes and Rotors on a 2015 Ford F-150
Step-by-step instructions with tools, parts, torque specs, and safety tips for 2010, 2011, 2012, 2013, 2014, 2015, 2016, 2017


🔧 Front Brakes and Rotors - Replacement
Your front brake pads and rotors wear together, so replacing both at the same time gives the best pedal feel and braking performance. On your F-150, this is a straightforward front-end brake job, but you need to handle the caliper correctly so the brake hose is not stressed.
Difficulty Level: Intermediate | Estimated Time: 2-4 hours
⚠️ Safety & Precautions
- Support the truck securely on jack stands before removing any wheels.
- Never let the brake caliper hang by the brake hose.
- Front brakes create brake dust; do not blow it off with compressed air.
- Use care around hot brake parts if the truck was recently driven.
- No battery disconnect is required for this repair.
🔧 Required Tools
You'll need the following tools for this repair:
- Floor jack (rated 3-ton minimum)
- Jack stands (rated 3-ton minimum)
- Wheel chocks
- 21mm socket
- 18mm socket
- 13mm socket
- Ratchet
- Breaker bar
- Torque wrench
- Bungee cord or caliper hanger
- Brake caliper compression tool (specialty)
- Rubber mallet
- Wire brush
- Brake cleaner
- Shop towels
- Safety glasses
- Nitrile gloves
🔩 Required Parts
HowToo sells all the parts you need for this repair:
- Front brake pad set - Qty: 1
- Front brake rotors - Replace in pairs - Qty: 2
- Brake hardware kit - Qty: 1
- Brake caliper grease - Qty: 1
- Brake cleaner - Qty: 1
📋 Before You Begin
- Park on level ground and set the parking brake.
- Put the transmission in Park.
- Loosen the front lug nuts slightly before lifting the truck.
- Use wheel chocks on the rear wheels.
🔨 Step-by-Step Instructions
Follow these steps in order:
Step 1: Lift and remove the wheel
- Use the floor jack to lift the front of the truck at a safe lift point.
- Place it on jack stands and remove the wheel with a 21mm socket.
- Keep the lug nuts together.
Step 2: Remove the caliper
- Use a 13mm socket to remove the caliper slide pin bolts.
- Lift the caliper off the bracket and hang it with a bungee cord or caliper hanger.
- Do not let the caliper hang by the hose.
- Torque on reassembly: 35 Nm (26 ft-lbs) for the caliper slide pin bolts.
Step 3: Remove the brake pads and hardware
- Remove the inner and outer brake pads from the caliper bracket.
- Remove any pad clips or hardware from the bracket.
- Use a wire brush to clean rust from the pad contact points.
- Clean bracket slides help the pads move freely.
Step 4: Remove the caliper bracket
- Use an 18mm socket and breaker bar to remove the caliper bracket bolts.
- Remove the bracket from the knuckle.
- Torque on reassembly: 221 Nm (163 ft-lbs) for the caliper bracket bolts.
Step 5: Remove the rotor
- Pull the rotor straight off the hub.
- If it is stuck, tap between the lug studs with a rubber mallet.
- Clean the hub face with a wire brush and brake cleaner.
- A clean hub prevents rotor runout.
Step 6: Install the new rotor
- Spray the new rotor with brake cleaner and wipe it dry.
- Install the rotor onto the hub.
- If the rotor has a retaining screw, remove it with the correct driver before installation or reuse the screw if equipped.
Step 7: Reinstall the caliper bracket
- Place the bracket back on the knuckle.
- Install and tighten the bolts with the 18mm socket.
- Torque to 221 Nm (163 ft-lbs).
Step 8: Install the new pads and hardware
- Install the new pad clips from the hardware kit.
- Apply a thin layer of brake caliper grease to the pad ears and contact points.
- Install the new inner and outer pads.
Step 9: Compress the caliper and reinstall it
- Use the brake caliper compression tool to push the caliper piston fully back.
- Slide the caliper over the new pads and bracket.
- Install the slide pin bolts with the 13mm socket.
- Torque to 35 Nm (26 ft-lbs).
Step 10: Reinstall the wheel
- Install the wheel and hand-start the lug nuts.
- Lower the truck and torque the lug nuts with a torque wrench in a star pattern.
- Torque to 204 Nm (150 ft-lbs).
Step 11: Repeat on the other side
- Replace the front brakes and rotors on the opposite side too.
- Brake parts should be replaced in pairs.
✅ After Repair
- Pump the brake pedal several times before moving the truck.
- Check that the pedal feels firm.
- Start with a slow test drive in a safe area.
- Listen for any scraping or clicking sounds.
- Seat the new pads with several gentle stops before hard braking.
💰 DIY vs Shop Cost
Shop Cost: $500-$900 (parts + labor)
DIY Cost: $180-$350 (parts only)
You Save: $320-$550 by doing it yourself!
Shop labor rates vary but typically run $100-$150/hour. This repair takes a shop approximately 2-4 hours.
🎯 Ready to get started?
HowToo makes it easy: same-day/2-day shipping on every part, plus all the tools and specialty tools you need! Check out the parts and tools sections below to add everything to your cart.