









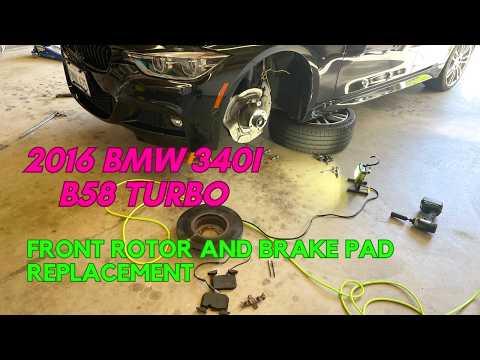







How to Replace Front Brake Pads & Rotors on a 2016 BMW 340i (F30)
Step-by-step DIY guide with tools, parts list, safety tips, and key torque specs for 2016, 2017, 2018
How to Replace Front Brake Pads & Rotors on a 2016 BMW 340i (F30)
Step-by-step DIY guide with tools, parts list, safety tips, and key torque specs for 2016, 2017, 2018


🔧 340i - Front Brake Pads & Rotors Replacement
You’ll remove the front wheels, take off the front brake calipers, replace the pads and rotors, then torque everything back to spec. This restores stopping power, reduces vibration/pulsation, and prevents metal-to-metal damage.
Difficulty Level: Intermediate | Estimated Time: 2-4 hours
Assumption: factory single-piston sliding front calipers; common F30 hardware.
⚠️ Safety & Precautions
- ⚠️ Work on a flat surface and use jack stands; never rely on a jack alone.
- ⚠️ Brakes may be hot; let everything cool before touching rotors/calipers.
- ⚠️ Do not press the brake pedal with a caliper removed (the piston can pop out).
- ⚠️ Brake dust is hazardous; use brake cleaner, not compressed air.
- ⚠️ Watch brake fluid level while compressing pistons; it can overflow.
🔧 Required Tools
You'll need the following tools for this repair:
- Floor jack (rated 3-ton minimum)
- Jack stands (rated 3-ton minimum)
- Wheel chocks
- 17mm socket
- Breaker bar (1/2-inch drive)
- Torque wrench (20-200 Nm range)
- 7mm hex bit socket
- 18mm socket
- Torx T30 bit
- 6mm hex bit socket
- Flathead screwdriver
- Piston compressor tool (specialty)
- Bungee cord
- Wire brush
- Rubber mallet
- Brake cleaner spray
- Shop towels
- Nitrile gloves
- Safety glasses
🔩 Required Parts
HowToo sells all the parts you need for this repair:
- Front brake pad set - Qty: 1
- Front brake rotors - Replace in pairs - Qty: 2
- Front brake pad wear sensor - Qty: 1
- Brake caliper carrier bolts - Replace in pairs - Qty: 2
- Brake lubricant silicone paste - Qty: 1
- Medium-strength threadlocker - Qty: 1
📋 Before You Begin
- 🧱 Park on level ground, steering wheel straight, transmission in P, and set the parking brake.
- 🧊 If you just drove, wait 30+ minutes for brakes to cool.
- 🧰 Open the hood and locate the brake fluid reservoir so you can watch the level during piston compression.
- 🧼 Lay out parts for the left and right side separately (pads can look similar but may differ).
🔨 Step-by-Step Instructions
Follow these steps in order:
Step 1: Loosen wheel bolts
- Use a 17mm socket and breaker bar to loosen the front wheel bolts about 1/2 turn (do not remove yet).
Step 2: Lift and support the front
- Place wheel chocks behind the rear wheels.
- Use a floor jack to lift the front at the proper center jack point, then support with jack stands at the factory lift points.
- Remove both front wheels using the 17mm socket.
Step 3: Remove the pad wear sensor (left front)
- On the left front brake, use a flathead screwdriver to gently pry the wear sensor out of the inner pad.
- Unclip the sensor wire from its holders, then open the connector box and unplug it using the flathead screwdriver.
- Tip: Pull on the connector, not the wire.
Step 4: Remove the caliper guide bolts
- Turn the steering slightly for access if needed.
- Use a flathead screwdriver to pop off the small plastic caps covering the guide bolts (if equipped).
- Use a 7mm hex bit socket to remove the two caliper guide bolts.
Step 5: Remove and hang the caliper
- Carefully slide the caliper off the pads/rotor.
- Hang the caliper from the strut spring using a bungee cord.
- Do not let the caliper hang by the brake hose.
Step 6: Remove the old pads and hardware
- Pull the old pads out by hand.
- If your pad set includes new spring clips/abutment clips, remove the old ones now.
- Use brake cleaner spray and shop towels to clean the caliper bracket area.
Step 7: Remove the caliper carrier (bracket)
- Use an 18mm socket and breaker bar to remove the two carrier bolts on the back side.
- Set the carrier aside.
- When reinstalling later: Torque to 110 Nm (81 ft-lbs).
Step 8: Remove the rotor retaining screw and rotor
- Remove the rotor retaining screw using Torx T30 bit (common) or 6mm hex bit socket (some variants).
- If the rotor is stuck, spray the hub/center area with brake cleaner spray, then tap the rotor hat with a rubber mallet to break it free.
- When reinstalling later: Torque retaining screw to 16 Nm (12 ft-lbs).
Step 9: Clean the hub face
- Use a wire brush to clean rust off the hub face (where the rotor sits).
- Wipe clean with shop towels and a light spray of brake cleaner spray.
- Tip: A clean hub helps prevent rotor vibration.
Step 10: Install the new rotor
- Install the new rotor onto the hub.
- Install the retaining screw using Torx T30 bit or 6mm hex bit socket.
- Torque to 16 Nm (12 ft-lbs).
Step 11: Reinstall the caliper carrier
- Position the carrier over the rotor.
- Install new carrier bolts using an 18mm socket. Apply medium-strength threadlocker if the bolts are not pre-coated.
- Torque to 110 Nm (81 ft-lbs).
Step 12: Compress the caliper piston
- Use a piston compressor tool (specialty) (it pushes the piston back smoothly) to compress the piston fully into the caliper.
- Check the brake fluid reservoir under the hood while compressing; stop if it’s about to overflow.
Step 13: Install new pads and wear sensor
- Apply a thin layer of brake lubricant silicone paste to pad backing plates and pad ears where they touch the carrier (do not get any on pad friction material).
- Install the new inner and outer pads into the carrier by hand.
- On the left front, push the new wear sensor into the inner pad until it clicks, then route and reconnect it.
Step 14: Reinstall the caliper
- Slide the caliper over the new pads and rotor.
- Install the guide bolts using a 7mm hex bit socket.
- Torque to 30 Nm (22 ft-lbs).
- Reinstall any guide bolt caps using the flathead screwdriver.
Step 15: Reinstall wheels
- Install wheels and hand-tighten bolts.
- Lower the car off the jack stands using the floor jack.
- Use a torque wrench with a 17mm socket to tighten wheel bolts in a star pattern: Torque to 140 Nm (103 ft-lbs).
Step 16: Pump the brake pedal
- Before starting the engine, press the brake pedal slowly 10–15 times until it feels firm.
- This seats the pistons against the new pads.
✅ After Repair
- 🧪 Check brake fluid level and top off only if needed.
- 🔍 With the engine running, confirm the brake pedal is firm and the car stops normally at low speed.
- 🛞 Do a careful test drive: listen for grinding, verify straight braking, and re-check wheel bolt torque after ~50 miles.
- 🧠 If the brake warning remains, the wear sensor may not be fully seated/connected.
- 🧱 Pad bedding (break-in): do 6–10 medium stops from ~40 to ~10 mph, letting brakes cool a bit between stops; avoid hard panic stops for the first 200 miles.
💰 DIY vs Shop Cost
Shop Cost: $600-$1,100 (parts + labor)
DIY Cost: $250-$650 (parts only)
You Save: $350-$450 by doing it yourself!
Shop labor rates vary but typically run $100-$150/hour. This repair takes a shop approximately 2-3 hours.
🎯 Ready to get started?
HowToo makes it easy: same-day/2-day shipping on every part, plus all the tools and specialty tools you need! Check out the parts and tools sections below to add everything to your cart.