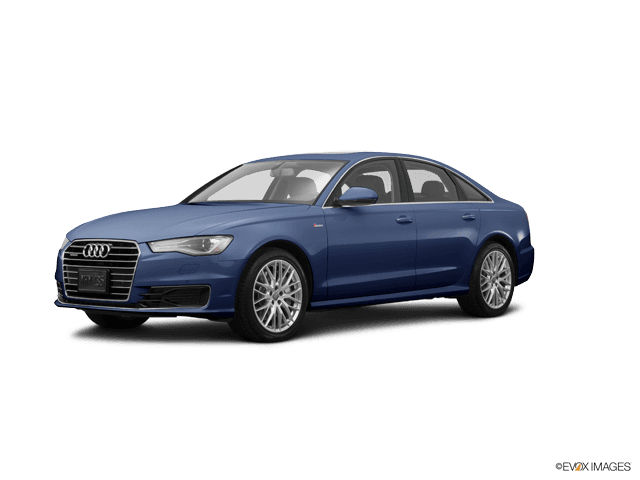
















How to Replace Front Brake Pads on a 2016-2018 Audi A6 (Step-by-Step DIY Guide)
Tools, parts list, wear sensor tips, and key torque specs for a safe front pad replacement
How to Replace Front Brake Pads on a 2016-2018 Audi A6 (Step-by-Step DIY Guide)
Tools, parts list, wear sensor tips, and key torque specs for a safe front pad replacement for 2016, 2017, 2018


🔧 A6 - Front Brake Pad Replacement
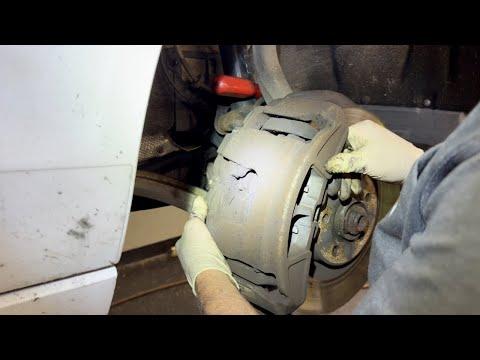
Replacing the front brake pads restores safe stopping power and prevents rotor damage from worn pads. On your A6, this is a straightforward front “floating caliper” design where the caliper slides on guide pins and the piston pushes the inner pad.
Difficulty Level: Intermediate | Estimated Time: 1.5-3.0 hours
Assumption: standard front brake setup (non-S6) with single-piston sliding caliper.
⚠️ Safety & Precautions
- 🛑 Never work under a car supported only by a jack—use jack stands on solid ground.
- 🛑 Brake dust is hazardous—wear a dust mask and use brake cleaner, not compressed air.
- 🛑 Brake fluid can damage paint—wipe spills immediately and keep the cap on the reservoir.
- 🛑 Do not press the brake pedal while the caliper is off the rotor.
- 🛑 Let brakes cool completely—hot rotors/calipers can burn you.
🔧 Required Tools
You'll need the following tools for this repair:
- Floor jack (rated 3-ton minimum)
- Jack stands (rated 3-ton minimum)
- Wheel chocks
- 17mm socket
- Breaker bar (1/2" drive)
- Torque wrench (20–200 Nm range)
- 7mm hex bit socket
- 21mm socket
- Ratchet (3/8" or 1/2" drive)
- Flathead screwdriver
- Brake caliper piston compression tool (specialty)
- Bungee cord or mechanics wire
- Small wire brush
- Brake cleaner spray
- Shop towels
- Nitrile gloves
- Safety glasses
- Dust mask
🔩 Required Parts
HowToo sells all the parts you need for this repair:
- Front brake pad set - Qty: 1
- Front brake pad wear sensor - Qty: 1
- Brake pad anti-squeal grease - Qty: 1
- Brake cleaner - Qty: 1
- DOT 4 brake fluid - Qty: 1 (top-off as needed)
📋 Before You Begin
- Park on level ground, turn the engine off, and set the parking brake.
- Chock the rear wheels using wheel chocks.
- Crack loose the front wheel bolts 1/4 turn using a 17mm socket and breaker bar before lifting.
- Open the hood and locate the brake fluid reservoir. Keep the cap on, but be ready to check the level—compressing the piston can make the fluid rise.
🔨 Step-by-Step Instructions
Follow these steps in order:
Step 1: Lift and secure the front of the car
- Lift the front using a floor jack (rated 3-ton minimum) at the proper front jack point.
- Set the car down onto jack stands (rated 3-ton minimum) and confirm it’s stable.
Step 2: Remove the front wheels
- Remove the wheel bolts using a 17mm socket and ratchet.
- Set wheels aside.
- When reinstalling later: Torque to 120 Nm (89 ft-lbs) using a torque wrench.
Step 3: Unplug the brake pad wear sensor (if equipped)
- Locate the sensor wire at the inner pad area and follow it to the connector on the suspension/inner fender.
- Release the connector using a flathead screwdriver (gently) and unplug it.
- Tip: Don’t pull the wire—pull the connector.
Step 4: Remove the caliper guide pin bolts
- Turn the steering to give yourself room (left side: steer right; right side: steer left).
- Find the two guide pin bolts on the back of the caliper.
- Remove them using a 7mm hex bit socket and ratchet.
- For reassembly: Torque to 30 Nm (22 ft-lbs) using a torque wrench.
- Guide pins are the “sliding” bolts that let the caliper move.
Step 5: Lift the caliper off and support it
- Carefully lift the caliper off the rotor by hand.
- Hang it from the spring/strut using a bungee cord or mechanics wire.
- Do not let the caliper hang by the rubber brake hose.
Step 6: Remove old pads and hardware
- Pull the outer and inner pads out of the bracket by hand.
- If your pad set includes new stainless hardware clips, remove the old clips now.
- Clean the pad contact areas on the bracket using a small wire brush and brake cleaner spray.
Step 7: Compress the caliper piston
- Place the old inner pad against the piston face (this protects the piston).
- Use a brake caliper piston compression tool (specialty) to press the piston straight back into the caliper slowly.
- Check the brake fluid reservoir level as you compress; remove excess fluid only if it is about to overflow (use shop towels to protect paint).
- Tip: Slow, steady pressure prevents seal damage.
Step 8: Install new pad hardware clips (if supplied)
- Snap the new clips into the caliper bracket by hand.
- Make sure they sit flat and fully seated.
Step 9: Install the new brake pads
- Apply a thin layer of brake pad anti-squeal grease to pad backing plates and pad “ears” where they slide (do not get grease on pad friction material).
- Install the inner and outer pads into the bracket by hand.
- If the inner pad uses a sensor: install the new sensor and route the wire exactly like the original.
Step 10: Reinstall the caliper
- Slide the caliper back over the new pads.
- Install the guide pin bolts using a 7mm hex bit socket and ratchet.
- Final tighten: Torque to 30 Nm (22 ft-lbs) using a torque wrench.
Step 11: Reconnect the wear sensor and re-secure the wiring
- Plug the connector back in by hand until it clicks.
- Make sure the wire is clipped away from the wheel and suspension movement.
Step 12: Reinstall wheels and lower the car
- Install wheel bolts finger-tight.
- Lower the car off the stands using a floor jack (rated 3-ton minimum).
- Final tighten in a star pattern using a torque wrench: Torque to 120 Nm (89 ft-lbs).
✅ After Repair
- 🧪 With the car on the ground, press the brake pedal slowly 10–15 times until it feels firm. This seats the pads against the rotor.
- 🧪 Check the brake fluid level and top off with DOT 4 brake fluid if needed.
- 🧪 Start the engine and confirm the pedal stays firm.
- 🧪 Test drive at low speed first. Verify normal braking and no warning lights.
- 🧪 Pad bed-in (break-in): make 6–10 moderate stops from ~40 mph to ~10 mph, allowing a little cooling between stops. Avoid hard panic stops for the first 200 miles.
💰 DIY vs Shop Cost
Shop Cost: $350-$650 (parts + labor)
DIY Cost: $80-$180 (parts only)
You Save: $270-$470 by doing it yourself!
Shop labor rates vary but typically run $100-$150/hour. This repair takes a shop approximately 1.0-1.8 hours.
🎯 Ready to get started?
HowToo makes it easy: same-day/2-day shipping on every part, plus all the tools and specialty tools you need! Check out the parts and tools sections below to add everything to your cart.
Guide for Disc Brake Pad Set replace for these Audi vehicles
| Year Make Model | Sub Model | Engine | Body Style |
|---|---|---|---|
| 2018 Audi A6 | - | - | - |
| 2017 Audi A6 | - | - | - |
| 2016 Audi A6 | - | - | - |