


How to Replace Front Brake Pads on a 2015-2018 Volkswagen GTI
Step-by-step instructions with tools, parts, torque specs, safety tips, and pad bedding
How to Replace Front Brake Pads on a 2015-2018 Volkswagen GTI
Step-by-step instructions with tools, parts, torque specs, safety tips, and pad bedding for 2015, 2016, 2017, 2018
🔧 Front Brake Pads - Replacement
Your GTI uses a front disc brake setup with a floating caliper, so pad replacement is straightforward once the wheel and caliper are out of the way. You’ll compress the caliper piston, swap the pads and hardware, then reassemble and bed the brakes in carefully.
Difficulty Level: Intermediate | Estimated Time: 1.5-2.5 hours
⚠️ Safety & Precautions
- Work on a flat surface and chock the rear wheels before lifting.
- Use jack stands. Never rely on the floor jack alone.
- Front brakes can get hot. Let them cool fully before starting.
- Do not press the brake pedal with a caliper removed.
- If your GTI has a front pad wear sensor, disconnect it carefully before removing the pad.
- Keep grease, brake fluid, and dirt off the pad friction surfaces and rotors.
🔧 Required Tools
You'll need the following tools for this repair:
- 17mm socket
- 17mm lug wrench
- 7mm hex bit socket
- Ratchet
- Breaker bar
- Torque wrench
- Floor jack (rated 3-ton minimum)
- Jack stands (rated 3-ton minimum)
- Wheel chocks
- Flat-blade screwdriver
- Brake caliper piston compression tool (specialty)
- Wire hook or bungee cord
- Wire brush
- Brake cleaner
- Shop towels
- Safety glasses
- Nitrile gloves
🔩 Required Parts
HowToo sells all the parts you need for this repair:
- Front brake pad set - Qty: 1
- Front pad hardware kit - Qty: 1
- Front brake pad wear sensor - Qty: 1, if equipped
- Brake cleaner - Qty: 1
📋 Before You Begin
- Park on level ground and set the parking brake.
- Place wheel chocks behind the rear tires.
- Loosen the front wheel bolts slightly before lifting.
- Have the new pads and hardware ready before opening the caliper.
- If the brake fluid reservoir is full, remove a little fluid before compressing the piston.
🔨 Step-by-Step Instructions
Follow these steps in order:
Step 1: Lift and remove the wheel
- Use a 17mm lug wrench to loosen the front wheel bolts, then raise the car with a floor jack (rated 3-ton minimum).
- Support it with jack stands (rated 3-ton minimum).
- Remove the wheel bolts and take off the wheel.
- Keep the bolts in a clean tray.
Step 2: Remove the caliper
- Turn the steering wheel for better access if needed.
- Use a 7mm hex bit socket and ratchet to remove the caliper guide pin bolts.
- Lift the caliper off the bracket carefully.
- Support the caliper with a wire hook or bungee cord. Do not let it hang by the hose.
- If equipped, disconnect the pad wear sensor from the pad.
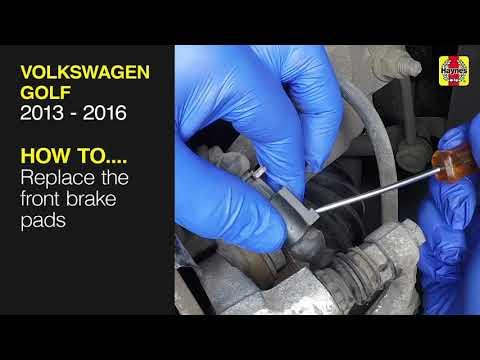
Step 3: Remove the old pads and hardware
- Slide the old brake pads out of the bracket.
- Remove the old pad clips and shims.
- Use a flat-blade screwdriver if the pads are stuck, but avoid damaging the bracket.
- Clean the bracket with brake cleaner and a wire brush.
Step 4: Compress the caliper piston
- Use a brake caliper piston compression tool (specialty) to push the piston fully back into the caliper.
- Watch the brake fluid reservoir while compressing. Remove excess fluid if needed.
- Push slowly and evenly.
Step 5: Install the new pads and hardware
- Install the new pad clips into the bracket.
- Apply a very light amount of brake grease only on pad contact points if your kit or service guidance allows it. Do not get any on the friction surface.
- Install the new inner and outer pads in the correct positions.
- If equipped, attach the new wear sensor to the correct pad.
Step 6: Reinstall the caliper
- Slide the caliper back over the new pads.
- Install the guide pin bolts with the 7mm hex bit socket.
- Torque to 35 Nm (26 ft-lbs).
Step 7: Reinstall the wheel
- Put the wheel back on and hand-start the bolts.
- Lower the car until the tire just touches the ground.
- Use a 17mm lug wrench to snug the bolts, then use a torque wrench.
- Torque to 120 Nm (89 ft-lbs).
Step 8: Repeat on the other side
- Replace the pads on the opposite front wheel using the same steps.
- Always replace pads in pairs.
✅ After Repair
- Before driving, pump the brake pedal slowly until it becomes firm.
- Check the brake fluid level and top off only if needed.
- Verify the wheels spin freely and the brake hose is not twisted.
- Test the brakes at low speed first.
- Bed the new pads with several moderate stops. Avoid hard braking for the first 200 miles.
💰 DIY vs Shop Cost
Shop Cost: $300-$550 (parts + labor)
DIY Cost: $90-$220 (parts only)
You Save: $210-$330 by doing it yourself!
Shop labor rates vary but typically run $100-$150/hour. This repair takes a shop approximately 1.5-2.0 hours.
🎯 Ready to get started?
HowToo makes it easy: same-day/2-day shipping on every part, plus all the tools and specialty tools you need! Check out the parts and tools sections below to add everything to your cart.
