








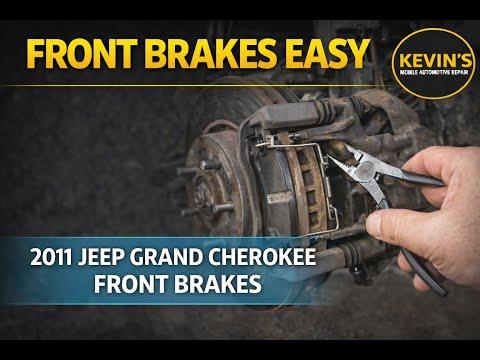







How to Replace Front Brake Pads on a 2011 Jeep Grand Cherokee (Step-by-Step Guide)
Tools, parts, safety tips, caliper type check, and torque-spec-ready instructions for a smooth DIY brake job
How to Replace Front Brake Pads on a 2011 Jeep Grand Cherokee (Step-by-Step Guide)
Tools, parts, safety tips, caliper type check, and torque-spec-ready instructions for a smooth DIY brake job for 2011


🔧 Grand Cherokee - Front Brake Pad Replacement
Replacing the front brake pads on your Grand Cherokee involves removing the front calipers, swapping the pads (and hardware), then compressing the caliper pistons so everything fits back together. The only catch is there are a couple front-caliper/brake-package variants, and the exact bolt sizes and torque specs depend on which one you have.
Difficulty Level: Intermediate | Estimated Time: 1.5-3 hours
⚠️ Safety & Precautions
- 🛑 Work on a flat, solid surface; never rely on a jack alone—use jack stands.
- 🧤 Brake dust is irritating—wear a mask and avoid blowing dust with compressed air.
- 🔥 Brakes can be very hot after driving; let the front brakes cool fully.
- 🧪 Brake fluid may rise when compressing pistons—keep fluid off paint.
- 🔒 Chock the rear wheels; keep the transmission in Park.
🔧 Required Tools
You'll need the following tools for this repair:
- Floor jack (rated 3-ton minimum)
- Jack stands (rated 3-ton minimum)
- Wheel chocks
- Lug wrench
- Torque wrench (10-200 ft-lbs range)
- Socket set (metric)
- Ratchet (3/8" and 1/2" drive)
- Breaker bar (1/2" drive)
- C-clamp or brake caliper piston compressor (specialty)
- Flathead screwdriver
- Bungee cord
- Wire brush
- Shop towels
- Nitrile gloves
- Safety glasses
🔩 Required Parts
HowToo sells all the parts you need for this repair:
- Front brake pad set - Qty: 1
- Front brake pad hardware/abutment clip kit - Qty: 1
- Brake lubricant (silicone or synthetic) - Qty: 1
- Brake cleaner - Qty: 1
📋 Before You Begin
- 🧭 Park on level ground, set the parking brake, and place wheel chocks behind the rear tires.
- 🔓 Loosen the front lug nuts slightly before lifting the front end.
- 🧴 Open the hood and locate the brake fluid reservoir; do not remove fluid unless it’s near the MAX line (it may rise when pistons are compressed).
- 📸 Quick check needed (so I can give exact socket sizes + torque specs): Please upload a clear photo of one front caliper (side view showing the caliper bolts), or answer this: Do you see 2 round pistons on the inboard side of the caliper (dual-piston), or just 1 (single-piston)?
🔨 Step-by-Step Instructions
Follow these steps in order:
Step 1: Lift and support the front end
- Use a lug wrench to loosen the front lug nuts about 1/2 turn.
- Use a floor jack (rated 3-ton minimum) to lift the front at the approved front jacking point.
- Set the vehicle down onto jack stands (rated 3-ton minimum).
- Remove the wheels using a lug wrench.
Step 2: Confirm caliper type (this controls bolt sizes + torque specs)
- Use safety glasses and a flathead screwdriver to gently move the outer pad/caliper and look for pistons on the inboard side.
- If you can, take a photo now so I can match your exact caliper/brake package.
- Don’t guess on torque-critical fasteners.
Step 3: Remove the caliper (procedure is the same; bolt specs will be provided after Step 2)
- Use a socket set (metric) and ratchet to remove the caliper guide/slide bolts.
- Lift the caliper off the bracket and support it with a bungee cord (do not let it hang by the brake hose).
- Torque to TBD Nm (TBD ft-lbs) (I’ll fill this in once you confirm the caliper type/photo).
Step 4: Remove old pads and hardware
- Pull the pads out of the bracket by hand.
- Remove the stainless pad clips (hardware) from the bracket.
- Use brake cleaner and shop towels to clean the bracket contact areas.
- Use a wire brush to remove rust where the clips sit.
Step 5: Compress the caliper pistons
- Place an old pad against the pistons, then use a C-clamp or brake caliper piston compressor (specialty) to slowly push the pistons fully back in.
- Check the brake fluid reservoir as you compress; stop if it approaches the brim.
- Go slow to avoid damaging seals.
Step 6: Install new hardware and pads
- Install the new pad clips into the bracket by hand.
- Apply a thin film of brake lubricant (silicone or synthetic) to the bracket pad contact points (where pads slide), not on pad friction material.
- Install the new pads into the bracket.
Step 7: Reinstall the caliper
- Position the caliper over the new pads and start the guide/slide bolts by hand.
- Use a ratchet to snug them, then final-tighten with a torque wrench (10-200 ft-lbs range).
- Torque to TBD Nm (TBD ft-lbs) (pending your caliper type/photo).
Step 8: Reinstall wheels
- Install the wheels and hand-thread lug nuts.
- Lower the vehicle using a floor jack (rated 3-ton minimum).
- Final-tighten lug nuts in a star pattern with a torque wrench (10-200 ft-lbs range).
- Torque to TBD Nm (TBD ft-lbs) (I’ll provide your exact lug torque once you confirm wheel/caliper package via photo).
✅ After Repair
- 🦶 With the engine off, press the brake pedal slowly 10-15 times until it feels firm (this seats the pistons against the new pads).
- 🧴 Verify brake fluid level is between MIN and MAX.
- 👂 On a short test drive, start with gentle stops; listen for grinding or pulling.
- 🔥 Do 5-8 moderate stops from ~30 mph to 5 mph to help pad transfer (avoid hard panic stops at first).
💰 DIY vs Shop Cost
Shop Cost: $250-$450 (parts + labor)
DIY Cost: $60-$160 (parts only)
You Save: $190-$290 by doing it yourself!
Shop labor rates vary but typically run $100-$150/hour. This repair takes a shop approximately 1.0-1.8 hours.
🎯 Ready to get started?
HowToo makes it easy: same-day/2-day shipping on every part, plus all the tools and specialty tools you need! Check out the parts and tools sections below to add everything to your cart.
Guide for Disc Brake Pad Set replace for these Jeep vehicles
| Year Make Model | Sub Model | Engine | Body Style |
|---|---|---|---|
| 2011 Jeep Grand Cherokee | - | - | - |